
推荐点击下面图片,通过本站淘宝优惠价购买:

https://www.modb.pro/db/116254
介绍

• 集成多种服务(389 Directory Server, MIT Kerberos, NTP, DNS, Dogtag certificate system, SSSD),简化安装配置
• 提供WEB、命令行两种管理工具,方便管理
• 多主复制,可扩展,高可用
• 接口丰富,支持CLI、 Web UI、 XMLRPC、JSONRPC API、Python SDK
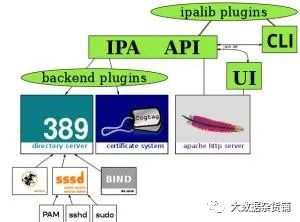
• MIT KDC:IPA 认证的核心
• 389 Directory Server:轻量级目录访问
• Dogtag Certificate System:一款认证系统,提供强大的安全框架来确保用户的身份以及通讯的私密性
• SSSD:SSSD是红帽企业版Linux6中新加入的一个守护进程,该进程可以用来访问多种验证服务器,如LDAP,Kerberos等,并提供授权。SSSD是介于本地用户和数据存储之间的进程,本地客户端首先连接SSSD,再由SSSD联系外部资源提供者(一台远程服务器)
• 使用ntp同步时间
• 防火墙关闭,或开放以下端口:TCP(80, 443,389, 636,88, 464) UDP(88, 464,123)
• 配置hosts文件,设置完全合格的主机名(如:192.168.1.1 freeipa1.douyu.com freeipa1)
• OS:Centos 7.5
• 三台机器集群
[root@local ~]# cat etc/sysconfig/network-scripts/ifcfg-eth0BOOTPROTO=staticIPADDR=192.168.192.130NETMASK=255.255.255.0 GATEWAY=192.168.192.2DEVICE=eth0ONBOOT=yeshostnamectl set-hostname wang-1.tmp.gce.cloudera.com
yum update -yfirewall-cmd --permanent --add-port={80/tcp,443/tcp,389/tcp,636/tcp,88/tcp,464/tcp,53/tcp,88/udp,464/udp,53/udp,123/udp}
firewall-cmd --reload
firewall-cmd --zone=public --list-ports
172.31.115.124 wang-1.tmp.gce.cloudera.com wang-1[root@wang-1 ~]# cat etc/hosts127.0.0.1 localhost localhost.localdomain localhost4 localhost4.localdomain4::1 localhost localhost.localdomain localhost6 localhost6.localdomain6172.31.115.124 wang-1.tmp.gce.cloudera.com wang-1 # Added by Google169.254.169.254 metadata.google.internal # Added by Google[root@wang-1 ~]# 
yum -y install rng-tools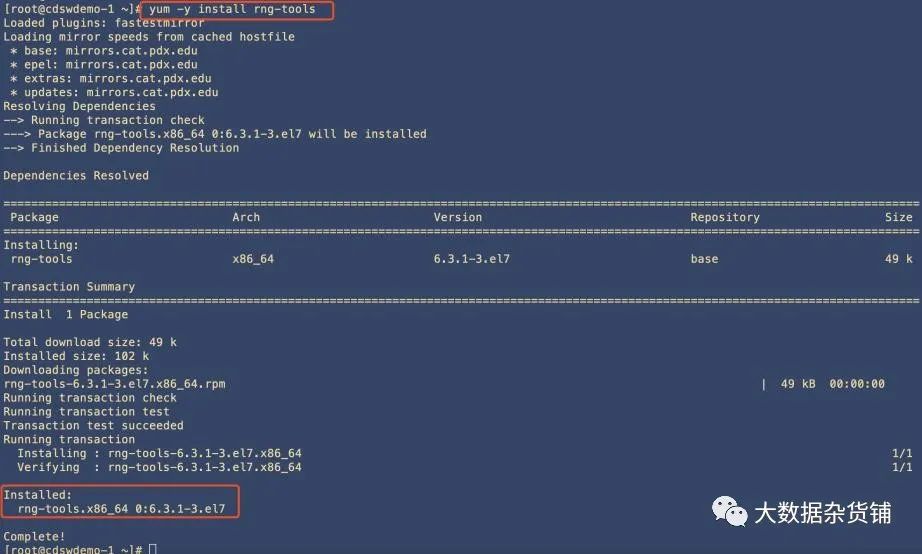
systemctl start rngdsystemctl enable rngdsystemctl status rngd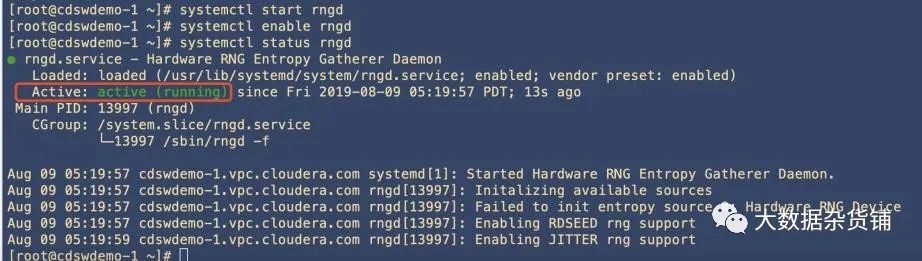
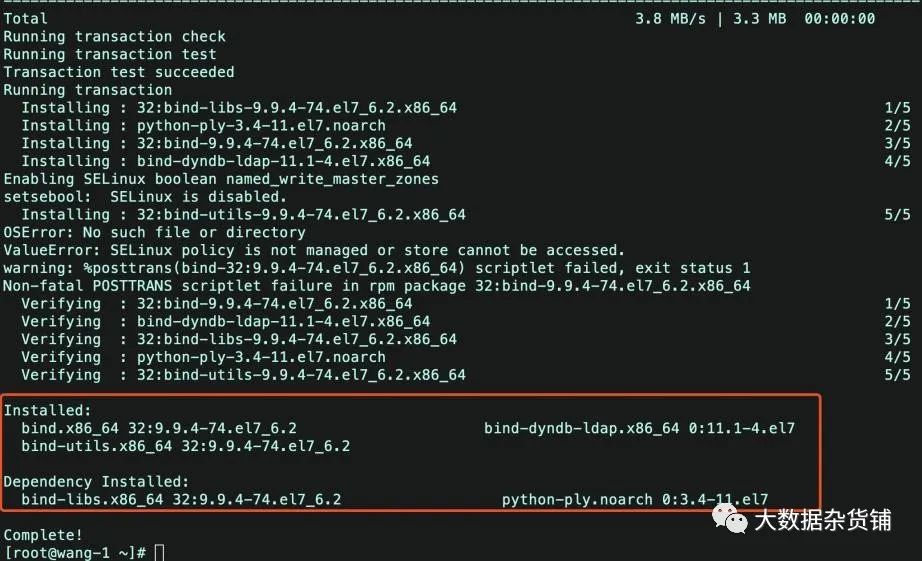
yum -y install bind bind-utils bind bind-dyndb-ldap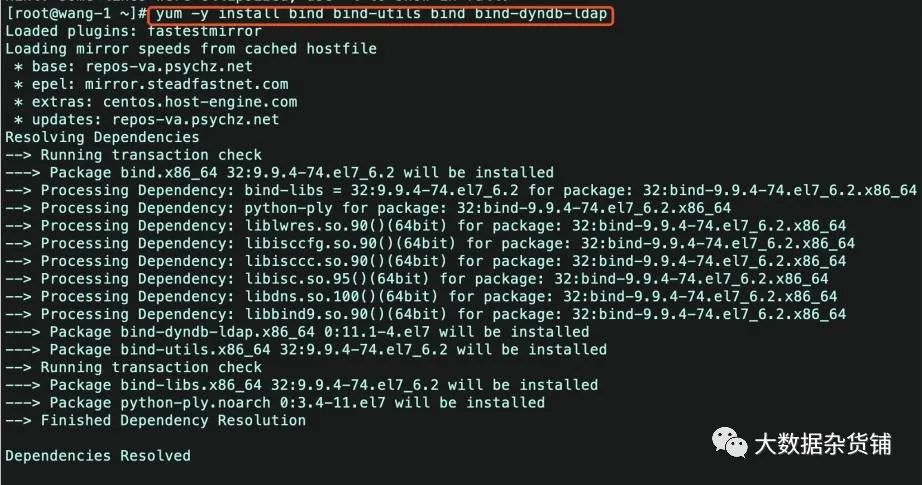

vi /etc/named.conf -- 将以下两个参数改为 yesdnssec-enable yes;dnssec-validation yes;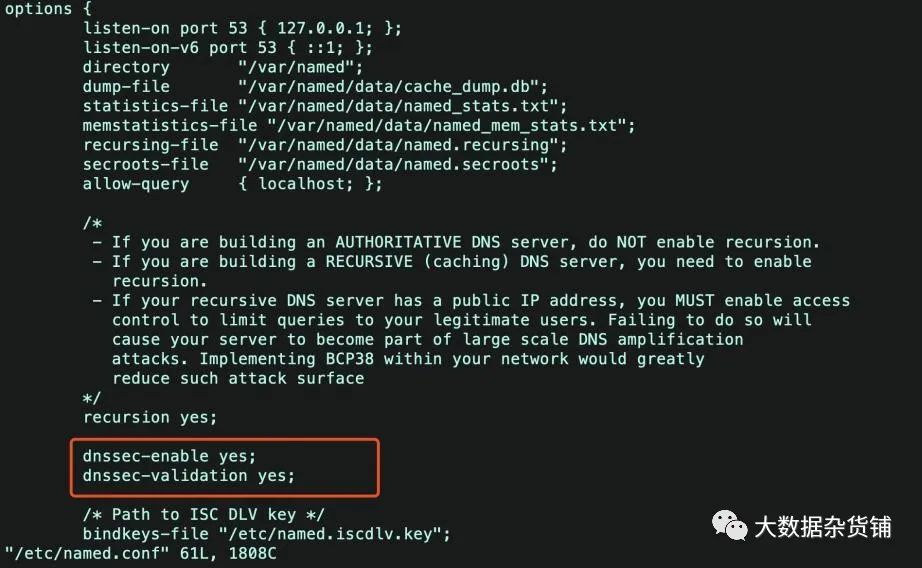
systemctl start named.servicesystemctl enable named
systemctl status named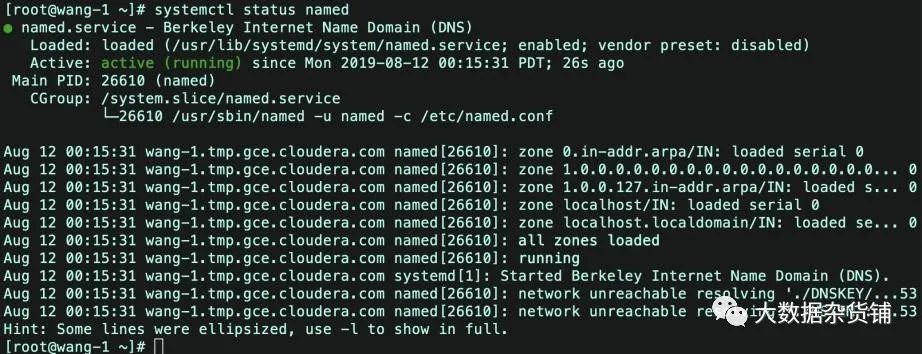
chmod: changing permissions of `/etc/resolv.conf': Operation not permittedsudo lsattr etc/resolv.conf
sudo chattr -i etc/resolv.confsudo lsattr etc/resolv.conf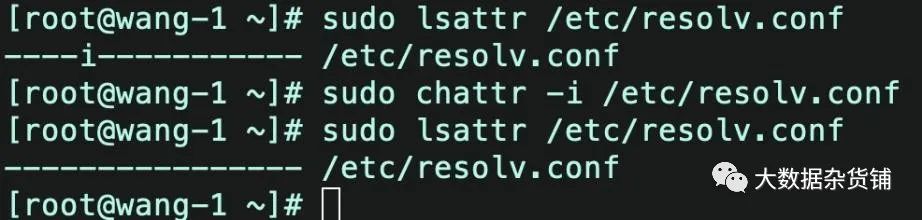
The domain name has been determined based on the host name
这会导致我们的所有的机器都不在同一个域内。 ipa-replica-prepare hadoop197.example.com --ip-address 192.168.116.197yum -y install ipa-server ipa-server-dns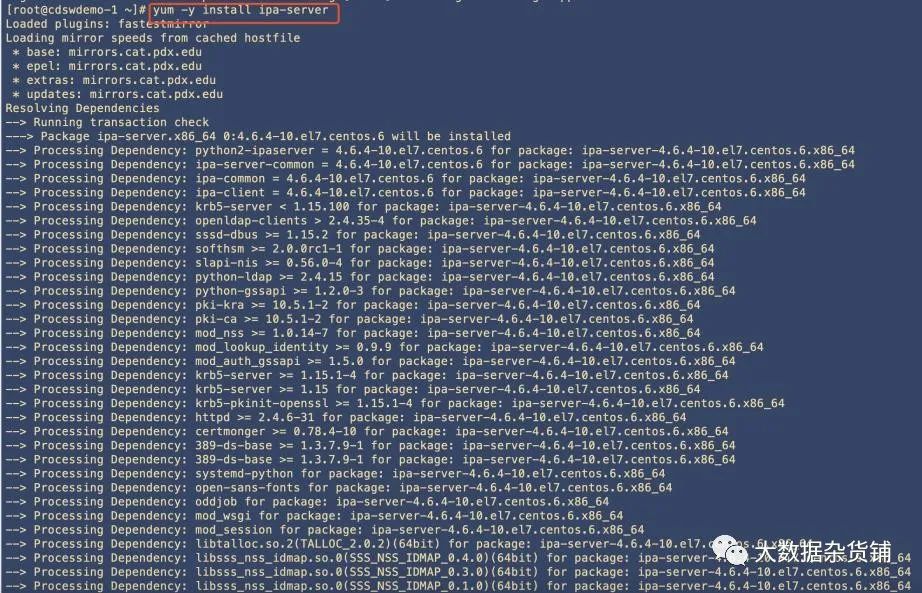

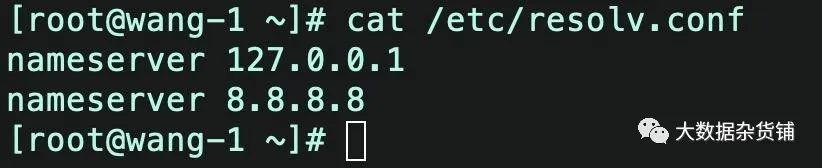
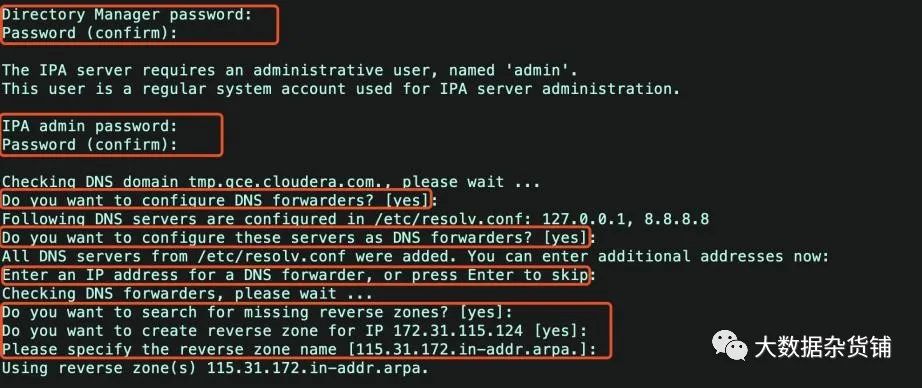
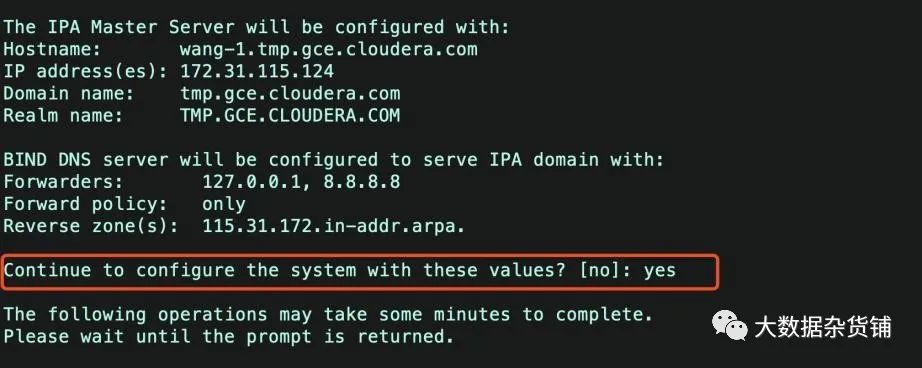
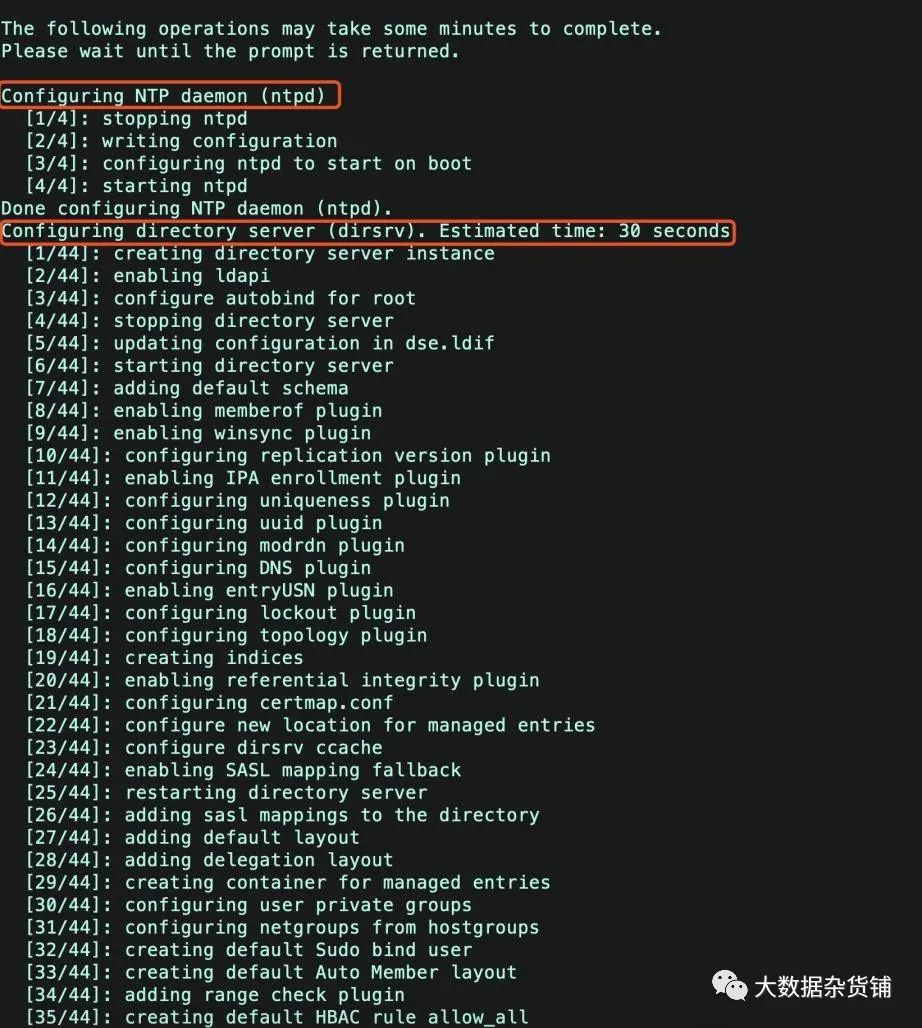
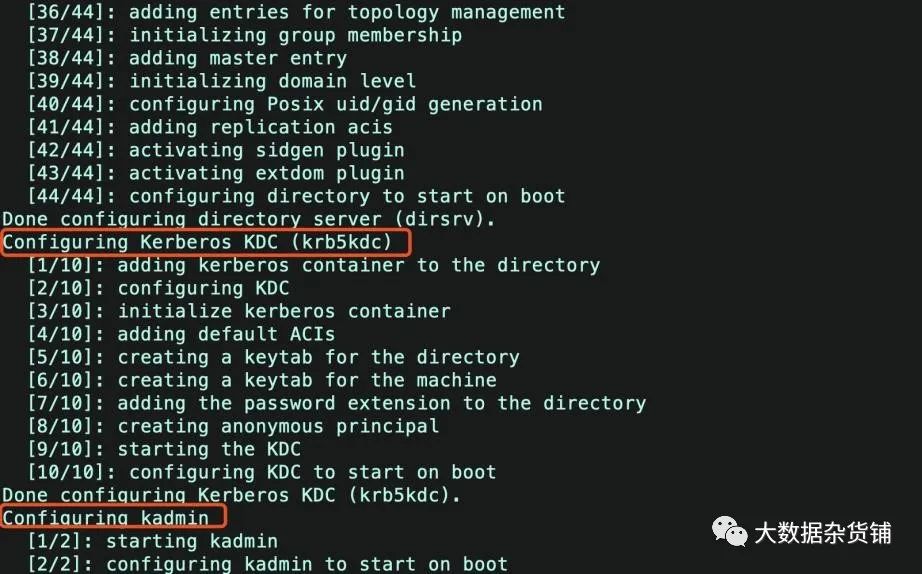
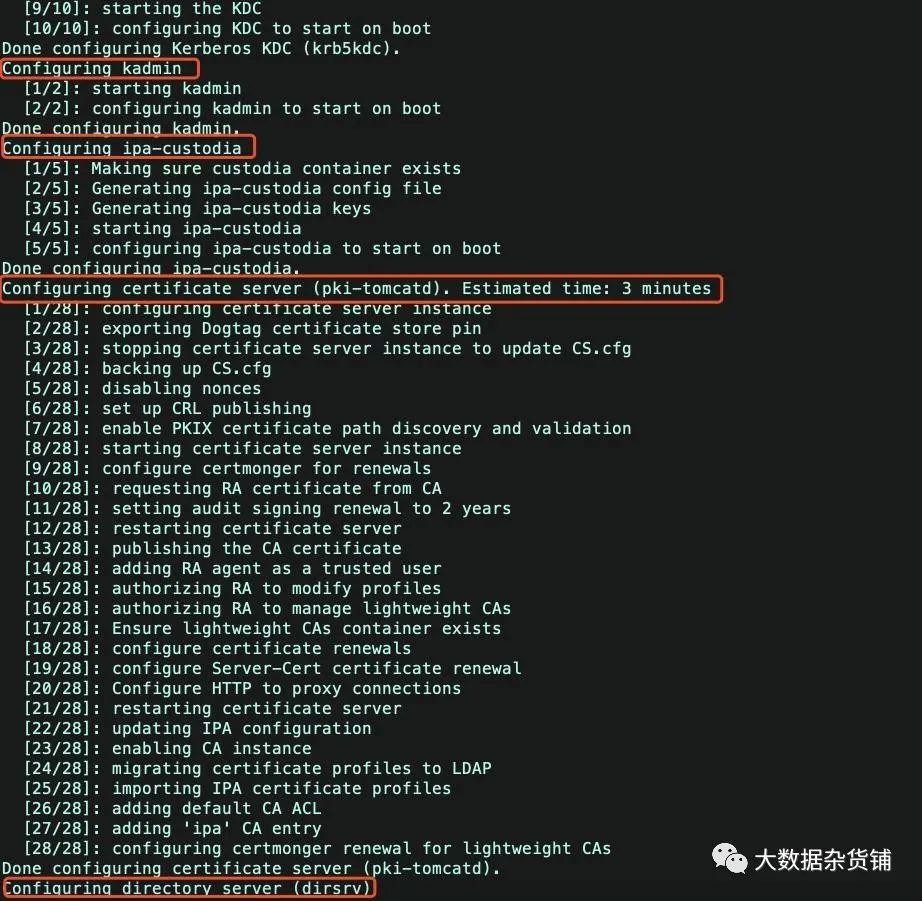
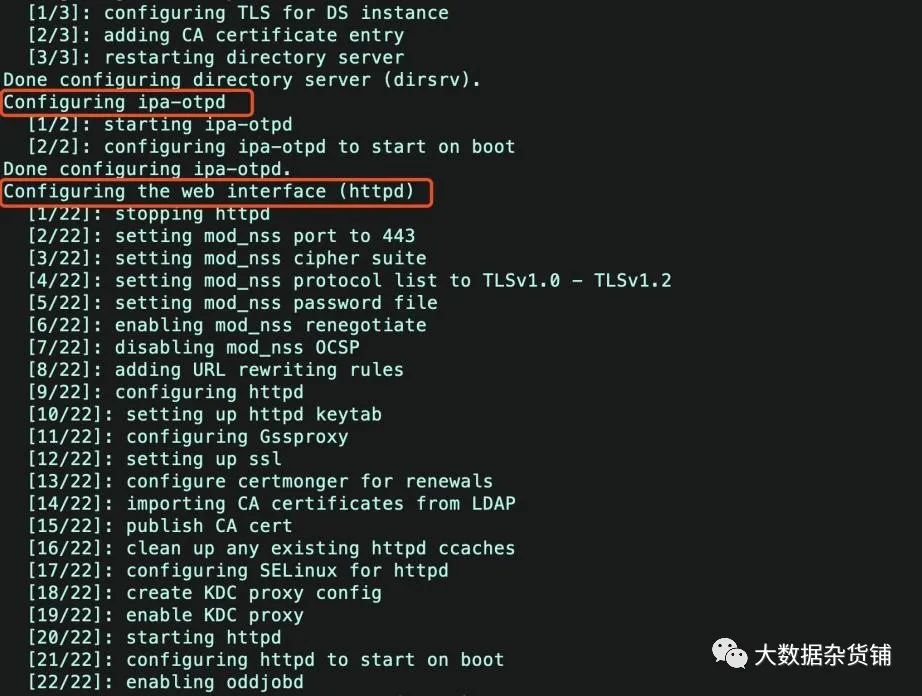
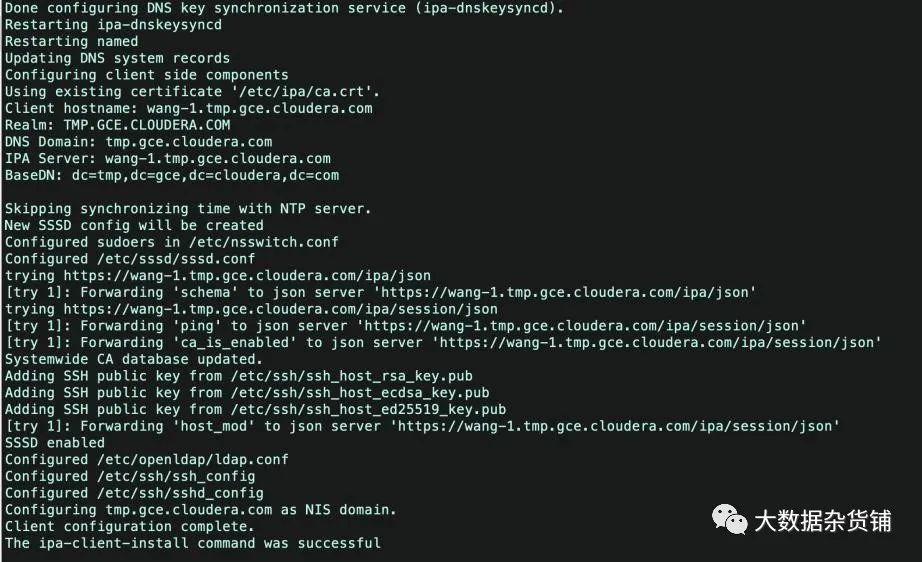
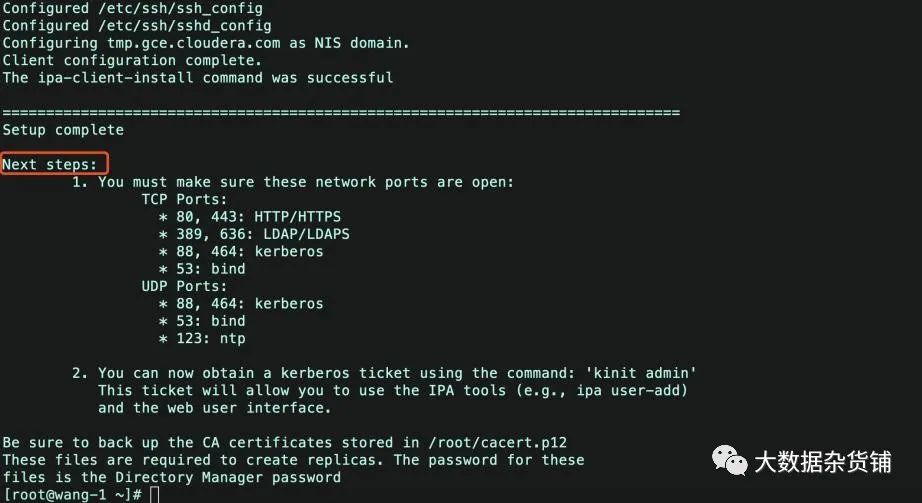
ipa-server-install --allow-zone-overlapDo you want to configure integrated DNS (BIND)? [no]: noServer host name [ipa.example.org]: ipa.example.orgPlease confirm the domain name [example.org]: ipa.example.orgPlease provide a realm name [EXAMPLE.ORG]: IPA.EXAMPLE.ORG[root@wang-1 ~]# ipa-server-install --allow-zone-overlapThe log file for this installation can be found in var/log/ipaserver-install.log==============================================================================This program will set up the IPA Server.This includes: * Configure a stand-alone CA (dogtag) for certificate management * Configure the Network Time Daemon (ntpd) * Create and configure an instance of Directory Server * Create and configure a Kerberos Key Distribution Center (KDC) * Configure Apache (httpd) * Configure the KDC to enable PKINITTo accept the default shown in brackets, press the Enter key.WARNING: conflicting time&date synchronization service 'chronyd' will be disabledin favor of ntpdDo you want to configure integrated DNS (BIND)? [no]: yesEnter the fully qualified domain name of the computeron which you're setting up server software. Using the form<hostname>.<domainname>Example: master.example.com.Server host name [wang-1.tmp.gce.cloudera.com]: Warning: skipping DNS resolution of host wang-1.tmp.gce.cloudera.comThe domain name has been determined based on the host name.Please confirm the domain name [tmp.gce.cloudera.com]: The kerberos protocol requires a Realm name to be defined.This is typically the domain name converted to uppercase.Please provide a realm name [TMP.GCE.CLOUDERA.COM]: Certain directory server operations require an administrative user.This user is referred to as the Directory Manager and has full accessto the Directory for system management tasks and will be added to theinstance of directory server created for IPA.The password must be at least 8 characters long.Directory Manager password: Password (confirm): The IPA server requires an administrative user, named 'admin'.This user is a regular system account used for IPA server administration.IPA admin password: Password (confirm): Checking DNS domain tmp.gce.cloudera.com., please wait ...Do you want to configure DNS forwarders? [yes]: Following DNS servers are configured in etc/resolv.conf: 127.0.0.1, 8.8.8.8Do you want to configure these servers as DNS forwarders? [yes]: All DNS servers from etc/resolv.conf were added. You can enter additional addresses now:Enter an IP address for a DNS forwarder, or press Enter to skip: Checking DNS forwarders, please wait ...Do you want to search for missing reverse zones? [yes]: Do you want to create reverse zone for IP 172.31.115.124 [yes]: Please specify the reverse zone name [115.31.172.in-addr.arpa.]: Using reverse zone(s) 115.31.172.in-addr.arpa.The IPA Master Server will be configured with:Hostname: wang-1.tmp.gce.cloudera.comIP address(es): 172.31.115.124Domain name: tmp.gce.cloudera.comRealm name: TMP.GCE.CLOUDERA.COMBIND DNS server will be configured to serve IPA domain with:Forwarders: 127.0.0.1, 8.8.8.8Forward policy: onlyReverse zone(s): 115.31.172.in-addr.arpa.Continue to configure the system with these values? [no]: yesThe following operations may take some minutes to complete.Please wait until the prompt is returned.Configuring NTP daemon (ntpd) [1/4]: stopping ntpd [2/4]: writing configuration [3/4]: configuring ntpd to start on boot [4/4]: starting ntpdDone configuring NTP daemon (ntpd).Configuring directory server (dirsrv). Estimated time: 30 seconds [1/44]: creating directory server instance [2/44]: enabling ldapi [3/44]: configure autobind for root [4/44]: stopping directory server [5/44]: updating configuration in dse.ldif [6/44]: starting directory server [7/44]: adding default schema [8/44]: enabling memberof plugin [9/44]: enabling winsync plugin [10/44]: configuring replication version plugin [11/44]: enabling IPA enrollment plugin [12/44]: configuring uniqueness plugin [13/44]: configuring uuid plugin [14/44]: configuring modrdn plugin [15/44]: configuring DNS plugin [16/44]: enabling entryUSN plugin [17/44]: configuring lockout plugin [18/44]: configuring topology plugin [19/44]: creating indices [20/44]: enabling referential integrity plugin [21/44]: configuring certmap.conf [22/44]: configure new location for managed entries [23/44]: configure dirsrv ccache [24/44]: enabling SASL mapping fallback [25/44]: restarting directory server [26/44]: adding sasl mappings to the directory [27/44]: adding default layout [28/44]: adding delegation layout [29/44]: creating container for managed entries [30/44]: configuring user private groups [31/44]: configuring netgroups from hostgroups [32/44]: creating default Sudo bind user [33/44]: creating default Auto Member layout [34/44]: adding range check plugin [35/44]: creating default HBAC rule allow_all [36/44]: adding entries for topology management [37/44]: initializing group membership [38/44]: adding master entry [39/44]: initializing domain level [40/44]: configuring Posix uid/gid generation [41/44]: adding replication acis [42/44]: activating sidgen plugin [43/44]: activating extdom plugin [44/44]: configuring directory to start on bootDone configuring directory server (dirsrv).Configuring Kerberos KDC (krb5kdc) [1/10]: adding kerberos container to the directory [2/10]: configuring KDC [3/10]: initialize kerberos container [4/10]: adding default ACIs [5/10]: creating a keytab for the directory [6/10]: creating a keytab for the machine [7/10]: adding the password extension to the directory [8/10]: creating anonymous principal [9/10]: starting the KDC [10/10]: configuring KDC to start on bootDone configuring Kerberos KDC (krb5kdc).Configuring kadmin [1/2]: starting kadmin [2/2]: configuring kadmin to start on bootDone configuring kadmin.Configuring ipa-custodia [1/5]: Making sure custodia container exists [2/5]: Generating ipa-custodia config file [3/5]: Generating ipa-custodia keys [4/5]: starting ipa-custodia [5/5]: configuring ipa-custodia to start on bootDone configuring ipa-custodia.Configuring certificate server (pki-tomcatd). Estimated time: 3 minutes [1/28]: configuring certificate server instance [2/28]: exporting Dogtag certificate store pin [3/28]: stopping certificate server instance to update CS.cfg [4/28]: backing up CS.cfg [5/28]: disabling nonces [6/28]: set up CRL publishing [7/28]: enable PKIX certificate path discovery and validation [8/28]: starting certificate server instance [9/28]: configure certmonger for renewals [10/28]: requesting RA certificate from CA [11/28]: setting audit signing renewal to 2 years [12/28]: restarting certificate server [13/28]: publishing the CA certificate [14/28]: adding RA agent as a trusted user [15/28]: authorizing RA to modify profiles [16/28]: authorizing RA to manage lightweight CAs [17/28]: Ensure lightweight CAs container exists [18/28]: configure certificate renewals [19/28]: configure Server-Cert certificate renewal [20/28]: Configure HTTP to proxy connections [21/28]: restarting certificate server [22/28]: updating IPA configuration [23/28]: enabling CA instance [24/28]: migrating certificate profiles to LDAP [25/28]: importing IPA certificate profiles [26/28]: adding default CA ACL [27/28]: adding 'ipa' CA entry [28/28]: configuring certmonger renewal for lightweight CAsDone configuring certificate server (pki-tomcatd).Configuring directory server (dirsrv) [1/3]: configuring TLS for DS instance [2/3]: adding CA certificate entry [3/3]: restarting directory serverDone configuring directory server (dirsrv).Configuring ipa-otpd [1/2]: starting ipa-otpd [2/2]: configuring ipa-otpd to start on bootDone configuring ipa-otpd.Configuring the web interface (httpd) [1/22]: stopping httpd [2/22]: setting mod_nss port to 443 [3/22]: setting mod_nss cipher suite [4/22]: setting mod_nss protocol list to TLSv1.0 - TLSv1.2 [5/22]: setting mod_nss password file [6/22]: enabling mod_nss renegotiate [7/22]: disabling mod_nss OCSP [8/22]: adding URL rewriting rules [9/22]: configuring httpd [10/22]: setting up httpd keytab [11/22]: configuring Gssproxy [12/22]: setting up ssl [13/22]: configure certmonger for renewals [14/22]: importing CA certificates from LDAP [15/22]: publish CA cert [16/22]: clean up any existing httpd ccaches [17/22]: configuring SELinux for httpd [18/22]: create KDC proxy config [19/22]: enable KDC proxy [20/22]: starting httpd [21/22]: configuring httpd to start on boot [22/22]: enabling oddjobdDone configuring the web interface (httpd).Configuring Kerberos KDC (krb5kdc) [1/1]: installing X509 Certificate for PKINITDone configuring Kerberos KDC (krb5kdc).Applying LDAP updatesUpgrading IPA:. Estimated time: 1 minute 30 seconds [1/10]: stopping directory server [2/10]: saving configuration [3/10]: disabling listeners [4/10]: enabling DS global lock [5/10]: disabling Schema Compat [6/10]: starting directory server [7/10]: upgrading server [8/10]: stopping directory server [9/10]: restoring configuration [10/10]: starting directory serverDone.Restarting the KDCConfiguring DNS (named) [1/12]: generating rndc key file [2/12]: adding DNS container [3/12]: setting up our zone [4/12]: setting up reverse zone [5/12]: setting up our own record [6/12]: setting up records for other masters [7/12]: adding NS record to the zones [8/12]: setting up kerberos principal [9/12]: setting up named.conf [10/12]: setting up server configuration [11/12]: configuring named to start on boot [12/12]: changing resolv.conf to point to ourselvesDone configuring DNS (named).Restarting the web server to pick up resolv.conf changesConfiguring DNS key synchronization service (ipa-dnskeysyncd) [1/7]: checking status [2/7]: setting up bind-dyndb-ldap working directory [3/7]: setting up kerberos principal [4/7]: setting up SoftHSM [5/7]: adding DNSSEC containers [6/7]: creating replica keys [7/7]: configuring ipa-dnskeysyncd to start on bootDone configuring DNS key synchronization service (ipa-dnskeysyncd).Restarting ipa-dnskeysyncdRestarting namedUpdating DNS system recordsConfiguring client side componentsUsing existing certificate '/etc/ipa/ca.crt'.Client hostname: wang-1.tmp.gce.cloudera.comRealm: TMP.GCE.CLOUDERA.COMDNS Domain: tmp.gce.cloudera.comIPA Server: wang-1.tmp.gce.cloudera.comBaseDN: dc=tmp,dc=gce,dc=cloudera,dc=comSkipping synchronizing time with NTP server.New SSSD config will be createdConfigured sudoers in etc/nsswitch.confConfigured etc/sssd/sssd.conftrying https://wang-1.tmp.gce.cloudera.com/ipa/json[try 1]: Forwarding 'schema' to json server 'https://wang-1.tmp.gce.cloudera.com/ipa/json'trying https://wang-1.tmp.gce.cloudera.com/ipa/session/json[try 1]: Forwarding 'ping' to json server 'https://wang-1.tmp.gce.cloudera.com/ipa/session/json'[try 1]: Forwarding 'ca_is_enabled' to json server 'https://wang-1.tmp.gce.cloudera.com/ipa/session/json'Systemwide CA database updated.Adding SSH public key from etc/ssh/ssh_host_rsa_key.pubAdding SSH public key from etc/ssh/ssh_host_ecdsa_key.pubAdding SSH public key from etc/ssh/ssh_host_ed25519_key.pub[try 1]: Forwarding 'host_mod' to json server 'https://wang-1.tmp.gce.cloudera.com/ipa/session/json'SSSD enabledConfigured etc/openldap/ldap.confConfigured etc/ssh/ssh_configConfigured etc/ssh/sshd_configConfiguring tmp.gce.cloudera.com as NIS domain.Client configuration complete.The ipa-client-install command was successful==============================================================================Setup completeNext steps: 1. You must make sure these network ports are open: TCP Ports: * 80, 443: HTTP/HTTPS * 389, 636: LDAP/LDAPS * 88, 464: kerberos * 53: bind UDP Ports: * 88, 464: kerberos * 53: bind * 123: ntp 2. You can now obtain a kerberos ticket using the command: 'kinit admin' This ticket will allow you to use the IPA tools (e.g., ipa user-add) and the web user interface.Be sure to back up the CA certificates stored in root/cacert.p12These files are required to create replicas. The password for thesefiles is the Directory Manager password[root@wang-1 ~]#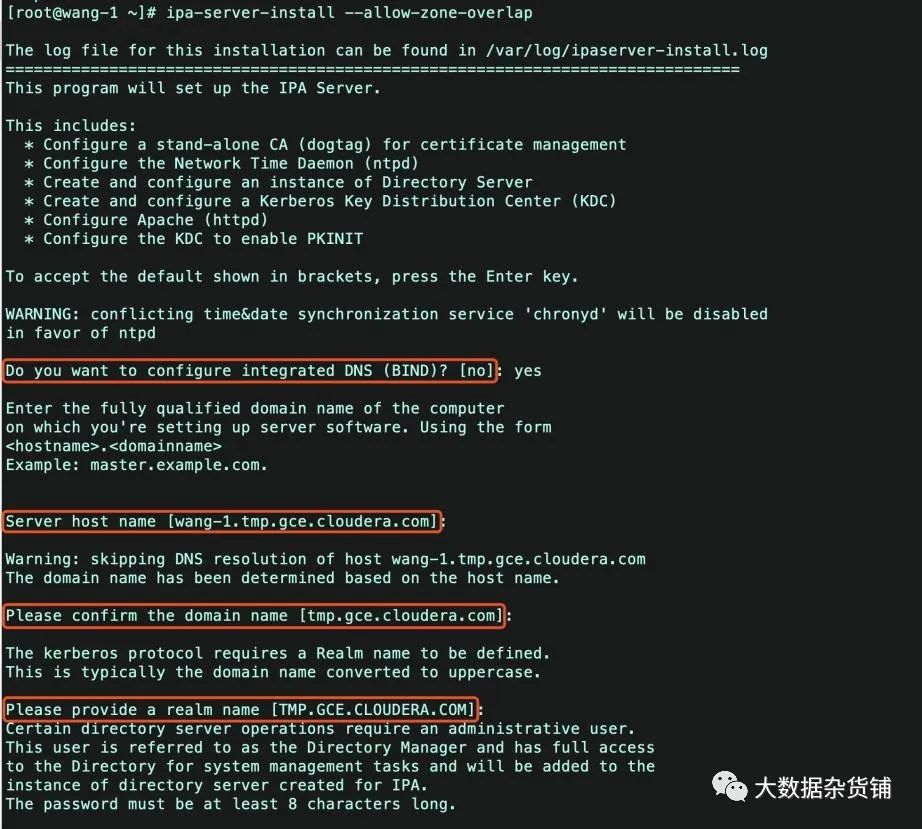

kinit admin
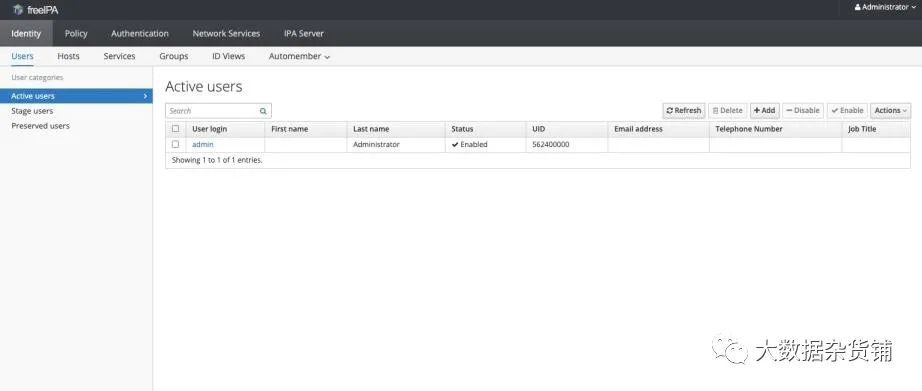
ipa user-find admin[root@wang-1 ~]# ipa user-find admin--------------1 user matched-------------- User login: admin Last name: Administrator Home directory: home/admin Login shell: bin/bash Principal alias: admin@TMP.GCE.CLOUDERA.COM UID: 580800000 GID: 580800000 Account disabled: False----------------------------Number of entries returned 1----------------------------[root@wang-1 ~]#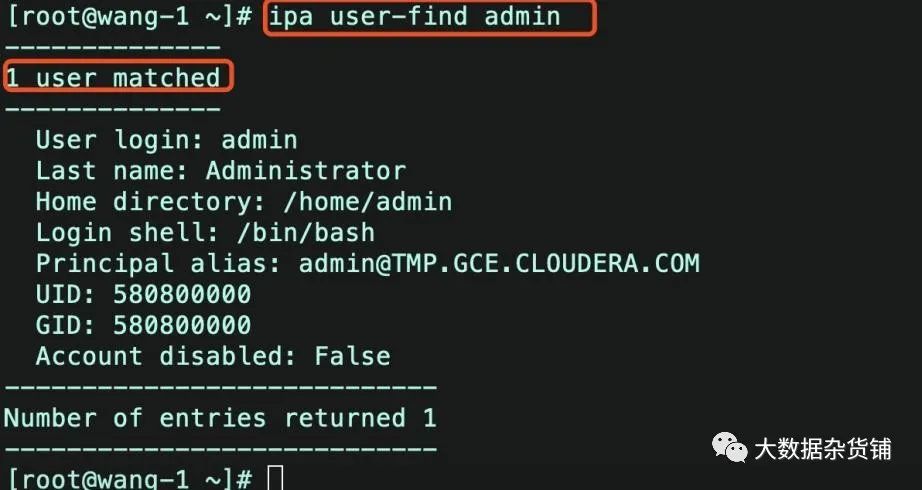

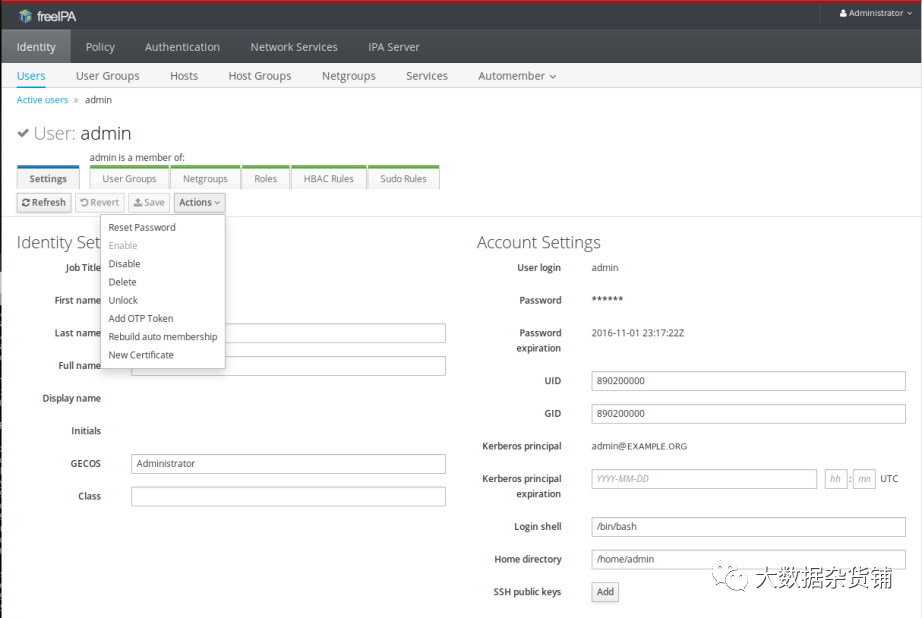
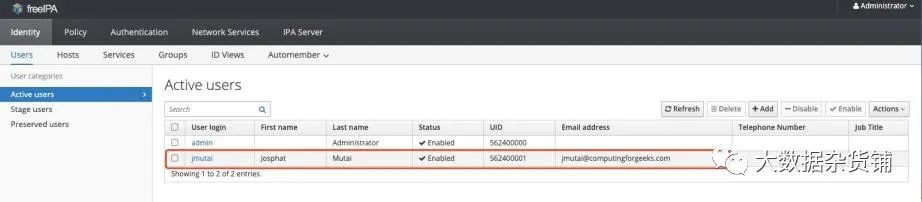
# ipa user-add jmutai --first=Josphat --last=Mutai --email=jmutai@computingforgeeks.com --shell=/bin/bash --password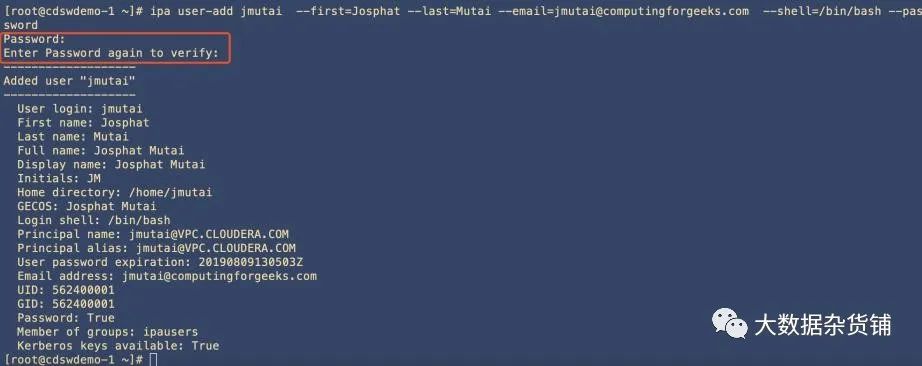
[root@wang-2 ~]# ipactl status Directory Service: RUNNINGkrb5kdc Service: RUNNINGkadmin Service: RUNNINGhttpd Service: RUNNINGipa-custodia Service: RUNNINGntpd Service: RUNNINGpki-tomcatd Service: RUNNINGipa-otpd Service: RUNNINGipa: INFO: The ipactl command was successful[root@wang-2 ~]#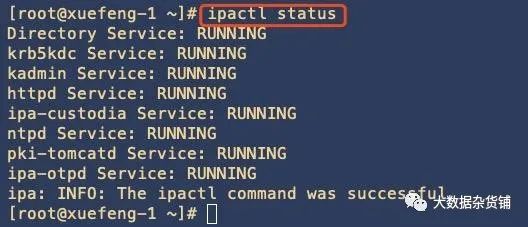
[root@xuefeng-1 ~]# ipactl --helpUsage: ipactl start|stop|restart|status Options: -h, --help show this help message and exit -d, --debug Display debugging information -f, --force Force IPA to start. Combine options --skip-version- check and --ignore-service-failures --ignore-service-failures If any service start fails, do not rollback the services, continue with the operation --skip-version-check skip version check
yum -y install ipa-client ntp
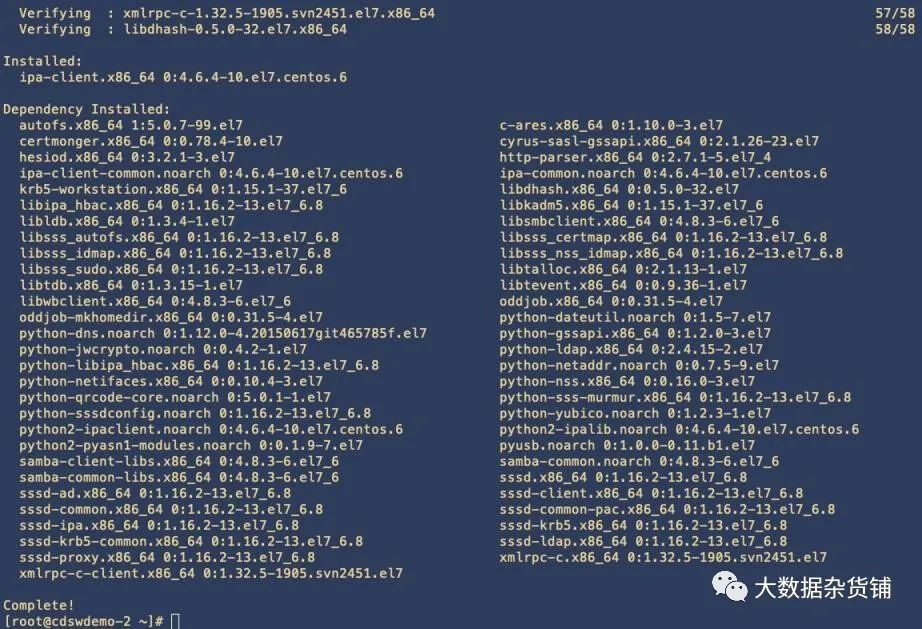
rpm -qa|grep -I ipa[root@cdswdemo-2 ~]# rpm -qa|grep -i ipaipa-client-4.6.4-10.el7.centos.6.x86_64 python-ipaddress-1.0.16-2.el7.noarch python2-ipalib-4.6.4-10.el7.centos.6.noarch ipa-common-4.6.4-10.el7.centos.6.noarchlibipa_hbac-1.16.2-13.el7_6.8.x86_64 ipa-client-common-4.6.4-10.el7.centos.6.noarch python-libipa_hbac-1.16.2-13.el7_6.8.x86_64 python2-ipaclient-4.6.4-10.el7.centos.6.noarch sssd-ipa-1.16.2-13.el7_6.8.x86_64 python-iniparse-0.4-9.el7.noarch [root@cdswdemo-2 ~]# 
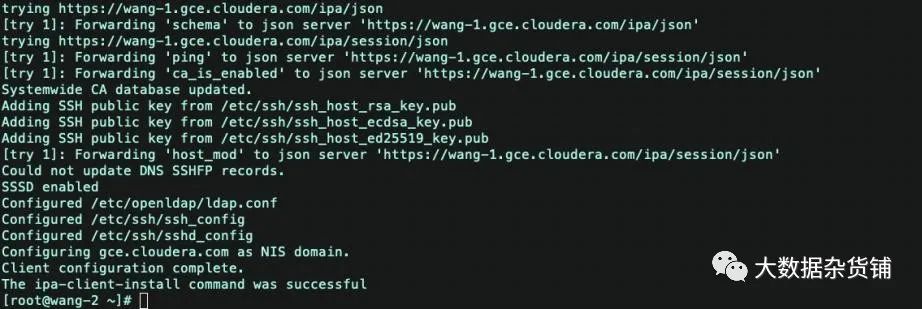
[root@ipa112 ~]# ipa-client-install --domain=example.com --realm=EXAMPLE.COM --principal=admin@EXAMPLE.COM --password=hadoop123 --enable-dns-updates --permit --no-ntpProvide your IPA server name (ex: ipa.example.com): ipa110.example.com --输入ipaserver,需要注意后面一定不要带空格,否则就会抛出异常ipa-client-install[root@wang-2 ~]# ipa-client-installWARNING: ntpd time&date synchronization service will not be configured asconflicting service (chronyd) is enabledUse --force-ntpd option to disable it and force configuration of ntpdDNS discovery failed to determine your DNS domainProvide the domain name of your IPA server (ex: example.com): gce.cloudera.comProvide your IPA server name (ex: ipa.example.com): wang-1.gce.cloudera.comThe failure to use DNS to find your IPA server indicates that your resolv.conf file is not properly configured.Autodiscovery of servers for failover cannot work with this configuration.If you proceed with the installation, services will be configured to always access the discovered server for all operations and will not fail over to other servers in case of failure.Proceed with fixed values and no DNS discovery? [no]: yesClient hostname: wang-2.gce.cloudera.comRealm: GCE.CLOUDERA.COMDNS Domain: gce.cloudera.comIPA Server: wang-1.gce.cloudera.comBaseDN: dc=gce,dc=cloudera,dc=comContinue to configure the system with these values? [no]: yesSkipping synchronizing time with NTP server.User authorized to enroll computers: adminPassword for admin@GCE.CLOUDERA.COM: Successfully retrieved CA cert Subject: CN=Certificate Authority,O=GCE.CLOUDERA.COM Issuer: CN=Certificate Authority,O=GCE.CLOUDERA.COM Valid From: 2019-08-11 13:44:00 Valid Until: 2039-08-11 13:44:00Enrolled in IPA realm GCE.CLOUDERA.COMCreated etc/ipa/default.confNew SSSD config will be createdConfigured sudoers in etc/nsswitch.confConfigured etc/sssd/sssd.confConfigured etc/krb5.conf for IPA realm GCE.CLOUDERA.COMtrying https://wang-1.gce.cloudera.com/ipa/json[try 1]: Forwarding 'schema' to json server 'https://wang-1.gce.cloudera.com/ipa/json'trying https://wang-1.gce.cloudera.com/ipa/session/json[try 1]: Forwarding 'ping' to json server 'https://wang-1.gce.cloudera.com/ipa/session/json'[try 1]: Forwarding 'ca_is_enabled' to json server 'https://wang-1.gce.cloudera.com/ipa/session/json'Systemwide CA database updated.Adding SSH public key from etc/ssh/ssh_host_rsa_key.pubAdding SSH public key from etc/ssh/ssh_host_ecdsa_key.pubAdding SSH public key from etc/ssh/ssh_host_ed25519_key.pub[try 1]: Forwarding 'host_mod' to json server 'https://wang-1.gce.cloudera.com/ipa/session/json'Could not update DNS SSHFP records.SSSD enabledConfigured etc/openldap/ldap.confConfigured etc/ssh/ssh_configConfigured etc/ssh/sshd_configConfiguring gce.cloudera.com as NIS domain.Client configuration complete.The ipa-client-install command was successful[root@wang-2 ~]#
kinit admin ipa-replica-prepare wang-3.gce.cloudera.com Replica creation using 'ipa-replica-prepare' to generate replica fileis supported only in 0-level IPA domain.The current IPA domain level is 1 and thus the replica mustbe created by promoting an existing IPA client.To set up a replica use the following procedure: 1.) set up a client on the host using 'ipa-client-install' 2.) promote the client to replica running 'ipa-replica-install' *without* replica file specified'ipa-replica-prepare' is allowed only in domain level 0The ipa-replica-prepare command failed.ipa host-add --force --ip-address=172.31.115.236 wang-3.gce.cloudera.comipa host-add --force --ip-address=172.31.115.236 wang-3.gce.cloudera.com[root@wang-2 ~]# ipa host-add --force --ip-address=172.31.115.236 wang-3.gce.cloudera.com ------------------------------------Added host "wang-3.gce.cloudera.com"------------------------------------ Host name: wang-3.gce.cloudera.com Principal name: host/wang-3.gce.cloudera.com@GCE.CLOUDERA.COM Principal alias: host/wang-3.gce.cloudera.com@GCE.CLOUDERA.COM Password: False Keytab: False Managed by: wang-3.gce.cloudera.com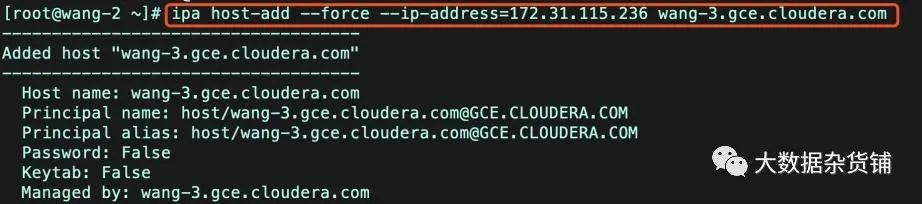
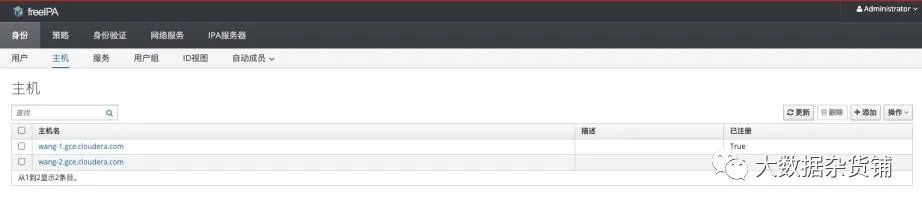
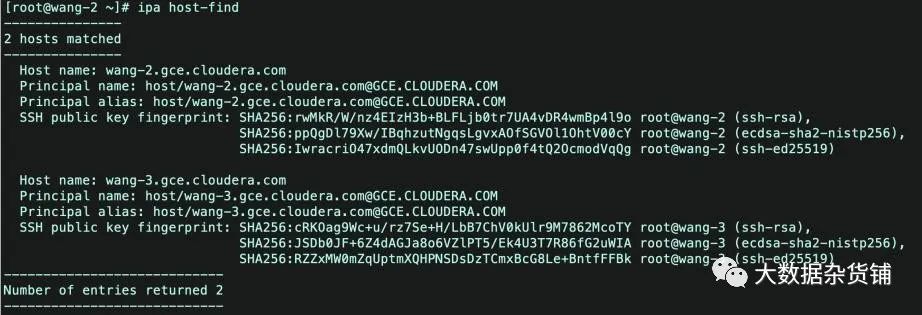
ipa host-find[root@wang-2 ~]# ipa host-find ---------------2 hosts matched--------------- Host name: wang-2.gce.cloudera.com Principal name: host/wang-2.gce.cloudera.com@GCE.CLOUDERA.COM Principal alias: host/wang-2.gce.cloudera.com@GCE.CLOUDERA.COM SSH public key fingerprint: SHA256:rwMkR/W/nz4EIzH3b+BLFLjb0tr7UA4vDR4wmBp4l9o root@wang-2 (ssh-rsa), SHA256:ppQgDl79Xw/IBqhzutNgqsLgvxAOfSGVOl1OhtV00cY root@wang-2 (ecdsa-sha2-nistp256), SHA256:IwracriO47xdmQLkvUODn47swUpp0f4tQ2OcmodVqQg root@wang-2 (ssh-ed25519) Host name: wang-3.gce.cloudera.com Principal name: host/wang-3.gce.cloudera.com@GCE.CLOUDERA.COM Principal alias: host/wang-3.gce.cloudera.com@GCE.CLOUDERA.COM----------------------------Number of entries returned 2----------------------------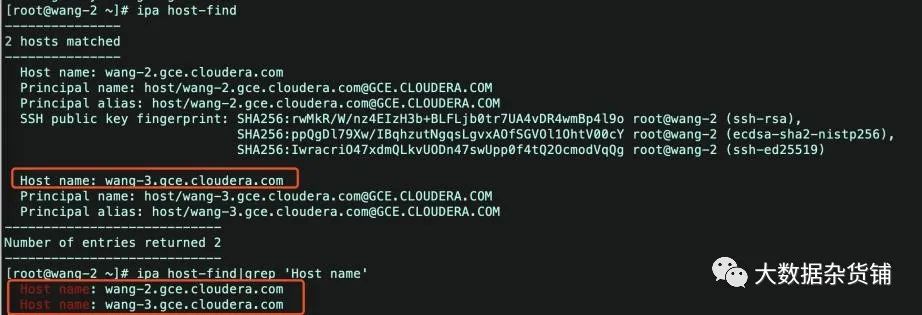
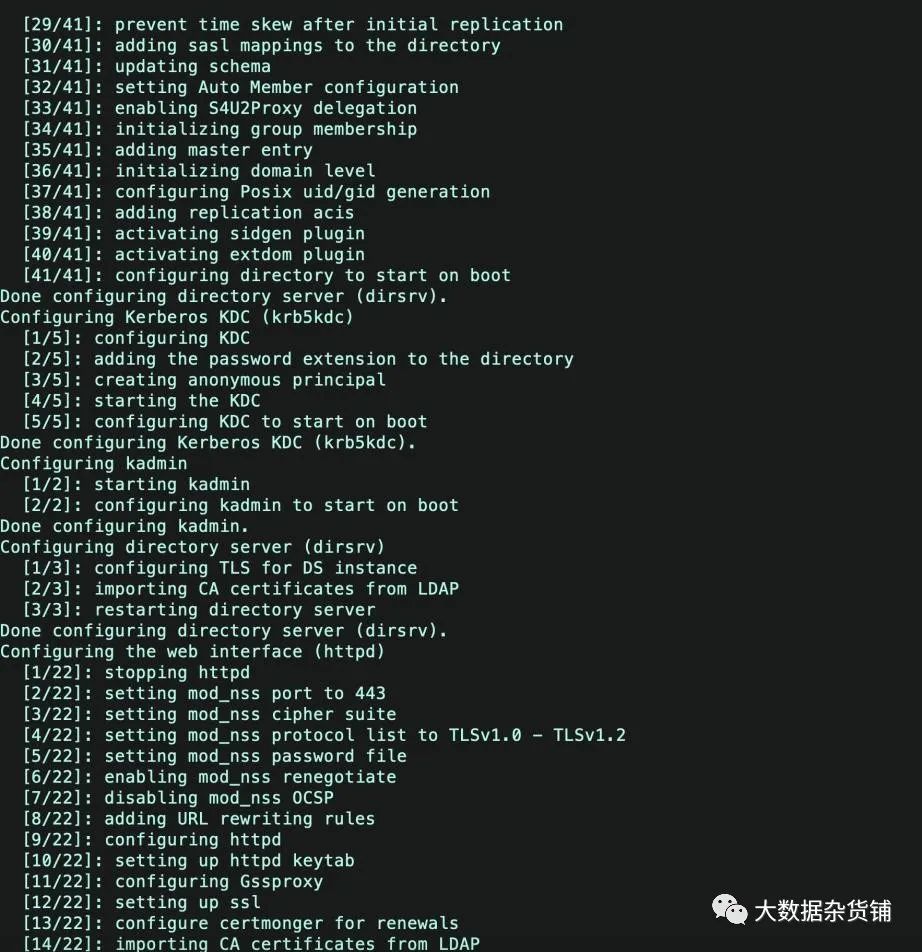
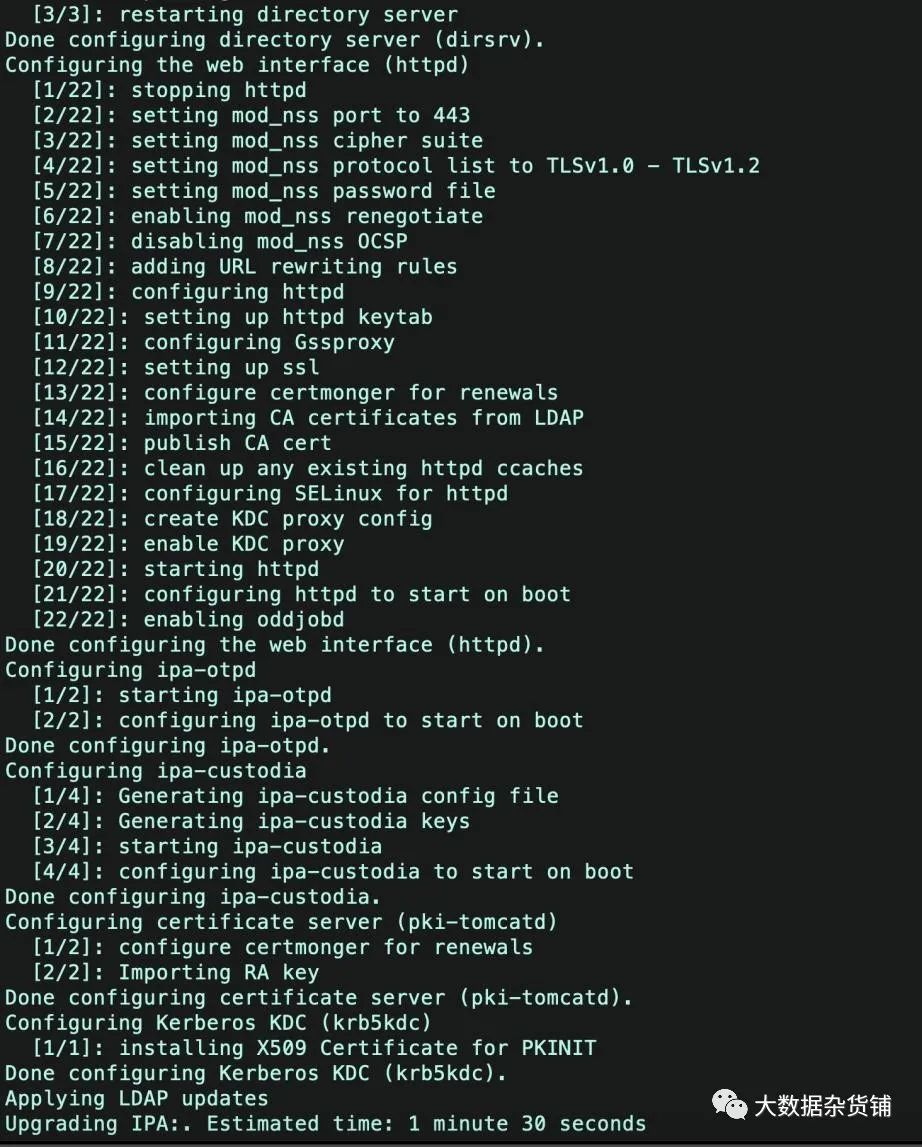
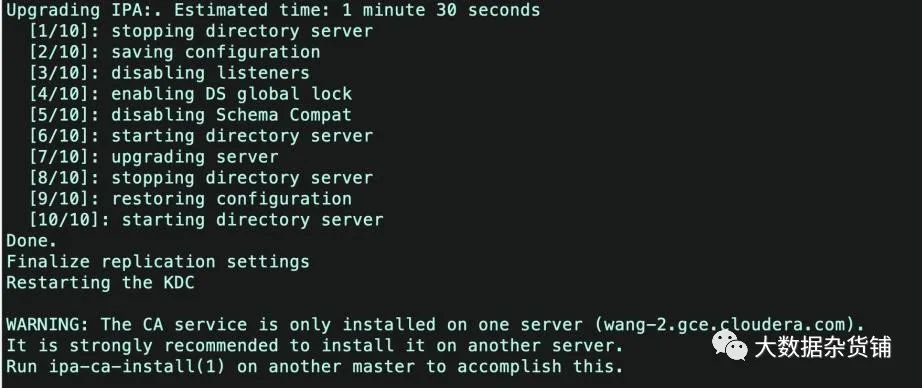
yum -y install ipa-server[root@wang-3 sbin]# ipa-replica-installWARNING: conflicting time&date synchronization service 'chronyd' willbe disabled in favor of ntpdPassword for admin@GCE.CLOUDERA.COM: Run connection check to masterConnection check OKConfiguring NTP daemon (ntpd) [1/4]: stopping ntpd [2/4]: writing configuration [3/4]: configuring ntpd to start on boot [4/4]: starting ntpdDone configuring NTP daemon (ntpd).Configuring directory server (dirsrv). Estimated time: 30 seconds [1/41]: creating directory server instance [2/41]: enabling ldapi [3/41]: configure autobind for root [4/41]: stopping directory server [5/41]: updating configuration in dse.ldif [6/41]: starting directory server [7/41]: adding default schema [8/41]: enabling memberof plugin [9/41]: enabling winsync plugin [10/41]: configuring replication version plugin [11/41]: enabling IPA enrollment plugin [12/41]: configuring uniqueness plugin [13/41]: configuring uuid plugin [14/41]: configuring modrdn plugin [15/41]: configuring DNS plugin [16/41]: enabling entryUSN plugin [17/41]: configuring lockout plugin [18/41]: configuring topology plugin [19/41]: creating indices [20/41]: enabling referential integrity plugin [21/41]: configuring certmap.conf [22/41]: configure new location for managed entries [23/41]: configure dirsrv ccache [24/41]: enabling SASL mapping fallback [25/41]: restarting directory server [26/41]: creating DS keytab [27/41]: ignore time skew for initial replication [28/41]: setting up initial replicationStarting replication, please wait until this has completed.Update in progress, 3 seconds elapsedUpdate succeeded [29/41]: prevent time skew after initial replication [30/41]: adding sasl mappings to the directory [31/41]: updating schema [32/41]: setting Auto Member configuration [33/41]: enabling S4U2Proxy delegation [34/41]: initializing group membership [35/41]: adding master entry [36/41]: initializing domain level [37/41]: configuring Posix uid/gid generation [38/41]: adding replication acis [39/41]: activating sidgen plugin [40/41]: activating extdom plugin [41/41]: configuring directory to start on bootDone configuring directory server (dirsrv).Configuring Kerberos KDC (krb5kdc) [1/5]: configuring KDC [2/5]: adding the password extension to the directory [3/5]: creating anonymous principal [4/5]: starting the KDC [5/5]: configuring KDC to start on bootDone configuring Kerberos KDC (krb5kdc).Configuring kadmin [1/2]: starting kadmin [2/2]: configuring kadmin to start on bootDone configuring kadmin.Configuring directory server (dirsrv) [1/3]: configuring TLS for DS instance [2/3]: importing CA certificates from LDAP [3/3]: restarting directory serverDone configuring directory server (dirsrv).Configuring the web interface (httpd) [1/22]: stopping httpd [2/22]: setting mod_nss port to 443 [3/22]: setting mod_nss cipher suite [4/22]: setting mod_nss protocol list to TLSv1.0 - TLSv1.2 [5/22]: setting mod_nss password file [6/22]: enabling mod_nss renegotiate [7/22]: disabling mod_nss OCSP [8/22]: adding URL rewriting rules [9/22]: configuring httpd [10/22]: setting up httpd keytab [11/22]: configuring Gssproxy [12/22]: setting up ssl [13/22]: configure certmonger for renewals [14/22]: importing CA certificates from LDAP [15/22]: publish CA cert [16/22]: clean up any existing httpd ccaches [17/22]: configuring SELinux for httpd [18/22]: create KDC proxy config [19/22]: enable KDC proxy [20/22]: starting httpd [21/22]: configuring httpd to start on boot [22/22]: enabling oddjobdDone configuring the web interface (httpd).Configuring ipa-otpd [1/2]: starting ipa-otpd [2/2]: configuring ipa-otpd to start on bootDone configuring ipa-otpd.Configuring ipa-custodia [1/4]: Generating ipa-custodia config file [2/4]: Generating ipa-custodia keys [3/4]: starting ipa-custodia [4/4]: configuring ipa-custodia to start on bootDone configuring ipa-custodia.Configuring certificate server (pki-tomcatd) [1/2]: configure certmonger for renewals [2/2]: Importing RA keyDone configuring certificate server (pki-tomcatd).Configuring Kerberos KDC (krb5kdc) [1/1]: installing X509 Certificate for PKINITDone configuring Kerberos KDC (krb5kdc).Applying LDAP updatesUpgrading IPA:. Estimated time: 1 minute 30 seconds [1/10]: stopping directory server [2/10]: saving configuration [3/10]: disabling listeners [4/10]: enabling DS global lock [5/10]: disabling Schema Compat [6/10]: starting directory server [7/10]: upgrading server [8/10]: stopping directory server [9/10]: restoring configuration [10/10]: starting directory serverDone.Finalize replication settingsRestarting the KDCWARNING: The CA service is only installed on one server (wang-2.gce.cloudera.com).It is strongly recommended to install it on another server.Run ipa-ca-install(1) on another master to accomplish this.
[root@wang-3 sbin]# ipa-replica-manage listDirectory Manager password: wang-2.gce.cloudera.com: masterwang-3.gce.cloudera.com: master[root@wang-3 sbin]#[realms] douyu.com = { kdc = ipa.douyu.com:88 #主服务器 kdc = ipa2.douyu.com:88 #新增热备配置 master_kdc = ipa.douyu.com:88 master_kdc = ipa2.douyu.com:88 #新增 admin_server = ipa.douyu.com:749 admin_server = ipa2.douyu.com:749 #新增 default_domain = douyu.com pkinit_anchors = FILE:/etc/ipa/ca.crt }ipa-server-install -U --uninstall #服务端卸载ipa-client-install -U --uninstall #客户端卸载#删除残留文件,避免二次安装失败cd /var/lib/ipa/rm -f ca*rm -f *.txtrm -f sysrestore/*cd /var/lib/dirsrv/rm -rf scripts*cd /var/run/dirsrv/rm -rf slapd*cd /etc/iparm -f ca.crtcd /var/log/dirsrvrm -rf slapd*rm -rf var/lib/pki* var/log/pki* etc/init.d/pki*rm -rf usr/share/pki /usr/share/tomcat5 /var/lib/tomcat5/#卸载软件包yum erase -y `rpmquery -a | grep freeipa` `rpmquery -a | grep ^pki-` `rpmquery -a | grep tomcat6` `rpmquery -a | grep httpd` 389-ds-base bind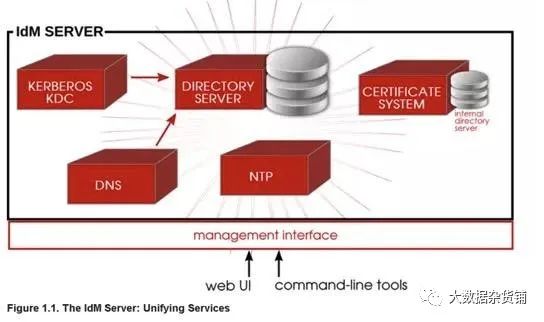
[root@hdp136 ~]# kinit lchkinit: Clients credentials have been revoked while getting initial credentials[root@hdp134 ~]# kadmin.local <-----执行kadmin.localAuthenticating as principal admin/admin@EXAMPLE.COM with password.kadmin.local: getprinc lch <---查看用户信息情况Principal: lch@EXAMPLE.COMExpiration date: [never]Last password change: Tue Feb 27 11:11:02 CST 2018Password expiration date: Mon May 28 11:11:02 CST 2018Maximum ticket life: 1 day 00:00:00Maximum renewable life: 7 days 00:00:00Last modified: Tue Feb 27 11:11:02 CST 2018 (lch@EXAMPLE.COM)Last successful authentication: Tue Feb 27 11:12:23 CST 2018Last failed authentication: Tue Feb 27 14:11:07 CST 2018Failed password attempts: 6 <--------------打印信息表明已经超过最大失败次数Number of keys: 4Key: vno 3, aes256-cts-hmac-sha1-96, SpecialKey: vno 3, aes128-cts-hmac-sha1-96, SpecialKey: vno 3, des3-cbc-sha1, SpecialKey: vno 3, arcfour-hmac, SpecialMKey: vno 1Attributes: REQUIRES_PRE_AUTHPolicy: [none]kadmin.local: modprinc -unlock lch@EXAMPLE.COM <---输入的命令进行解锁Principal "lch@EXAMPLE.COM" modified.sasl_io_recv failed to decode packet for connection....[root@ipa110 /]# cat package.ldif dn: cn=configchangetype: modifyreplace: nsslapd-sasl-max-buffer-sizensslapd-sasl-max-buffer-size: 2097152[root@ipa110 /]# ldapmodify -h localhost -D "cn=directory manager" -w hadoop123 -f package.ldif -ZZ[root@hdp136 ~]# cat /etc/nsswitch.conf... passwd: files sss... [root@hdp136 ~]# service sssd statussssd (pid 1799) is running...
[root@hdfs142 sssd]# vi /etc/sssd/sssd.conf [domain/example.com]cache_credentials = Truedebug_level = 9 ---修改这个值然后重启sssdLDAP Error: Connect error: TLS error -8054:You are attempting to import a cert with the same issuer/serial as an existing cert, but that is not the same cert.[root@test-1 OneNodeCDHCluster]# ipa-server-installThe log file for this installation can be found in /var/log/ipaserver-install.log==============================================================================This program will set up the IPA Server.This includes: * Configure a stand-alone CA (dogtag) for certificate management * Configure the Network Time Daemon (ntpd) * Create and configure an instance of Directory Server * Create and configure a Kerberos Key Distribution Center (KDC) * Configure Apache (httpd) * Configure the KDC to enable PKINITTo accept the default shown in brackets, press the Enter key.WARNING: conflicting time&date synchronization service 'chronyd' will be disabledin favor of ntpdApache is already configured with a listener on port 443:*:443 test-1.vpc.cloudera.com (/etc/httpd/conf.d/ssl.conf:56)ipapython.admintool: ERROR Aborting installationipapython.admintool: ERROR The ipa-server-install command failed. See /var/log/ipaserver-install.log for more information[root@test-1 OneNodeCDHCluster]#
vi /etc/httpd/conf.d/ssl.conf:1,$s/443/444/gChecking IdM Server Logs: https://access.redhat.com/documentation/en-US/Red_Hat_Enterprise_Linux/6/html/Identity_Management_Guide/server-config.html#logging#!/bin/bashfor line in `grep "x:[5-9][0-9][0-9]:" /etc/passwd`do USER=`echo $line | cut -d: -f1` FIRST=`echo $line | cut -d: -f5 | awk {'print $1'}` LAST=`echo $line | cut -d: -f5 | awk {'print $2'}` if [ ! "$FIRST" ] then FIRST=$USER fi if [ ! "$LAST" ] then LAST=$USER fi echo $USER | ipa user-add $USER --first=$FIRST --last=$LAST --passworddonevi /etc/pam.d/system-auth# add if you need ( create home directory automatically if it's none )session optional pam_mkhomedir.so skel=/etc/skel umask=077systemctl start oddjobd #启动服务systemctl enable oddjobd
本文链接:https://hqyman.cn/post/4967.html 非本站原创文章欢迎转载,原创文章需保留本站地址!
休息一下,本站随机推荐观看栏目: