
Cacti服务器ip:192.168.10.112,cacti 使用yum方式安装,默认路径为/usr/share/cacti
第二:本例操作环境
[iyunv@i-tcz0hdhc ~]# yum update -y
[iyunv@i-tcz0hdhc ~]# uname -a
Linux i-tcz0hdhc 2.6.32-431.29.2.el6.x86_64 #1 SMP Tue Sep 9 21:36:05 UTC 2014 x86_64 x86_64 x86_64 GNU/Linux
[iyunv@i-tcz0hdhc ~]# more /etc/redhat-release
CentOS release 6.6 (Final)
[iyunv@i-tcz0hdhc ~]#
第三:插件安装
插件下载地址:
http://docs.cacti.net/plugins
1、 安装插件包
[iyunv@i-tcz0hdhc ~]# wget http://docs.cacti.net/_media/plugin:settings-v0.71-1.tgz
[iyunv@i-tcz0hdhc ~]# wget http://docs.cacti.net/_media/plugin:realtime-v0.5-2.tgz
[iyunv@i-tcz0hdhc ~]# wget http://docs.cacti.net/_media/plugin:thold-v0.5.0.tgz
[iyunv@i-tcz0hdhc ~]# wget http://docs.cacti.net/_media/plugin:monitor-v1.3-1.tgz
[iyunv@i-tcz0hdhc ~]# cd /usr/share/cacti/plugins
[iyunv@i-tcz0hdhc plugins]#
[iyunv@i-tcz0hdhc plugins]# tar -zxvf /root/plugin\:settings-v0.71-1.tgz
[iyunv@i-tcz0hdhc plugins]# tar -zxvf /root/plugin\:realtime-v0.5-2.tgz
[iyunv@i-tcz0hdhc plugins]# tar -zxvf /root/plugin\:thold-v0.5.0.tgz
[iyunv@i-tcz0hdhc plugins]# tar -zxvf /root/plugin\:monitor-v1.3-1.tgz
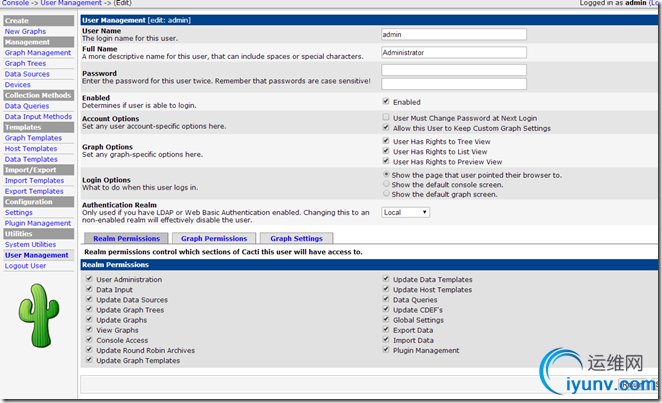
2、 启用插件管理功能
Console → Utilities → User Management → admin → Realm Permission 勾选 Plugin Management 后保存
* 通常这一步不用做,默认就是在的。
3、 激活安装插件
Console → Configuration → Plugin Management → Action
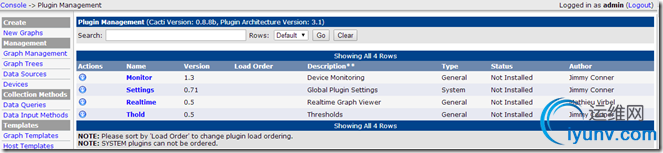
安装插件(逐个点击向下小箭头)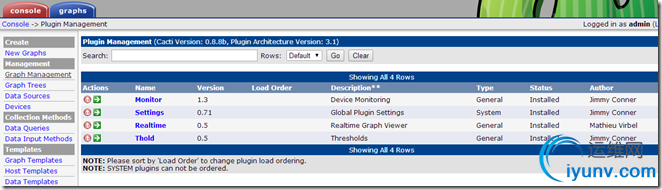
启用插件(再点击向右的绿箭头)
此时 cacti插件安装成功

第三:插件配置和使用
1、 使用monitor插件
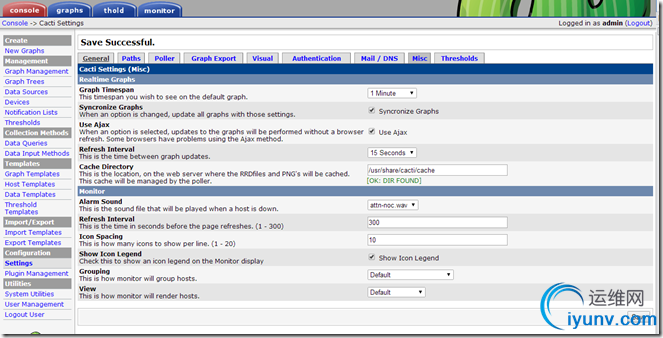
a.打开“Console → Settings → Misc”,可以调整Monitor的各项配置。
例如:勾选“Show Icon Legend”可以在监控页面显示图例,“View”可以选用Tiles类型,以显示设备状态表格。
b. 为cacti添加新设备时,勾选上“Monitor Host”项。对已添加的设备可以通过“Management → Devices”进去修改。
c.单击Web页面上方的“monitor”标签链接,可以进入查看各设备/主机的状态图示。
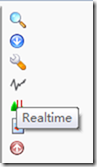
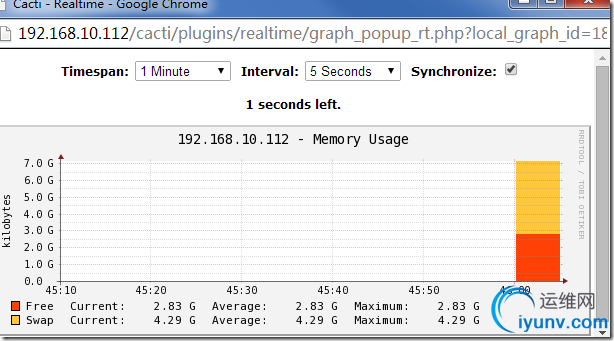
2、使用realtime插件
安装完realtime,在每一个监控图边上,都会有一个小图标,此时点击这个小图标,不会出来实时的数据,会报“The Image Cache Directory directory does not exist. Please first create it and set permissions and then attempt to open another realtime graph”。
提示出没有Cache目录以及权限等的错误,需要进一步配置后才能取到数据。
a. 设置Cache目录及权限
在cacti服务器上做如下操作:
[iyunv@i-tcz0hdhc cacti]# cd /usr/share/cacti/
[iyunv@i-tcz0hdhc cacti]# mkdir cache
[iyunv@i-tcz0hdhc cacti]# chown apache.root cache
b. 登陆cacti网页
打开“Console → Settings → Misc”,设置“Cache Diredtiory”为“/usr/share/cacti/cache/”,保存后会出现 [OK: DIR FOUND]
此时再点击上图的小图标就会出来数据了
3、 使用thold插件
使用thold之前 先要配置email参数
a. 配置email参数
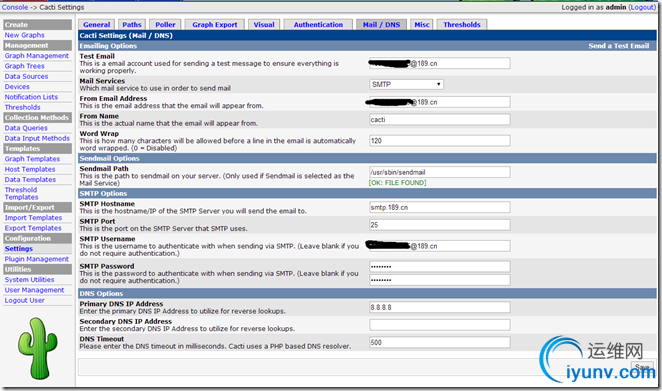
打开“Console → Settings → Mail/DNS”:可以调整“SMTP
Options”和“DNS Options”等配置。
Test Email: 你的收件箱地址
Mail Services:SMTP 你的邮箱类型
From Email Address:发件邮箱地址
From Name:发件人描述
SMTP Hostname:发件邮件的smtp服务器
SMTP Username:你的发件邮箱的用户名
SMTP Password:你的发件邮箱密码
DNS Options : 下配置你的DNS主从服务器,如8.8.8.8
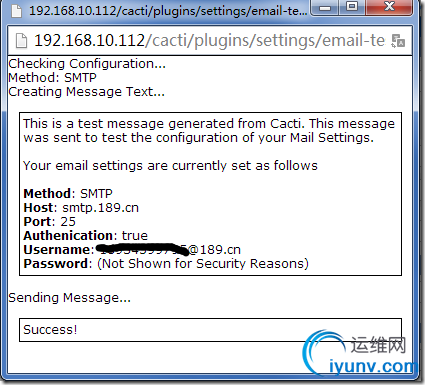
填写完成后,点击“Save”。然后再占击右上角的“Send a Test Email”测试邮件功能
b. 开启短信提醒
在189邮箱(或是其它支持短信提醒功能的邮箱)里开启短信提醒功能,这样收到新邮件后,手机就能收到短信提醒了。
邮箱中的短信提醒功能设置这里不再说明。
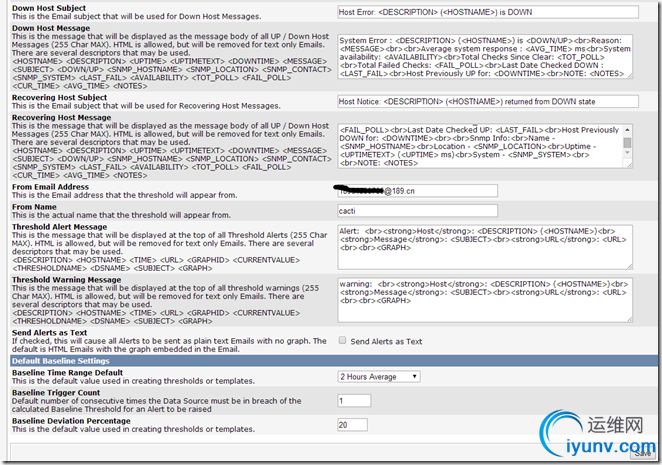
c. 设置thold模板
打开“Console → Settings → Thresholds”,可以调整Thold的各项配置。例如:“Dead Host Notifications Email”处可填写设备当机时发送警告信息到哪个邮箱;勾选“Send alerts as text”项,可以设置只发送文本格式的邮件。
这里要注意的是,有部分邮箱的短信提醒功能只支持纯文本格式的邮件。

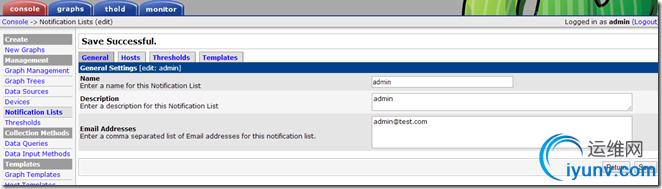
d. 创建通知列表(可省略)
打开“Console -> Notification Lists”,可添加一个邮件列表
e. 创建告警模板
打开“Console -> Threshold Templates”,可以添加、取出需要关联到预警系统的模板,例如:可以添加和“Interface-Traffic”
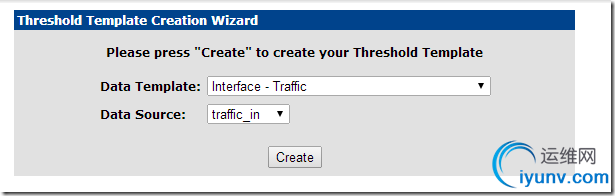
按照提示一步步的进行。
选择“traffic_in”数据项,分别设置警告阈值“High Warning Threshold ”(如200000000比特/秒)和“Low Warning Threshold ”。“Data Manipulation” 可以选择数值的类型。
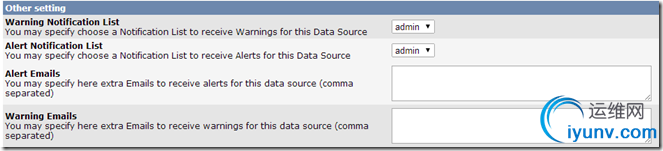
Other setting中可以附加告警时通知的邮件联系人。“Warning Notification List ”和“Alert Notification List ”只有创建过通知列表后这两项才会显示
f. 告警的项
打开“ Create → New Graphs ”,选择需要提供预警的设备,单击右侧上方的“ Auto-create thresholds”自动创建预警项目。
打开“Management → Thresholds”,可以管理已经创建的预警项目。
打开“Management → Thresholds”,可以管理已经创建的预警项目。
或者在“Management → Thresholds”中手动创建告警项
如只安装thold,查看[thold]中,会出现:You are missing a dependency for thold, please install the 'Settings' plugin. 将“settings"插件install-Enable后就可以了。
Setting不需要单独配置,但setting又是必须的
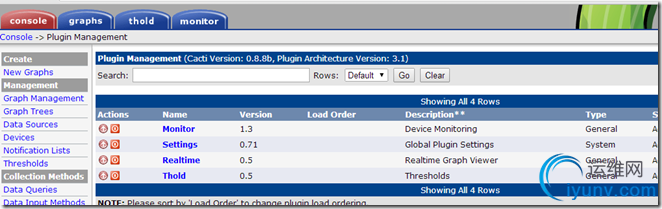
monitor thold setting realtime插件安装完毕
推荐本站淘宝优惠价购买喜欢的宝贝:

本文链接:https://hqyman.cn/post/107.html 非本站原创文章欢迎转载,原创文章需保留本站地址!

 微信支付宝扫一扫,打赏作者吧~
休息一下~~