
文章目录
前言
没想到前天小水了一篇博文竟然就火了既然如此那我再来一篇嘿嘿~
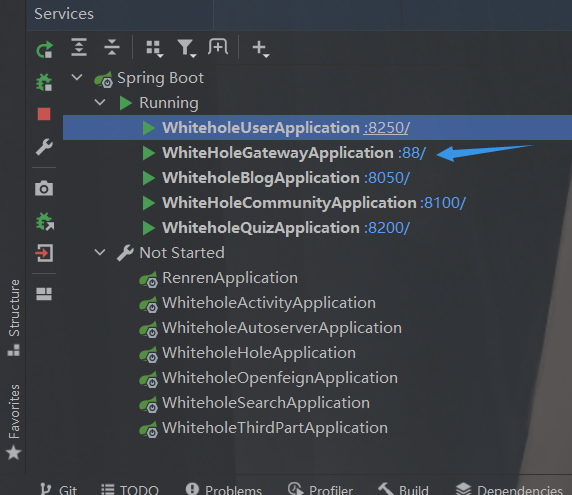
那么今天带来的其实也没啥就是简简单单的校验去校验token然后就好了但是区别是啥呢咱们这边有个大冤种就是这个 GateWay。此外这边的全部代码都是在WhiteHolev0.7里面的可见的。
由于这个玩意咱们不好再像以前直接去在拦截器里面去搞事情。而且说实话请求那么多如果全部都在GateWay去做的话我是真的懒得去写那些啥配置了到时候放行哪些接口都会搞乱。
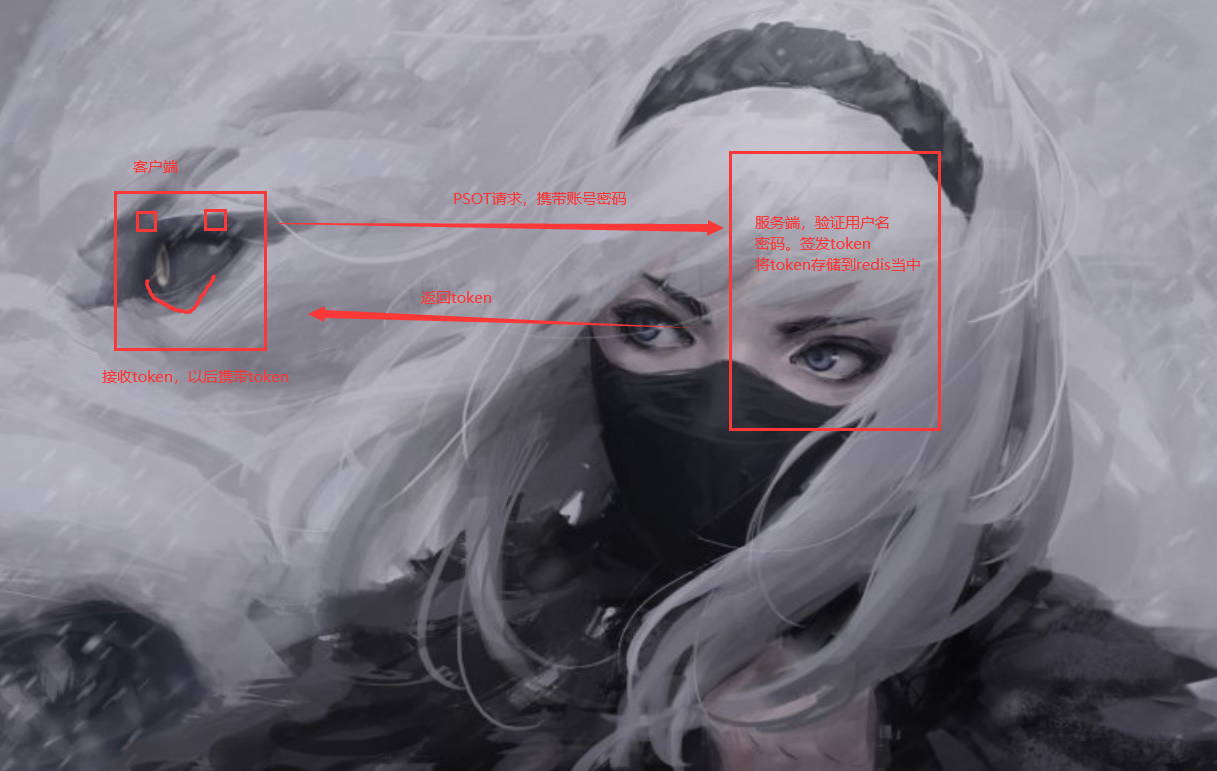
所以问题背景就是在分布式微服务的场景下如何去更好地校验token。并且通过我们的token我们可以做到单点登录。
那么这个时候我们就不得不提到我们上篇博文提到的内容了。
SpringBoot轻轻松松搞定用户邮箱登录注册
当然重点是登录模块。
token存储
既然我们要校验那么我们要做的就是拿到这个token那么首先要做的就是生成token然后存储token咱们上一篇博文已经说的很清楚了甚至还给出了对应的工具类。我们的流程是这样的
那么在这里的话和先前不一样的是由于咱们的这个其实是一个多端的所以的话咱们不仅仅有PC端还有移动端当然移动端的作者也是我这个大冤种所以token的话也是要做到多端的。那么这样的话我们就要对上次做一点改动。
这里的话和上次不一样的地方有两个。
Token 存储实体
这里新建了一个token的实体用来存储到redis里面。
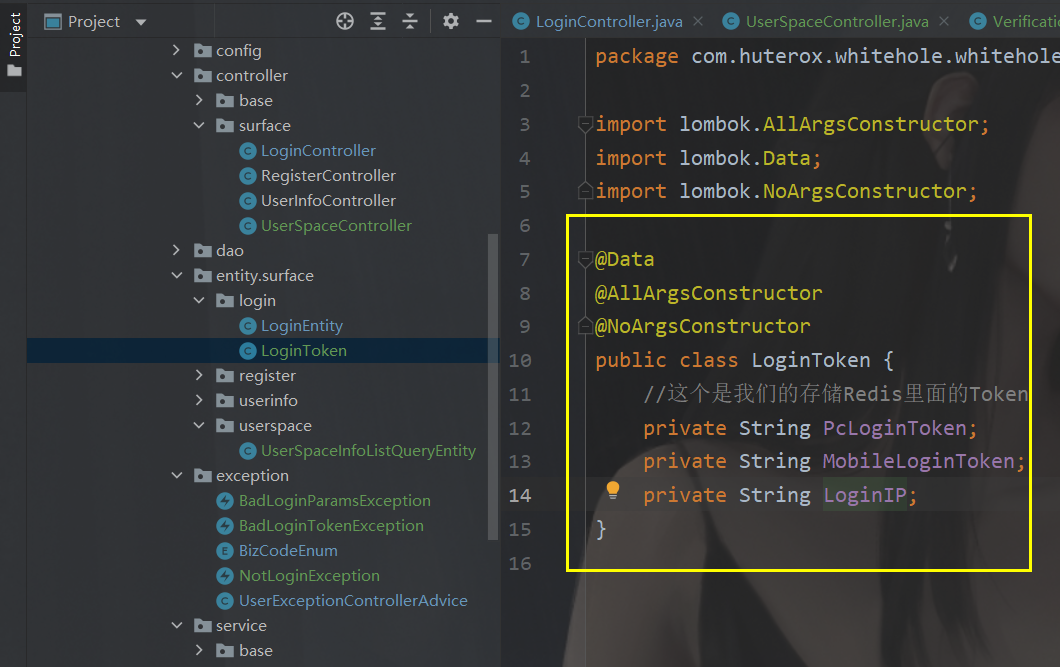
@Data
@AllArgsConstructor
@NoArgsConstructor
public class LoginToken {
//这个是我们的存储Redis里面的Token
private String PcLoginToken;
private String MobileLoginToken;
private String LoginIP;
}
login 业务代码
之后就是我们修改后的代码了。这个也就是和先前做了一点改动主要是做多端的token嘛。
@Service
public class loginServiceImpl implements LoginService {

    @Autowired
    UserService userService;
    @Autowired
    RedisUtils redisUtils;
    //为安全期间这里也做一个20防刷
    @Override
    public R Login(LoginEntity entity) {

        String username = entity.getUsername();
        String password = entity.getPassword();
        password=password.replaceAll(" ","");
        if(redisUtils.hasKey(RedisTransKey.getLoginKey(username))){
            return R.error(BizCodeEnum.OVER_REQUESTS.getCode(),BizCodeEnum.OVER_REQUESTS.getMsg());
        }
        redisUtils.set(RedisTransKey.setLoginKey(username),1,20);
        UserEntity User = userService.getOne(
                new QueryWrapper<UserEntity>().eq("username", username)
        );
        if(User!=null){
            if(SecurityUtils.matchesPassword(password,User.getPassword())){
                //登录成功,签发token,按照平台类型去签发不同的Token
                String token = JwtTokenUtil.generateToken(User);
                //登录成功后,将userid--->token存redis,便于做登录验证
                String ipAddr = GetIPAddrUtils.GetIPAddr();
                if(entity.getType().equals(LoginType.PcType)){
                    LoginToken loginToken = new LoginToken(token,null,ipAddr);
                    redisUtils.set(RedisTransKey.setTokenKey(User.getUserid()+":"+LoginType.PcType)
                            ,loginToken,7, TimeUnit.DAYS
                    );
                    return Objects.requireNonNull(R.ok(BizCodeEnum.SUCCESSFUL.getMsg())
                                    .put(LoginType.PcLoginToken, token))
                                    .put("userid",User.getUserid());
                }else if (entity.getType().equals(LoginType.MobileType)){
                    LoginToken loginToken = new LoginToken(null,token,ipAddr);
                    redisUtils.set(RedisTransKey.setTokenKey(User.getUserid()+":"+LoginType.MobileType)
                            ,loginToken,7, TimeUnit.DAYS
                    );
                    return Objects.requireNonNull(R.ok(BizCodeEnum.SUCCESSFUL.getMsg())
                                    .put(LoginType.PcLoginToken, token))
                                    .put("userid",User.getUserid());
                } else {
                    return R.error(BizCodeEnum.NUNKNOW_LGINTYPE.getCode(),BizCodeEnum.NUNKNOW_LGINTYPE.getMsg());
                }
            }else {
                return R.error(BizCodeEnum.BAD_PUTDATA.getCode(),BizCodeEnum.BAD_PUTDATA.getMsg());
            }
        }else {
            return R.error(BizCodeEnum.NO_SUCHUSER.getCode(),BizCodeEnum.NO_SUCHUSER.getMsg());
        }
    }
}
枚举类修改
同样的这里和先前的枚举类有一点不一样主要是多了一点东西。
public enum BizCodeEnum {
UNKNOW_EXCEPTION(10000,"系统未知异常"),
VAILD_EXCEPTION(10001,"参数格式校验失败"),
HAS_USERNAME(10002,"已存在该用户"),
OVER_REQUESTS(10003,"访问频次过多"),
OVER_TIME(10004,"操作超时"),
BAD_DOING(10005,"疑似恶意操作"),
BAD_EMAILCODE_VERIFY(10007,"邮箱验证码错误"),
REPARATION_GO(10008,"请重新操作"),
NO_SUCHUSER(10009,"该用户不存在"),
BAD_PUTDATA(10010,"信息提交错误,请重新检查"),
NOT_LOGIN(10011,"用户未登录"),
BAD_LOGIN_PARAMS(10012,"请求异常!触发5次以上账号将保护性封禁"),
NUNKNOW_LGINTYPE(10013,"平台识别异常"),
BAD_TOKEN(10014,"token校验失败"),
SUCCESSFUL(200,"successful");
private int code;
private String msg;
BizCodeEnum(int code,String msg){
this.code = code;
this.msg = msg;
}
public int getCode() {
return code;
}
public String getMsg() {
return msg;
}
}
、
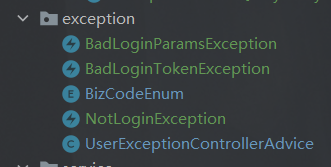
当然同样的多的东西还有几个异常类这个其实就是继承了Exception。
/**
* 校验用户登录时,参数不对的情况,此时可能是恶意爬虫
* */
public class BadLoginParamsException extends Exception{
public BadLoginParamsException(){}
public BadLoginParamsException(String message){
super(message);
}
}
public class BadLoginTokenException extends Exception{
public BadLoginTokenException(){}
public BadLoginTokenException(String message){
super(message);
}
}
ublic class NotLoginException extends Exception{
public NotLoginException(){}
public NotLoginException(String message){
super(message);
}
}
其他的倒还是和先前的保持一致。
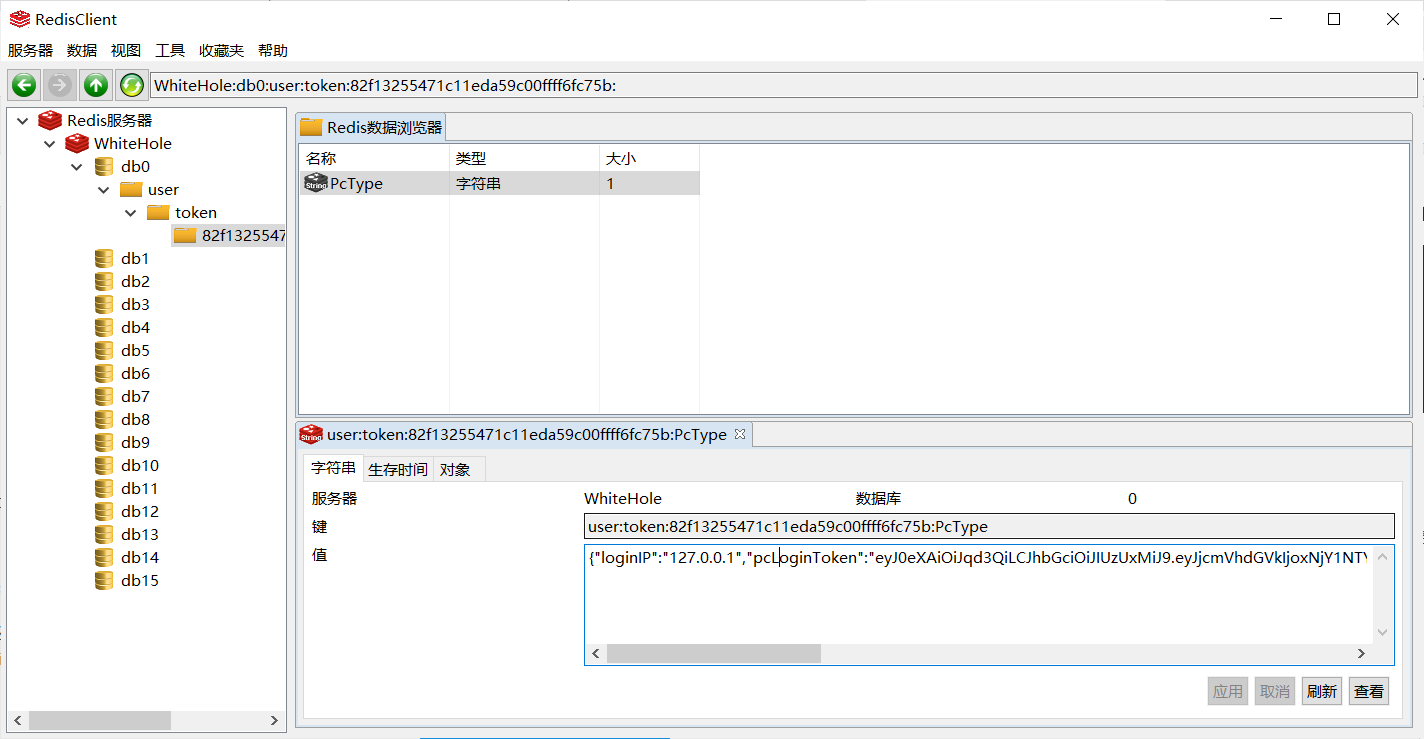
存储效果
那么到此我们在登录部分完成了对token的存储但是这个是在服务端现在这个玩意已经存到了咱们的redis里面
客户端存储
现在我们服务端已经存储好了那么接下来就是要在客户端进行存储。这个也好办我们直接来看到完整的用户登录代码就知道了。
<template>
  <div>
    <el-form :model="formLogin" :rules="rules" ref="ruleForm" label-width="0px" >
      <el-form-item prop="username">
        <el-input v-model="formLogin.username" placeholder="账号">
          <i slot="prepend" class="el-icon-s-custom"/>
        </el-input>
      </el-form-item>
      <el-form-item prop="password">
        <el-input type="password" placeholder="密码" v-model="formLogin.password">
          <i slot="prepend" class="el-icon-lock"/>
        </el-input>
      </el-form-item>
      <el-form-item prop="code">
        <el-row :span="24">
          <el-col :span="12">
            <el-input v-model="formLogin.code" auto-complete="off"  placeholder="请输入验证码" size=""></el-input>
          </el-col>
          <el-col :span="12">
            <div class="login-code" @click="refreshCode">
              <!--验证码组件-->
              <s-identify :identifyCode="identifyCode"></s-identify>
            </div>
          </el-col>
        </el-row>
      </el-form-item>
      <el-form-item>
        <div class="login-btn">
          <el-button type="primary" @click="submitForm()" style="margin-left: auto;width: 35%">登录</el-button>
          <el-button type="primary" @click="goRegister" style="margin-left: 27%;width: 35%" >注册</el-button>
        </div>
      </el-form-item>
    </el-form>
  </div>
</template>

<script>
import SIdentify from "../../components/SIdentify/SIdentify";
export default {
  name: "loginbyUserName",
  components: { SIdentify },
  data() {
    return{
      formLogin: {
        username: "",
        password: "",
        code: ""
      },
      identifyCodes: '1234567890abcdefjhijklinopqrsduvwxyz',//随机串内容
      identifyCode: '',
      // 校验
      rules: {
        username:
          [
            { required: true, message: "请输入用户名", trigger: "blur" }
          ],
        password: [
          { required: true, message: "请输入密码(区分大小写)", trigger: "blur" }
        ],
        code: [
          { required: true, message: "请输入验证码", trigger: "blur" }
        ]
      }

    }
  },
  mounted () {
    // 初始化验证码
    this.identifyCode = ''
    this.makeCode(this.identifyCodes, 4)
  },
  methods:{
    refreshCode () {
      this.identifyCode = ''
      this.makeCode(this.identifyCodes, 4)
    },
    makeCode (o, l) {
      for (let i = 0; i < l; i++) {
        this.identifyCode += this.identifyCodes[this.randomNum(0, this.identifyCodes.length)]
      }
    },
    randomNum (min, max) {
      return Math.floor(Math.random() * (max - min) + min)
    },

    submitForm(){

      if (this.formLogin.code.toLowerCase() !== this.identifyCode.toLowerCase()) {
        this.$message.error('请填写正确验证码')
        this.refreshCode()

      }
      else {
        //这边后面做一个提交,服务器验证,通过之后获得token
        this.axios({
          url: "/user/user/login",
          method: 'post',
          data:{
            "username":this.formLogin.username,
            "password":this.formLogin.password,
            "type": "PcType",
          }
        }).then((res)=>{
            res = res.data
          if (res.code===10001){
            alert("请将对应信息填写完整!")
          }else if(res.code===0){
            alert("登录成功")
            localStorage.setExpire("LoginToken",res.PcLoginToken,this.OverTime)
            localStorage.setExpire("userid",res.userid,this.OverTime)
            this.$router.push({ path: '/userinfo', query: {'userid':res.userid} });
          }else {
            alert(res.msg);
          }
        })
      }
    },
    goRegister(){
      this.$router.push("/register")
    }
  },
}
</script>

<style scoped>
</style>


这里的话咱们对localStorage做了一点优化
这个代码是在main.js直接搞的。
Storage.prototype.setExpire=(key, value, expire) =>{
  let obj={
    data:value,
    time:Date.now(),
    expire:expire
  };
  localStorage.setItem(key,JSON.stringify(obj));
}
//Storage优化
Storage.prototype.getExpire= key =>{
  let val =localStorage.getItem(key);
  if(!val){
    return val;
  }
  val =JSON.parse(val);
  if(Date.now()-val.time>val.expire){
    localStorage.removeItem(key);
    return null;
  }
  return val.data;
}
这个this.OverTime 就是一个全局变量就是7天过期的意思。
token验证
前面咱们说完了这个存储那么现在的话咱们就是验证服务了。首先我们来看到什么地方需要验证。
我们拿这个为例子
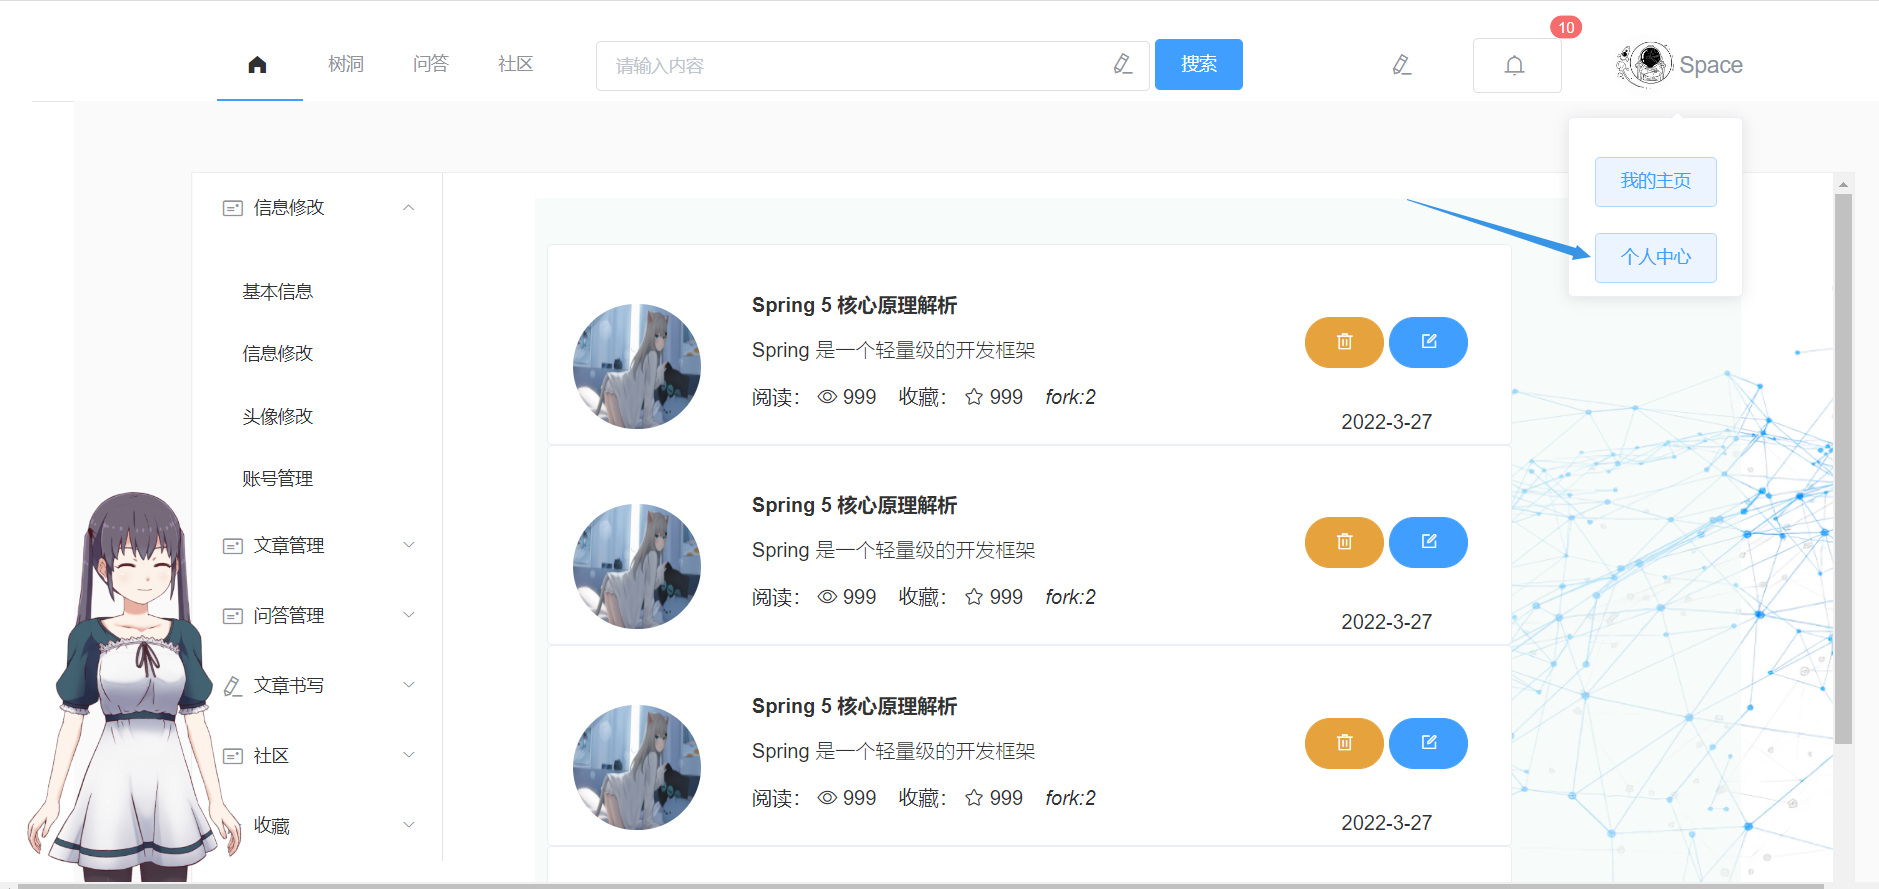
主页的话都是get请求没啥技术含量不过我不介意再水一篇博客~。那么就是咱们这个页面需要。
那么在这里的话我先说一下执行流程这样的话咱们完整的案例就起来了

前端提交
那么现在咱们来看看前端的代码
<script>
export default {
name: "myspace",
data() {
return {
}
},
created() {
//先对token再进行验证
let loginToken = localStorage.getExpire("LoginToken");
let userid = localStorage.getExpire("userid");
//这个只有用户自己才能进入,自己只能进入自己对应的MySpace
if(loginToken==null && userid==null){
alert("检测到您未登录,请先登录")
this.$router.push({path: "/login"});
}else {
//发送token验证token是否正常,否则一样不给过
this.axios({
url: "/user/user/space/isLogin",
method: 'get',
headers: {
"userid": userid,
"loginType": "PcType",
"loginToken": loginToken,
},
params: {
'userid': userid,
}
}).then((res)=>{
res = res.data;
if (!(res.code === 0)) {
alert(res.msg)
this.$router.push({path: "/login"});
}
}).catch((err)=>{
alert("未知异常,请重新登录")
this.$router.push({path: "/login"});
});
}
}
}
</script>
前面的那些玩意没啥用咱们直接看到这个实际执行的代码。
后端校验
ok现在咱们可以来聊聊这个后端的校验了这个还是很重要的也是咱们今天的主角。
那么在开始的时候咱们说了这个使用拦截器的方案并不是可行的而且在后面可能我们还需要在业务处理的时候拿到token去解析里面的东西完成一些处理到时候在拦截器的时候也不好处理。而且重点是并不是所有的接口都要的但是也不是少部分的接口不要这TM就尴尬了那么如何破局。那么此时我们就需要定位到每一个具体的方法上面那么问题不就解决了这个咋搞诶嘿搞个切面+注解不就完了。
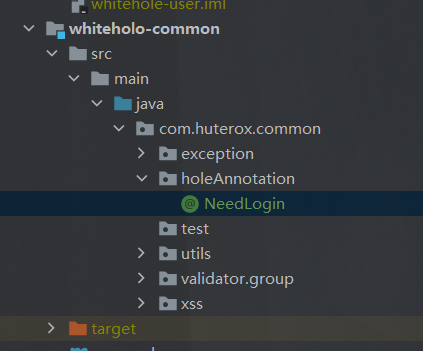
自定义注解
先定义一个注解
@Target(ElementType.METHOD)
@Retention(RetentionPolicy.RUNTIME)
public @interface NeedLogin {
    String value() default "";
}
这个注解我放在了common组件下
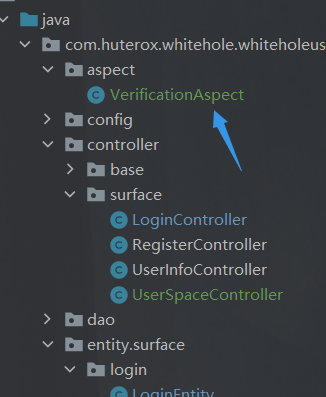
切面处理
那么之后就是咱们的切面了我们刚刚定义的异常处理类都是在这个切面上处理的。
public class VerificationAspect {
@Autowired
RedisUtils redisUtils;
@Pointcut("@annotation(com.huterox.common.holeAnnotation.NeedLogin)")
public void verification() {}
/**
* 环绕通知 @Around ,当然也可以使用 @Before (前置通知) @After (后置通知)就算了
* @param proceedingJoinPoint
* @return
* 我们这里再直接抛出异常,反正有那个谁统一异常类
*/
@Around("verification()")
public Object verification(ProceedingJoinPoint proceedingJoinPoint) throws Throwable{
RequestAttributes requestAttributes = RequestContextHolder.getRequestAttributes();
ServletRequestAttributes servletRequestAttributes = (ServletRequestAttributes) requestAttributes;
assert servletRequestAttributes != null;
HttpServletRequest request = servletRequestAttributes.getRequest();
//分登录的设备进行验证
String loginType = request.getHeader("loginType");
String userid = request.getHeader("userid");
String tokenUser = request.getHeader("loginToken");
String tokenKey = RedisTransKey.getTokenKey(userid + ":" + loginType);
if(tokenUser==null || userid==null || loginType==null){
throw new BadLoginParamsException();
}
if(redisUtils.hasKey(tokenKey)){
if(loginType.equals(LoginType.PcType)){
Object o = redisUtils.get(tokenKey);
LoginToken loginToken = JSON.parseObject(o.toString(), LoginToken.class);
if(!loginToken.getPcLoginToken().equals(tokenUser)){
throw new BadLoginTokenException();
}
}else if (loginType.equals(LoginType.MobileType)){
Object o = redisUtils.get(tokenKey);
LoginToken loginToken = JSON.parseObject(o.toString(), LoginToken.class);
if(!loginToken.getMobileLoginToken().equals(tokenUser)){
throw new BadLoginTokenException();
}
}
}else {
throw new NotLoginException();
}
return proceedingJoinPoint.proceed();
}
}
使用
那么接下来就是使用了。我们来看到这个
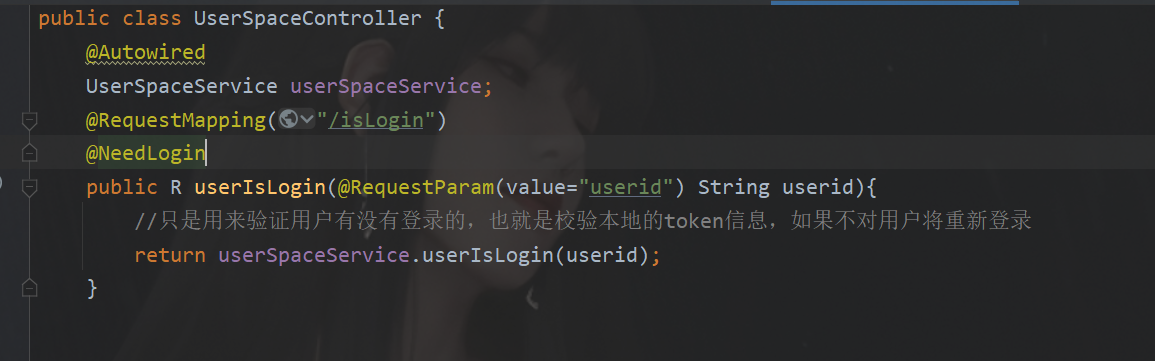
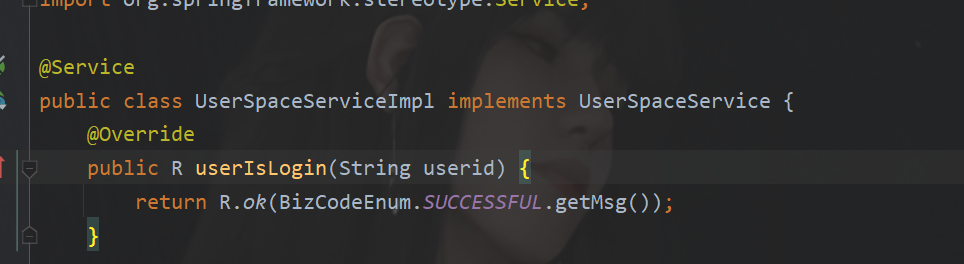
这个是我们的controller作用就是用来检验这个用户本地的token对不对的那么实现的服务类啥也没有
之后我们来看到咱们的一个效果
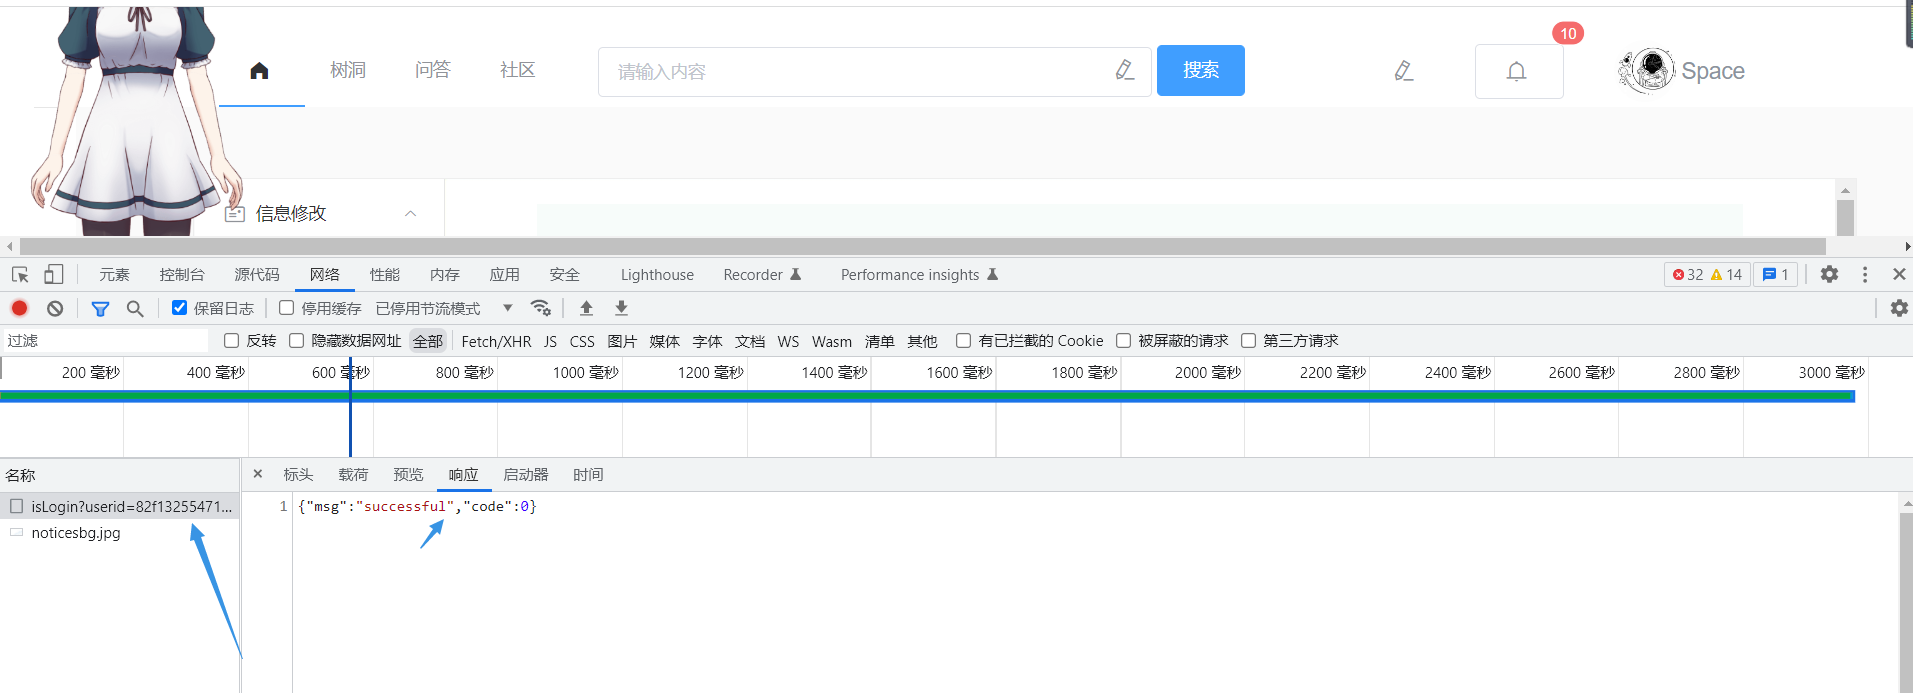
可以看到在进入页面的时候钩子函数会请求咱们的这个接口然后的话咱们通过这个接口的话可以看到验证的效果。这里验证通过了。
推荐本站淘宝优惠价购买喜欢的宝贝:

本文链接:https://hqyman.cn/post/3348.html 非本站原创文章欢迎转载,原创文章需保留本站地址!

 微信支付宝扫一扫,打赏作者吧~
休息一下~~