一、准备工作:
主数据库服务器:
OS:Windows Server 2008 R2 DB: SQL Server 2008 R2
Hostname : CXMasterDB
IP: 192.168.1.224/24 dg: 192.168.1.1
DNS: 192.168.1.19 DNS: 202.96.209.133
从数据库服务器:
OS:Windows Server 2008 R2 DB: SQL Server 2008 R2
Hostname : CXSlaveDB
IP: 192.168.1.225/24 dg: 192.168.1.1
DNS: 192.168.1.19 DNS: 202.96.209.133
//主数据库Northwind,如下图所示:

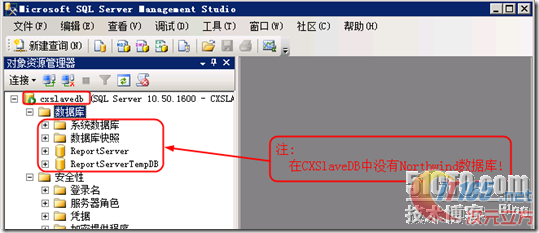
//从CXSlave中,没有数据库Northwind,如下图所示:
二、创建SQL Server数据库的管理员用户和共享文件夹权限,设置SQL Server服务和SQL Server代理的登录用户为sqladmin
1. 在主数据库CXMasterDB服务器上创建用户sqladmin,如下图所示:
win + R ---> lusrmgr.msc回车,如下图所示:

//设置sqladmin的权限
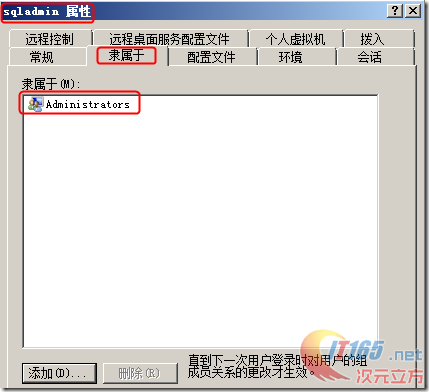
2. 同理,在从数据库CXSlaveDB服务器上创建用户sqladmin且加入administrators组,其他都删除之!
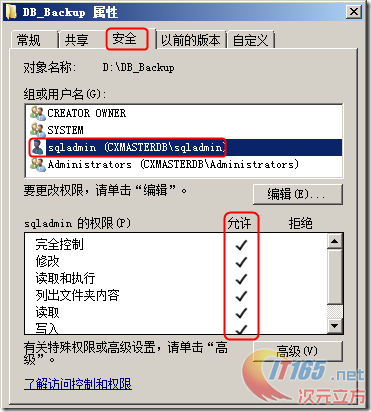
3. 分别在主从数据库服务器上创建用于存放主从备份日志文件的共享文件夹DB_Backpup且共享权限和NTFS权限,如如下图所示:

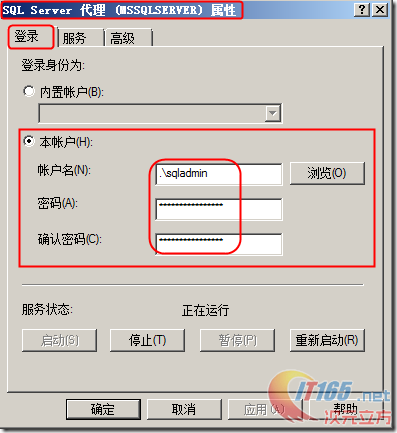
4. 分别从主数据库服务器上和从数据库服务器上打开SQLServer配置管理器,将SQLServer服务和SQLServer代理服务的“登录身份为”sqladmin用户且启动模式为:自动,如下图所示:

三、配置SQLServer日志传送
1. 在主数据库服务器CXMasterDB上配置
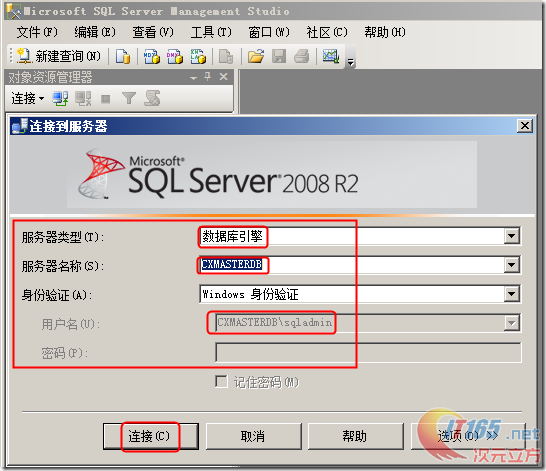
//用sqladmin连接到本地SQL Server数据库服务器
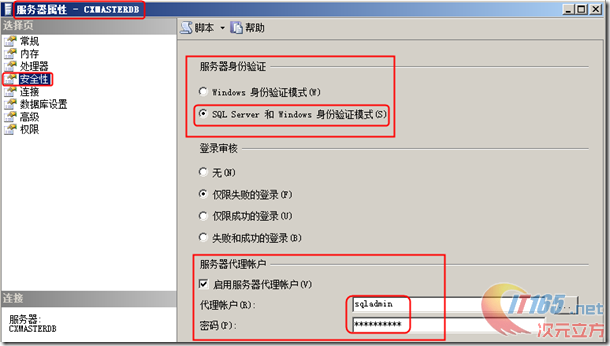
//在数据库实例中,配置 服务器身份验证模式 和 服务器代理帐户
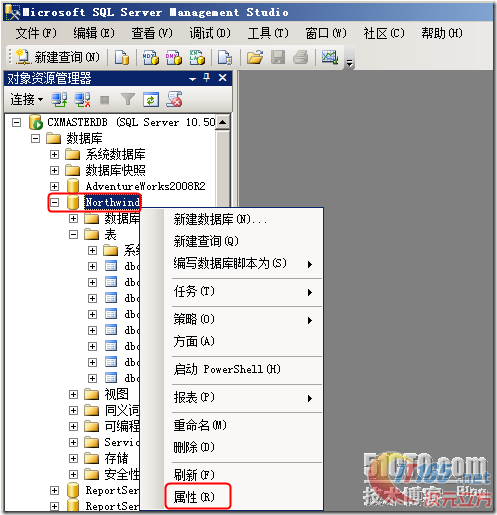
2. 在主数据库CXMasterDB中的Northwind数据库的属性的配置
//在Northwind数据库的属性 --> 选项 的配置

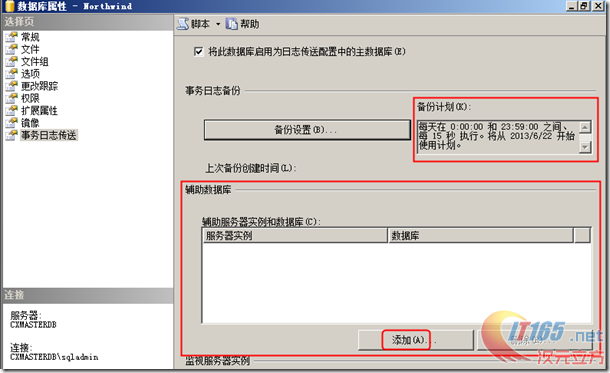
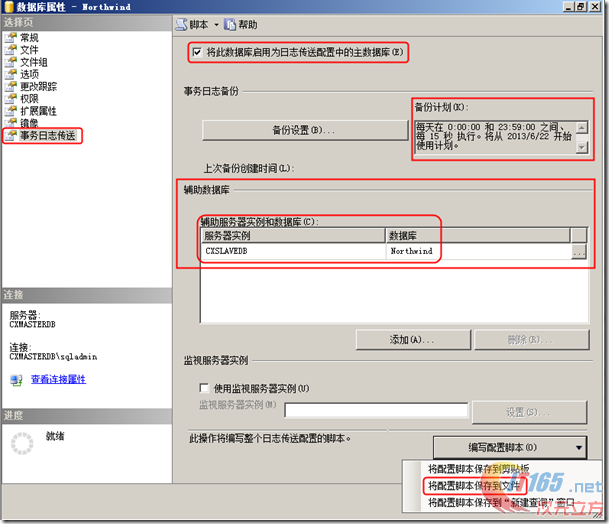
//在Northwind数据库的属性 --> 事务日志传送 的配置

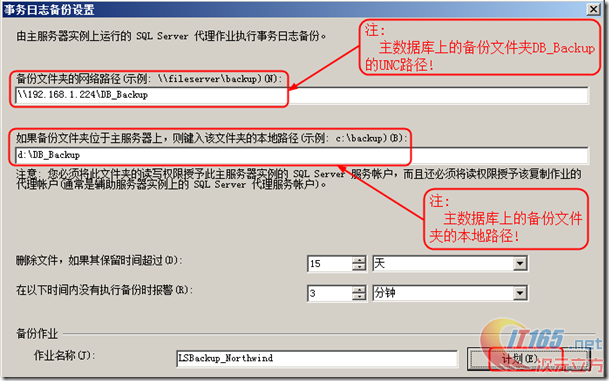
//事务日志备份设置,如下图所示:
//在上图中,点击 计划… 后,弹出如下图所示:
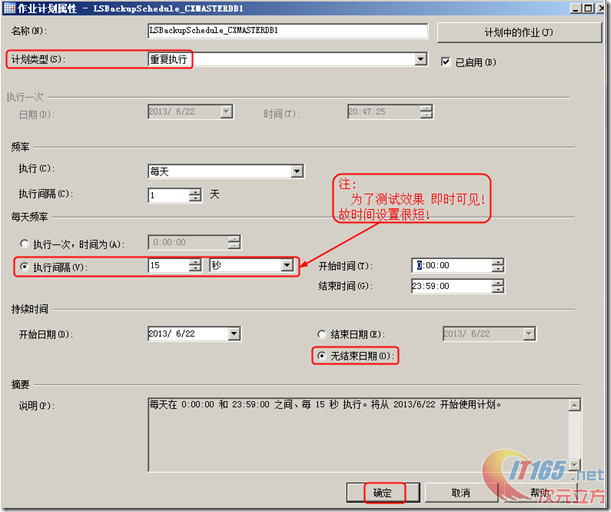
一路 确定 !见到下图为止!
//添加 辅助数据库实例和数据库
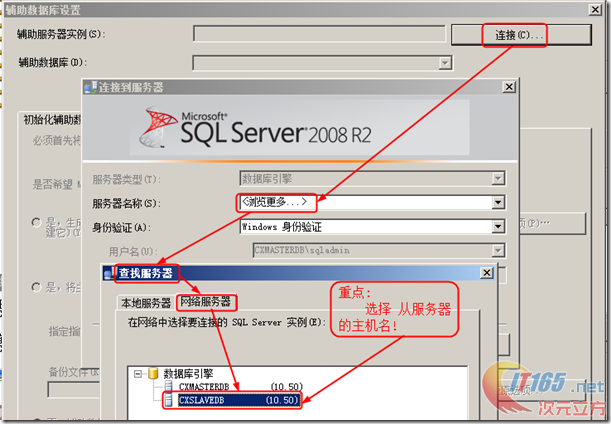
//连接到 辅助服务器实例和辅助数据库
//辅助数据库设置--->初始化辅助数据库

注:
下面查看看,辅助服务器CXSlaveDB中数据库的 数据文件和日志文件 的文件夹的路径

//辅助数据库设置--->复制文件

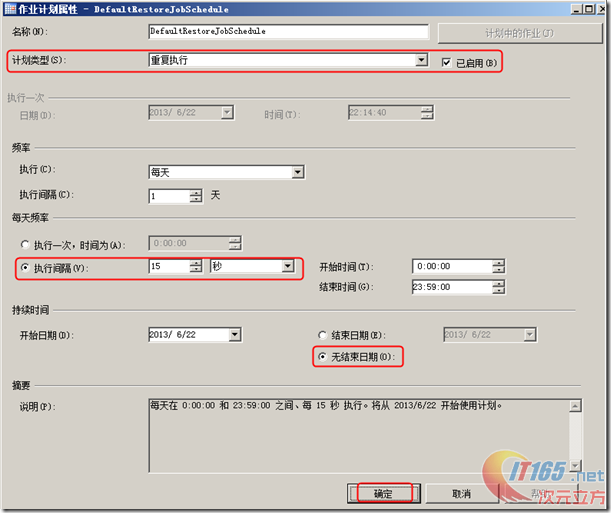
//在上图中 击点 计划(E) … 则弹出如下图所示,设置从数据库还原日志的计划任务:

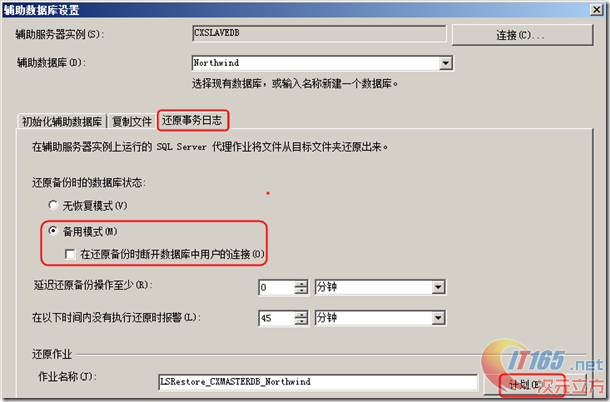
辅助数据库设置--->还原事务日志
//在上图中 击点 计划(E) … 则弹出如下图所示,设置从数据库还原日志的计划任务:
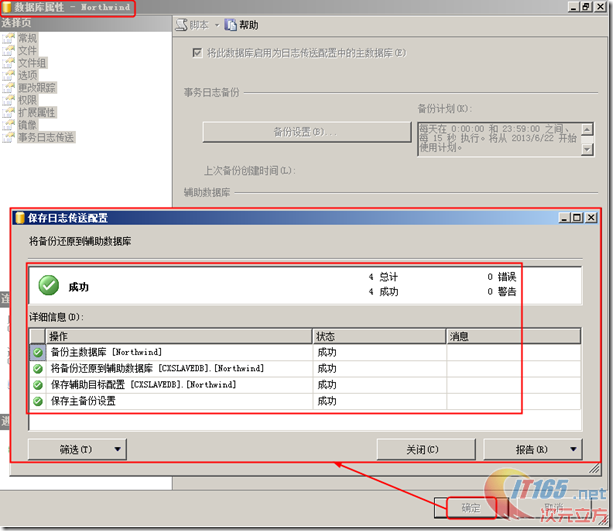
//将配置信息导出到文件
//在下图中点击 确定 后,一目了然了!
三、验证SQL Server 2008 R2主从数据库是否同步
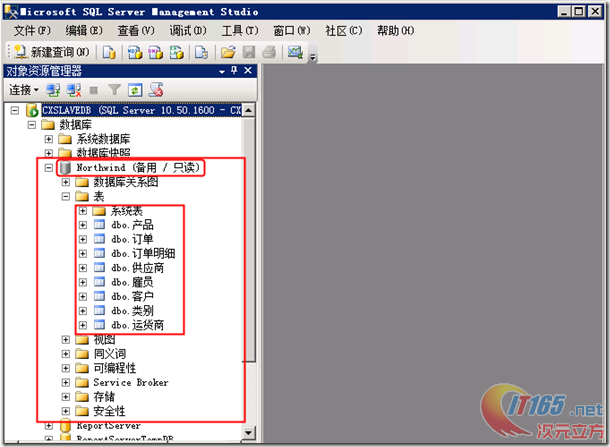
1. 我们去从服务器CXSlaveDB看看是否有Northwind数据库,由下图所示,可见成功了!
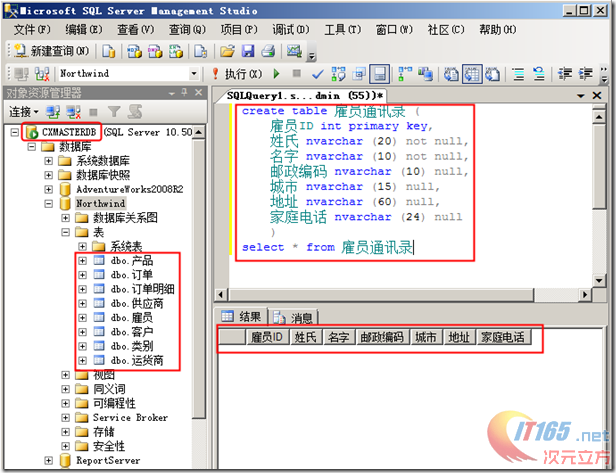
2. 现在我们去主数据库服务器CXMasterDB中Northwind数据库添加如下图所示的表:
//创建表名为 雇员通讯录
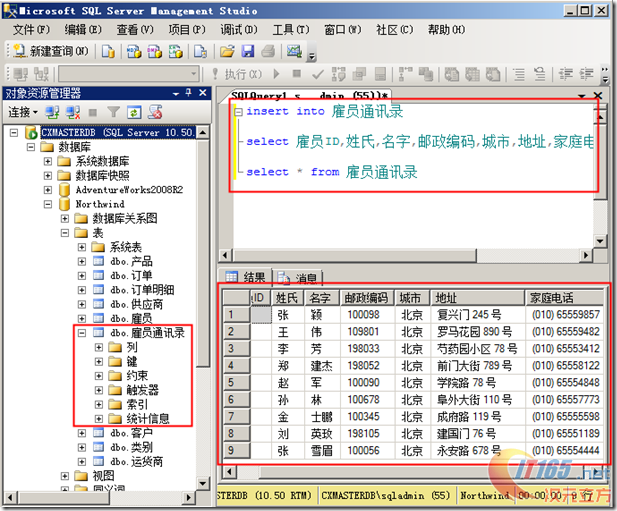
//刷新下,就可见到 dbo.雇员通讯录 ,如下图所示:
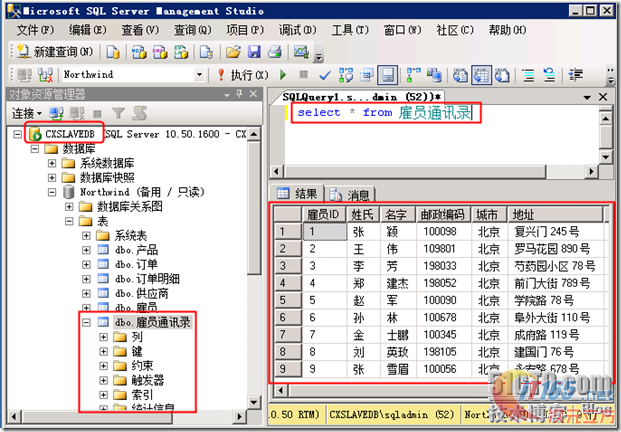
3. 现在我们去从数据库服务器CXSlaveDB的Northwind数据库是否有表dbo.雇员通讯录,如下图所示:
思考:
下面我们到主数据库服务器CXMasterDB的Northwind数据库中,删除表dbo.雇员通讯录
看看从数据库CXSlaveDB的Northwind数据库中的表dbo.雇员通讯录,是否也被删除了?
附:
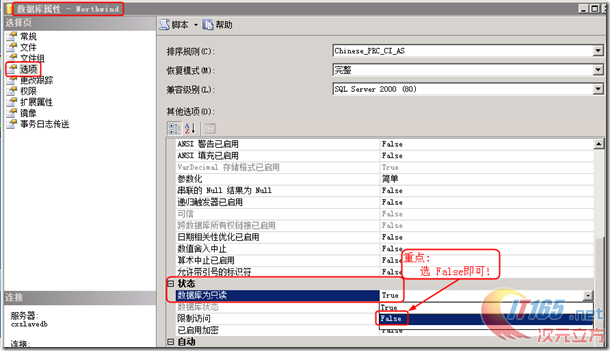
1. 如何删除Northwind(备用 / 只读)数据库

//在数据库属性 –-> 选项 ---> 状态 --->数据库为只读 修改为 False即可!能删除吗???
推荐本站淘宝优惠价购买喜欢的宝贝:

本文链接:https://hqyman.cn/post/4122.html 非本站原创文章欢迎转载,原创文章需保留本站地址!
打赏

微信支付宝扫一扫,打赏作者吧~
休息一下~~
 HQY 一个和谐有爱的空间