
Pritunl简介
#官方网站

#官方文档

#Github项目地址

#客户端下载地址(也可以使用OpenVPN作为客户端)

https://openvpn.net/client

#pritunl作用pritunl是使用OpenVPN协议构建的分布式企业VPN服务器、具备web管理界面(分布式需要购买企业许可)
Pritunl部署前准备
#此博文适用于rhel7以上的操作系统#操作系统版本
cat /etc/centos-release
CentOS Linux release 7.9.2009 (Core)
#epel、Base源、关闭防火墙和selinux
bash <(curl -sSL
#rhel7系统pritunl、MongoDB源tee /etc/yum.repos.d/pritunl.repo << EOF
[pritunl]
name=Pritunl
baseurl=https://repo.pritunl.com/stable/yum/centos/7/
gpgcheck=0
enabled=1
[mongodb-4.4]
name=MongoDB
baseurl=https://repo.mongodb.org/yum/redhat/7/mongodb-org/4.4/x86_64/
gpgcheck=0
enabled=1
EOF#rhel8系统pritunl、MongoDB源tee /etc/yum.repos.d/pritunl.repo << EOF
[pritunl]
name=Pritunl
baseurl=https://repo.pritunl.com/stable/yum/oraclelinux/8/
gpgcheck=0
enabled=1
[mongodb-4.4]
name=MongoDB
baseurl=https://repo.mongodb.org/yum/redhat/8/mongodb-org/4.4/x86_64/
gpgcheck=0
enabled=1
EOF#建立YUM源缓存yum clean all && yum makecacheCopy
Pritunl部署
#rhel7系统安装软件
yum -y install pritunl mongodb-org
#rhel8系统安装软件(指定mongodb的版本)
yum install mongodb-org-4.4.18 mongodb-org-server-4.4.18 pritunl
#启动服务
systemctl start mongod pritunl
systemctl enable mongod pritunl
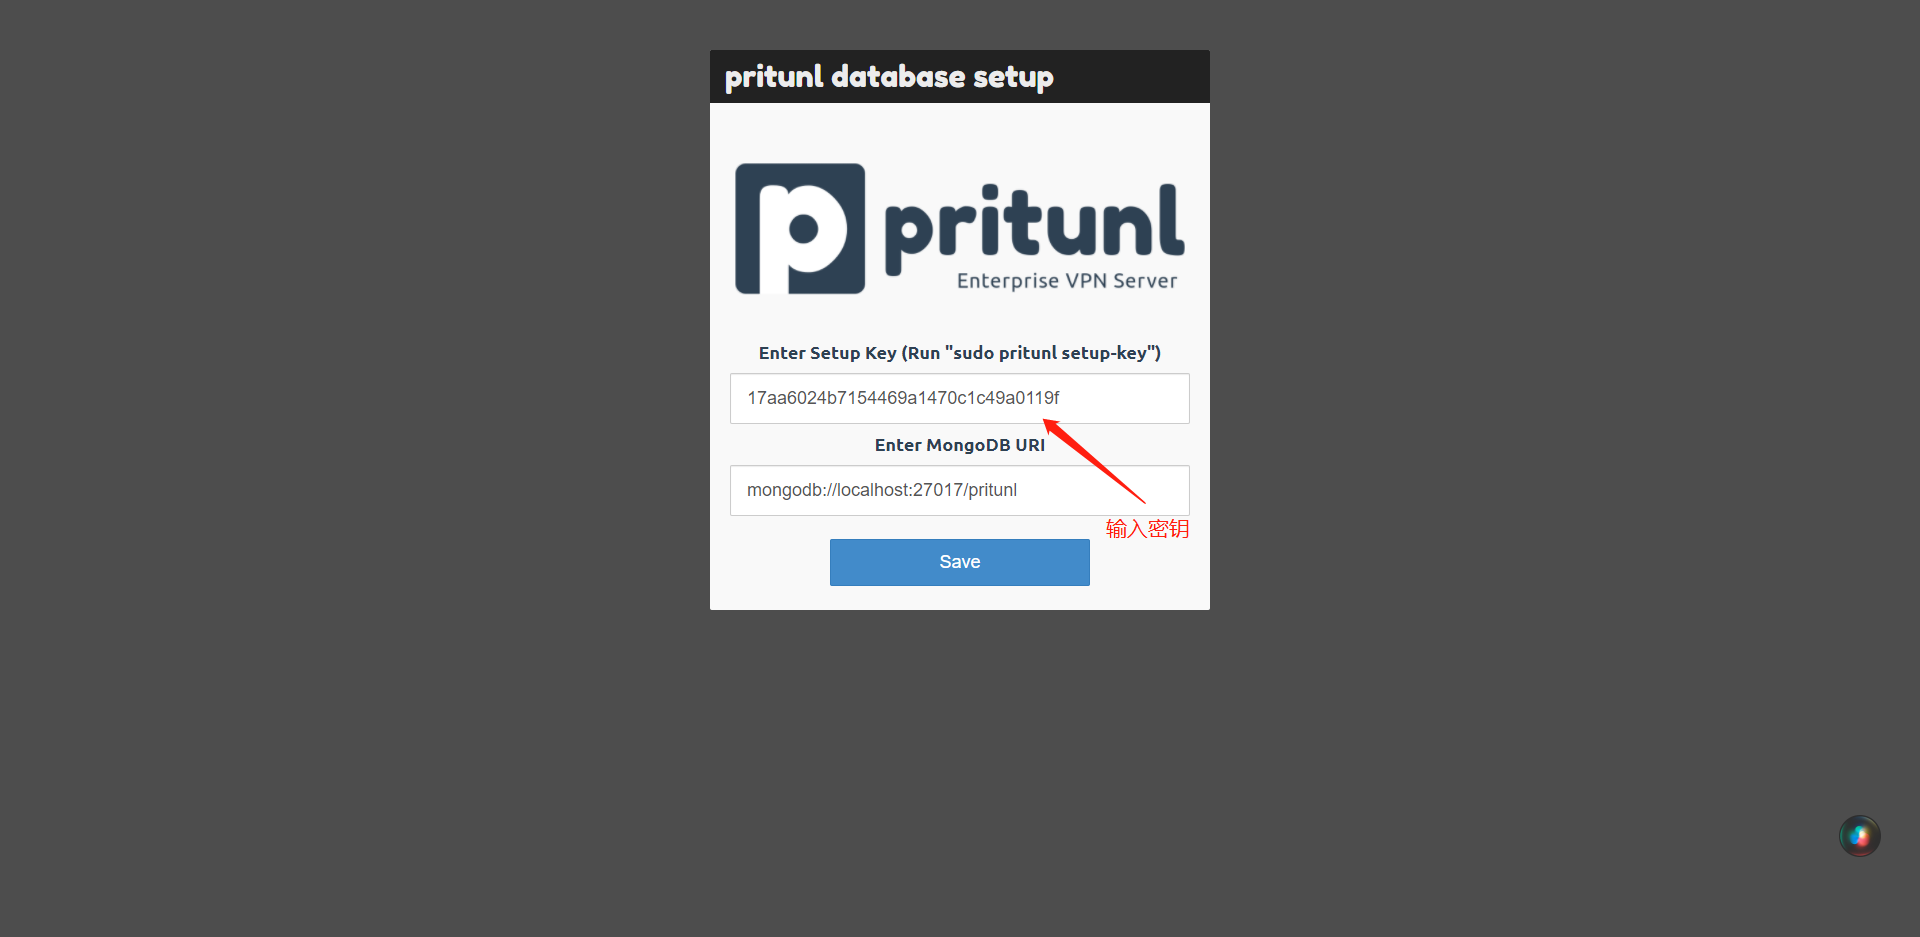
#初始化密钥
pritunl setup-key
5306c12e4ffb4eb5b8affd0ce0da87b4
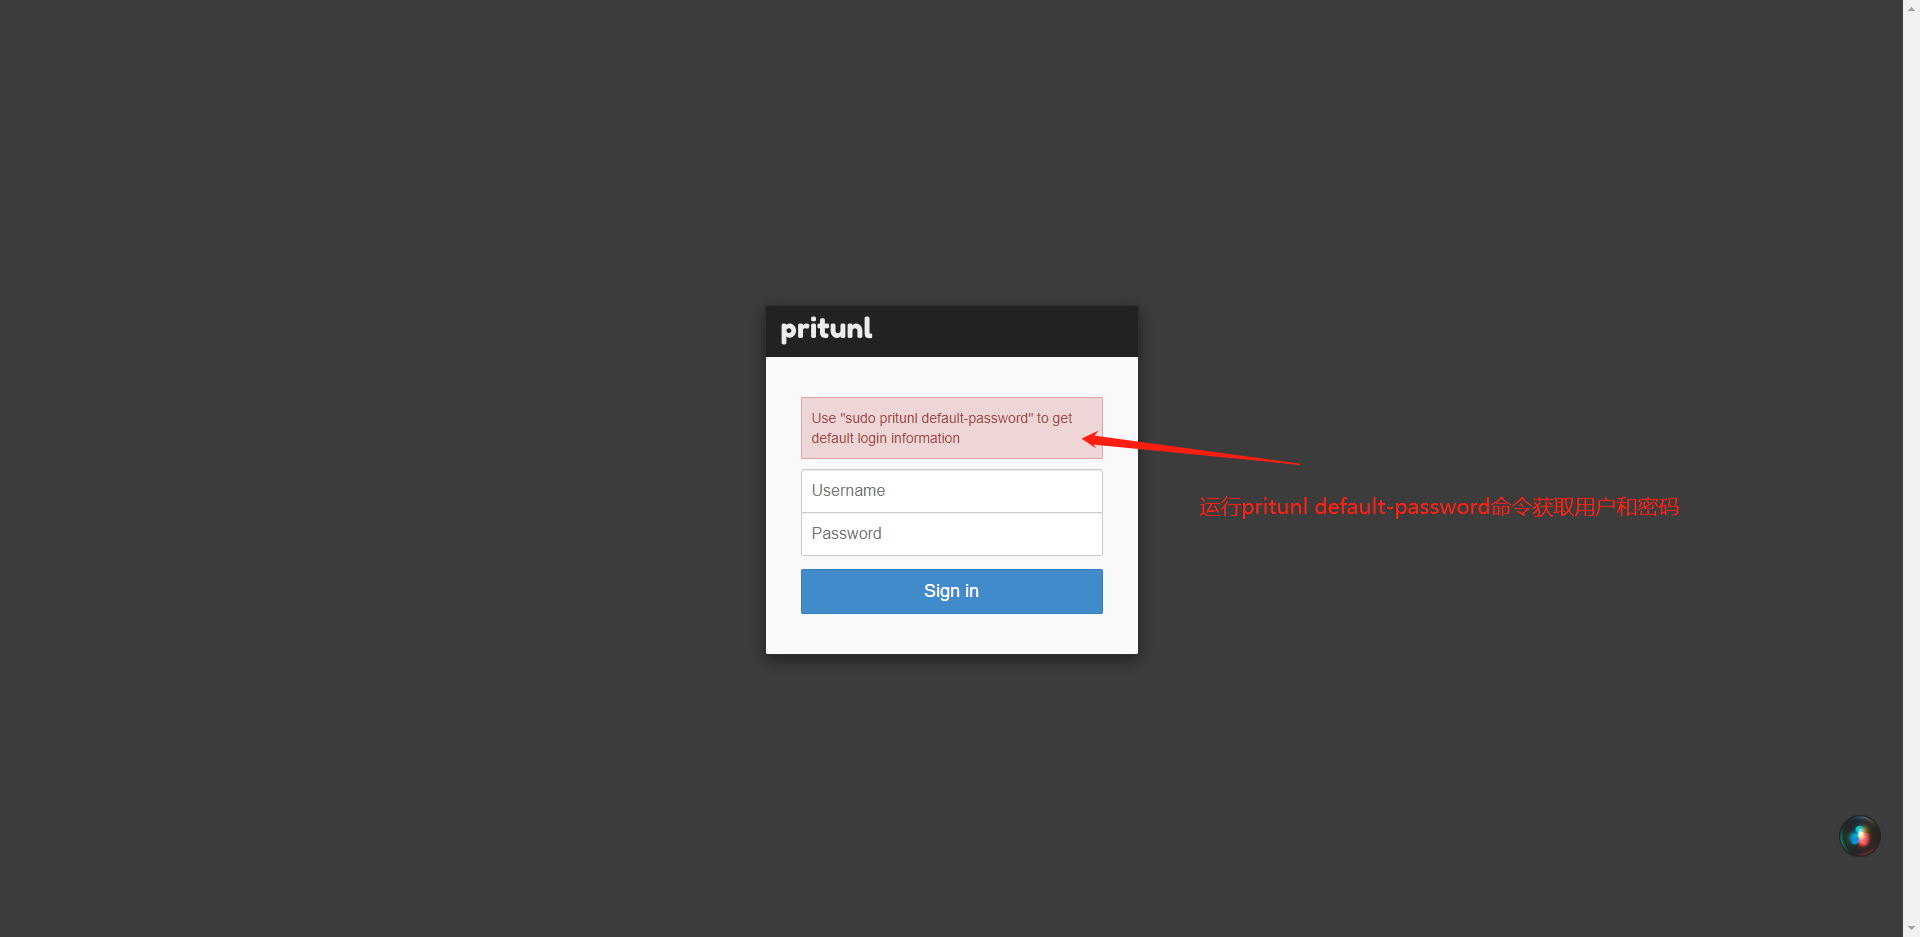
#初始化用户
pritunl default-password
Administrator default password:
username: "pritunl"
password: "SLIsHNDDjr1l"Copy
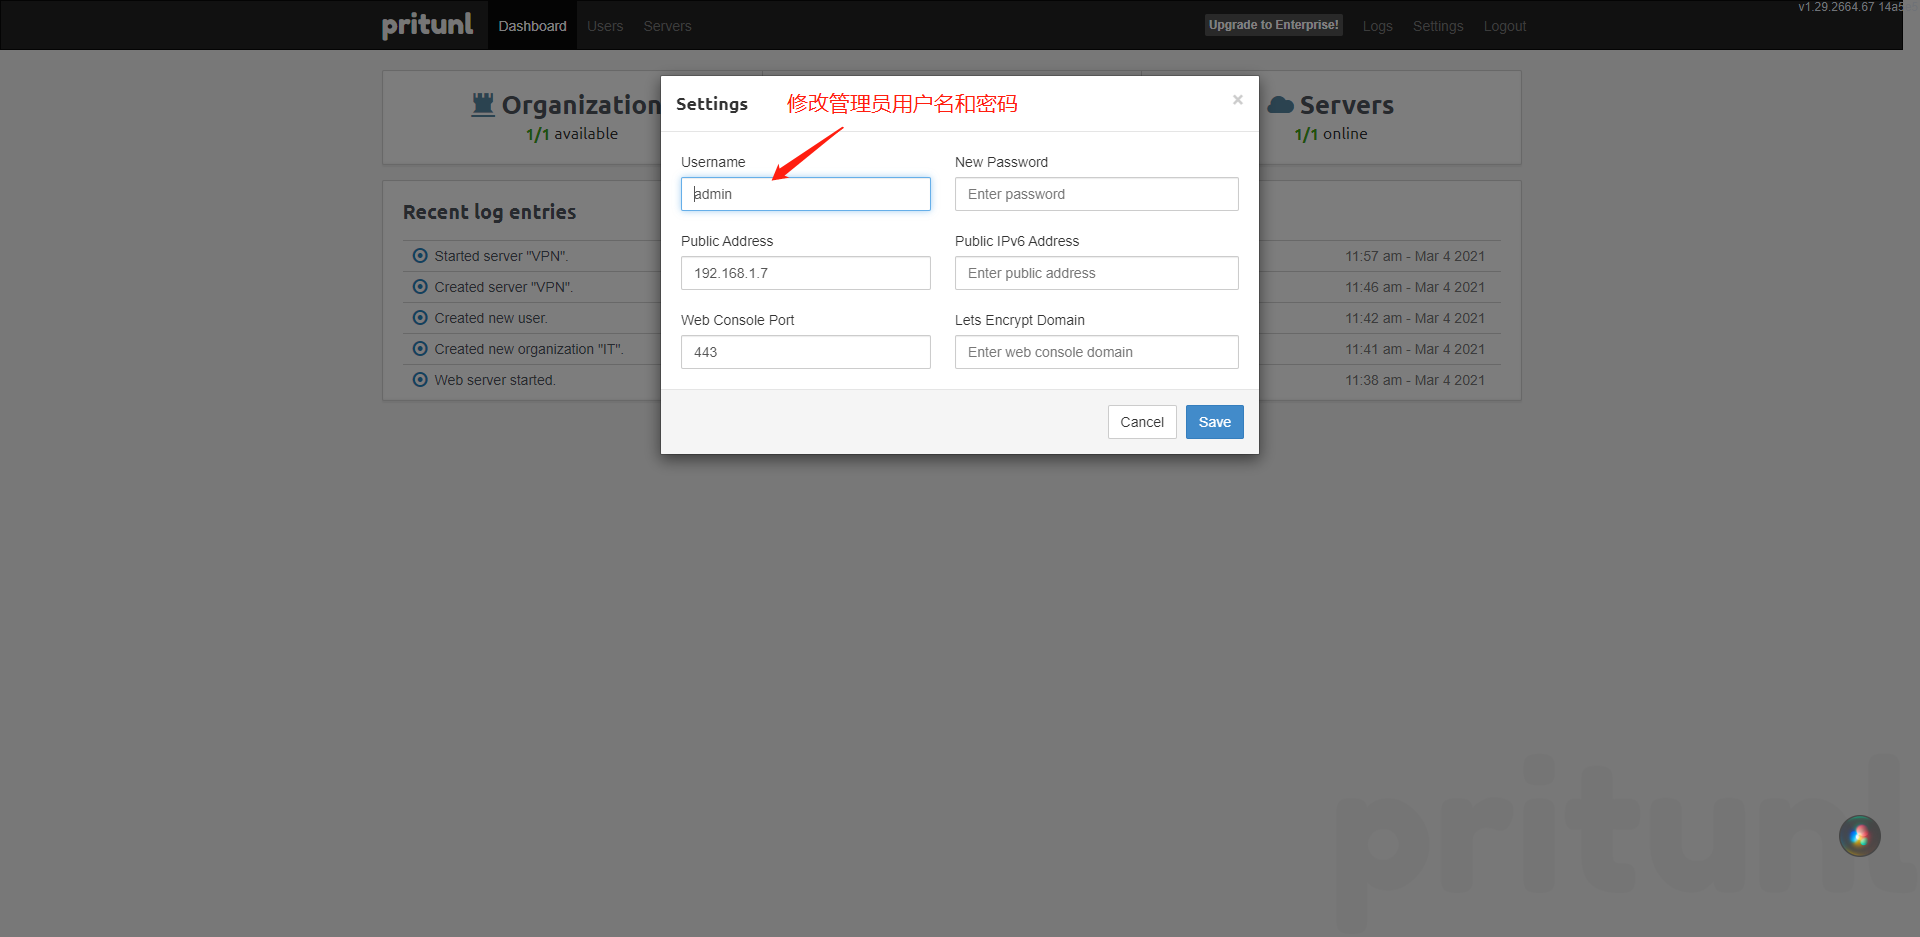
访问Pritunl
#访问地址
#用户名和密码pritunl
SLIsHNDDjr1lCopy
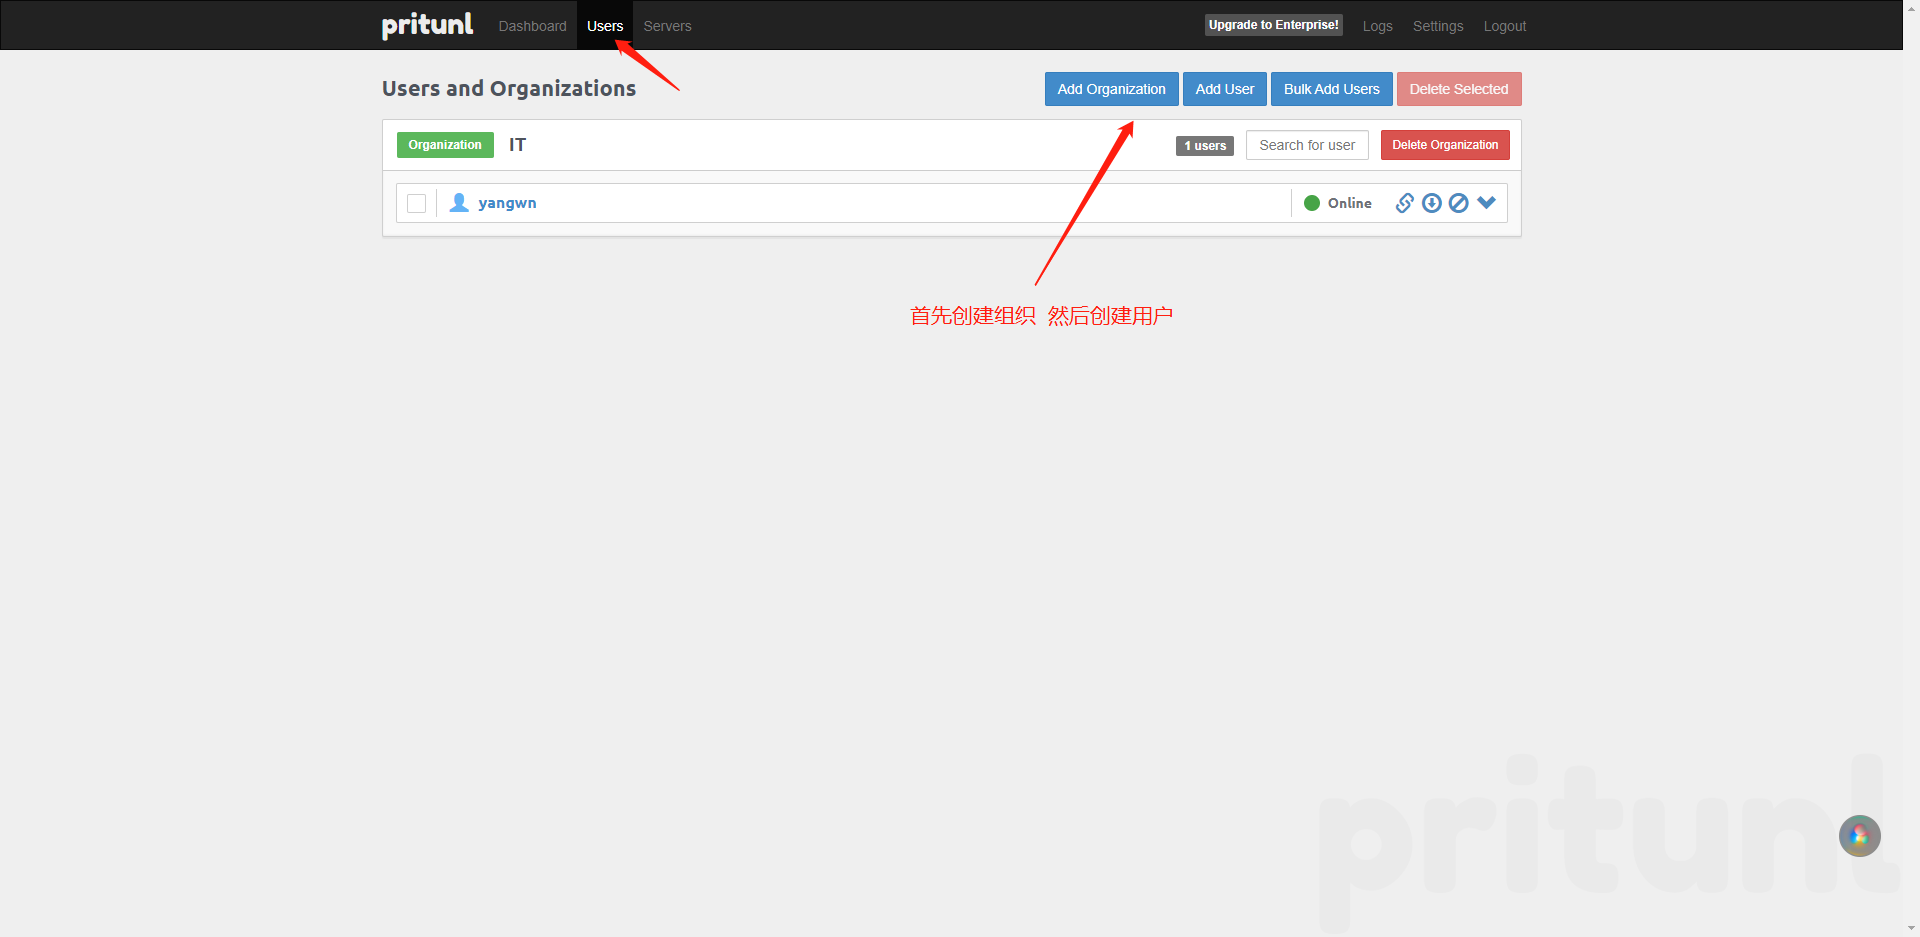
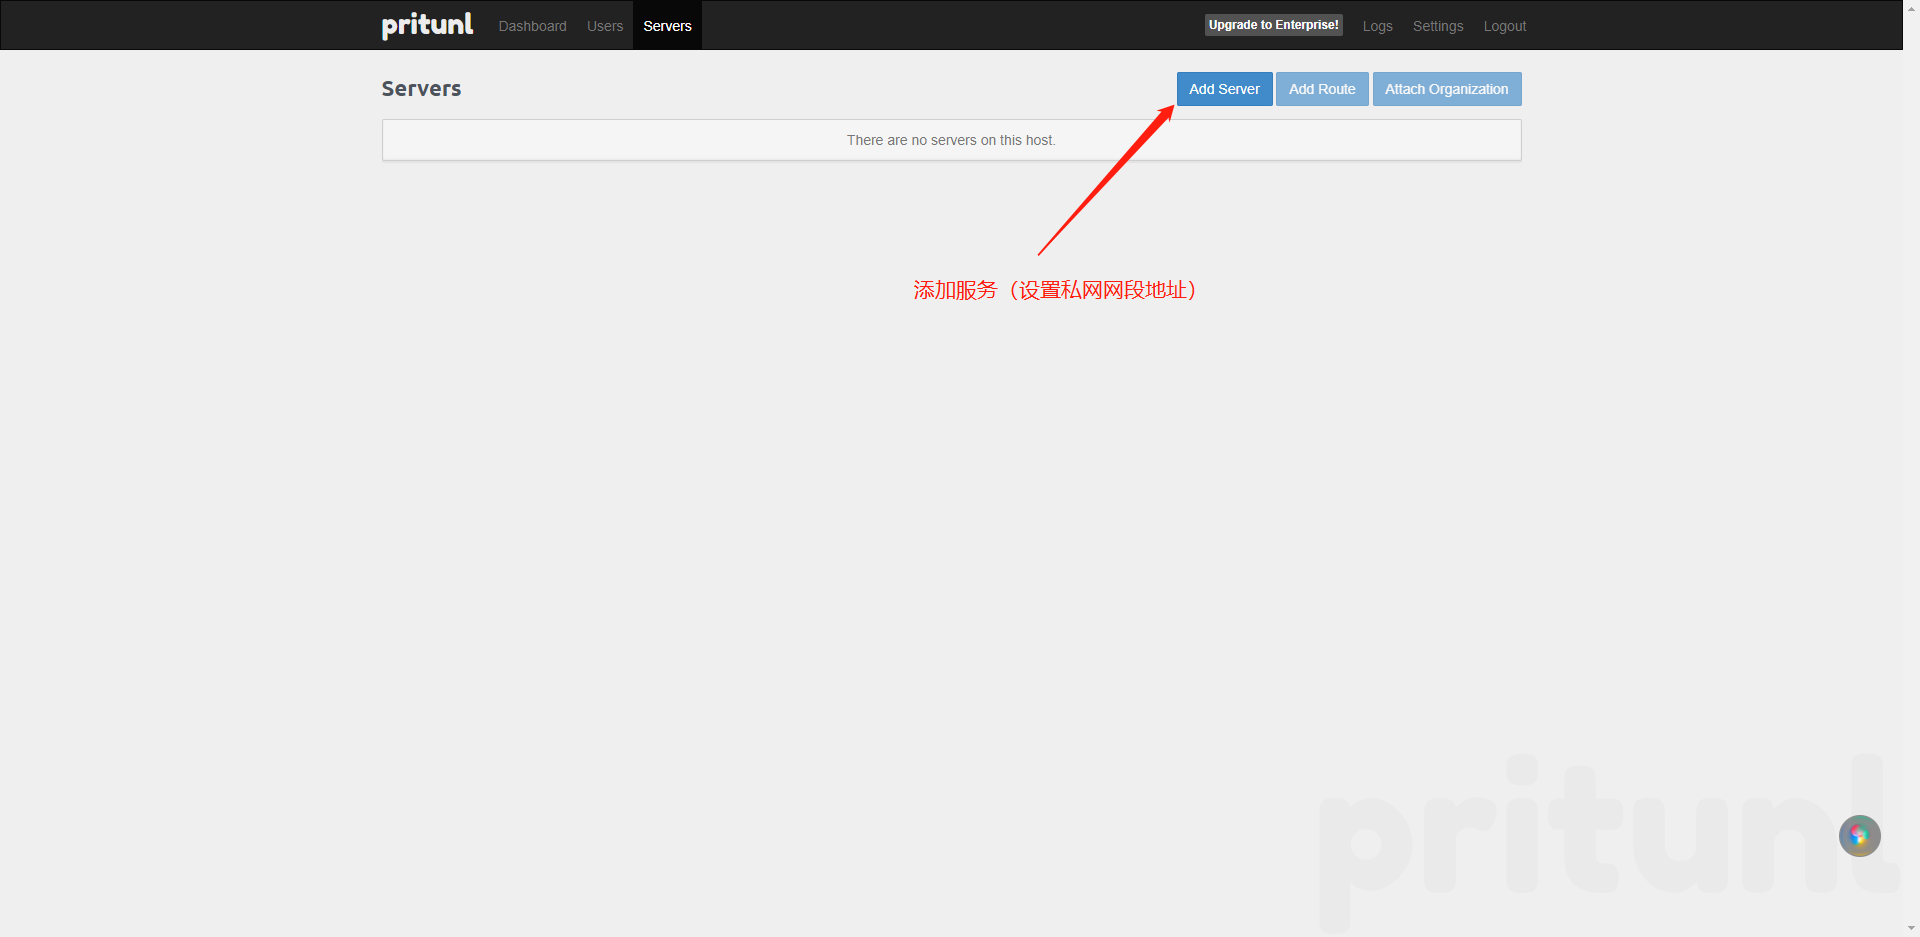
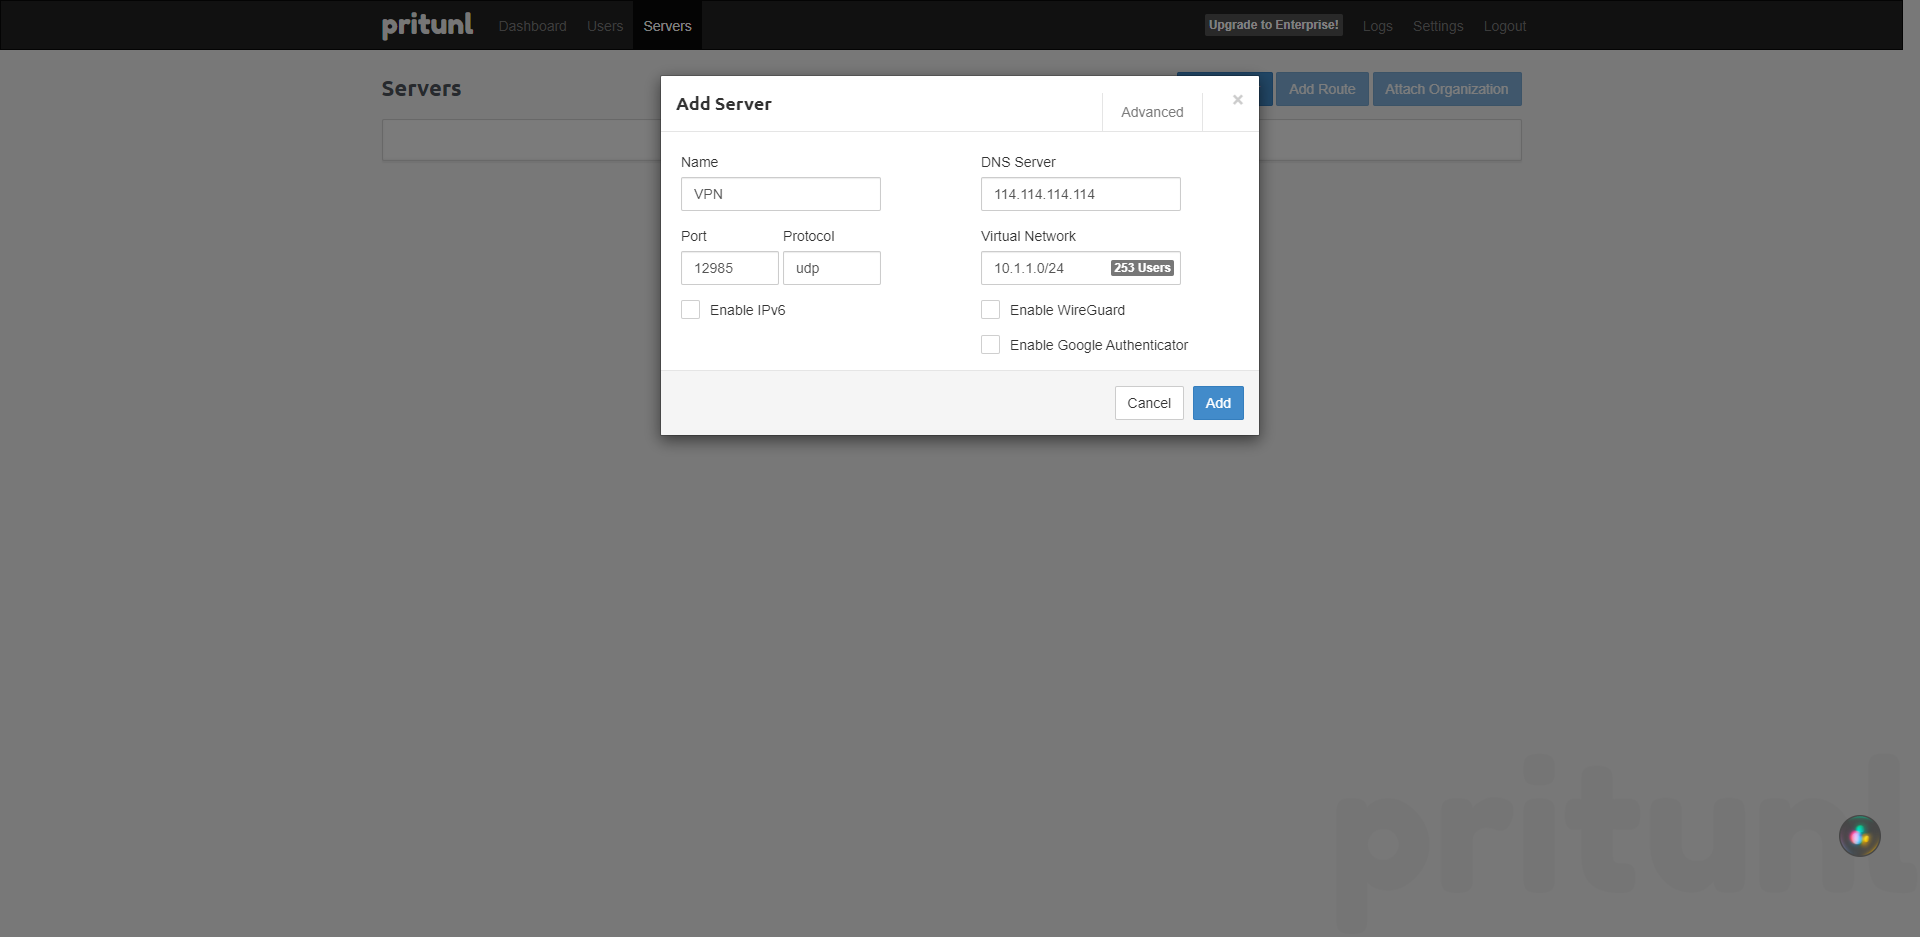
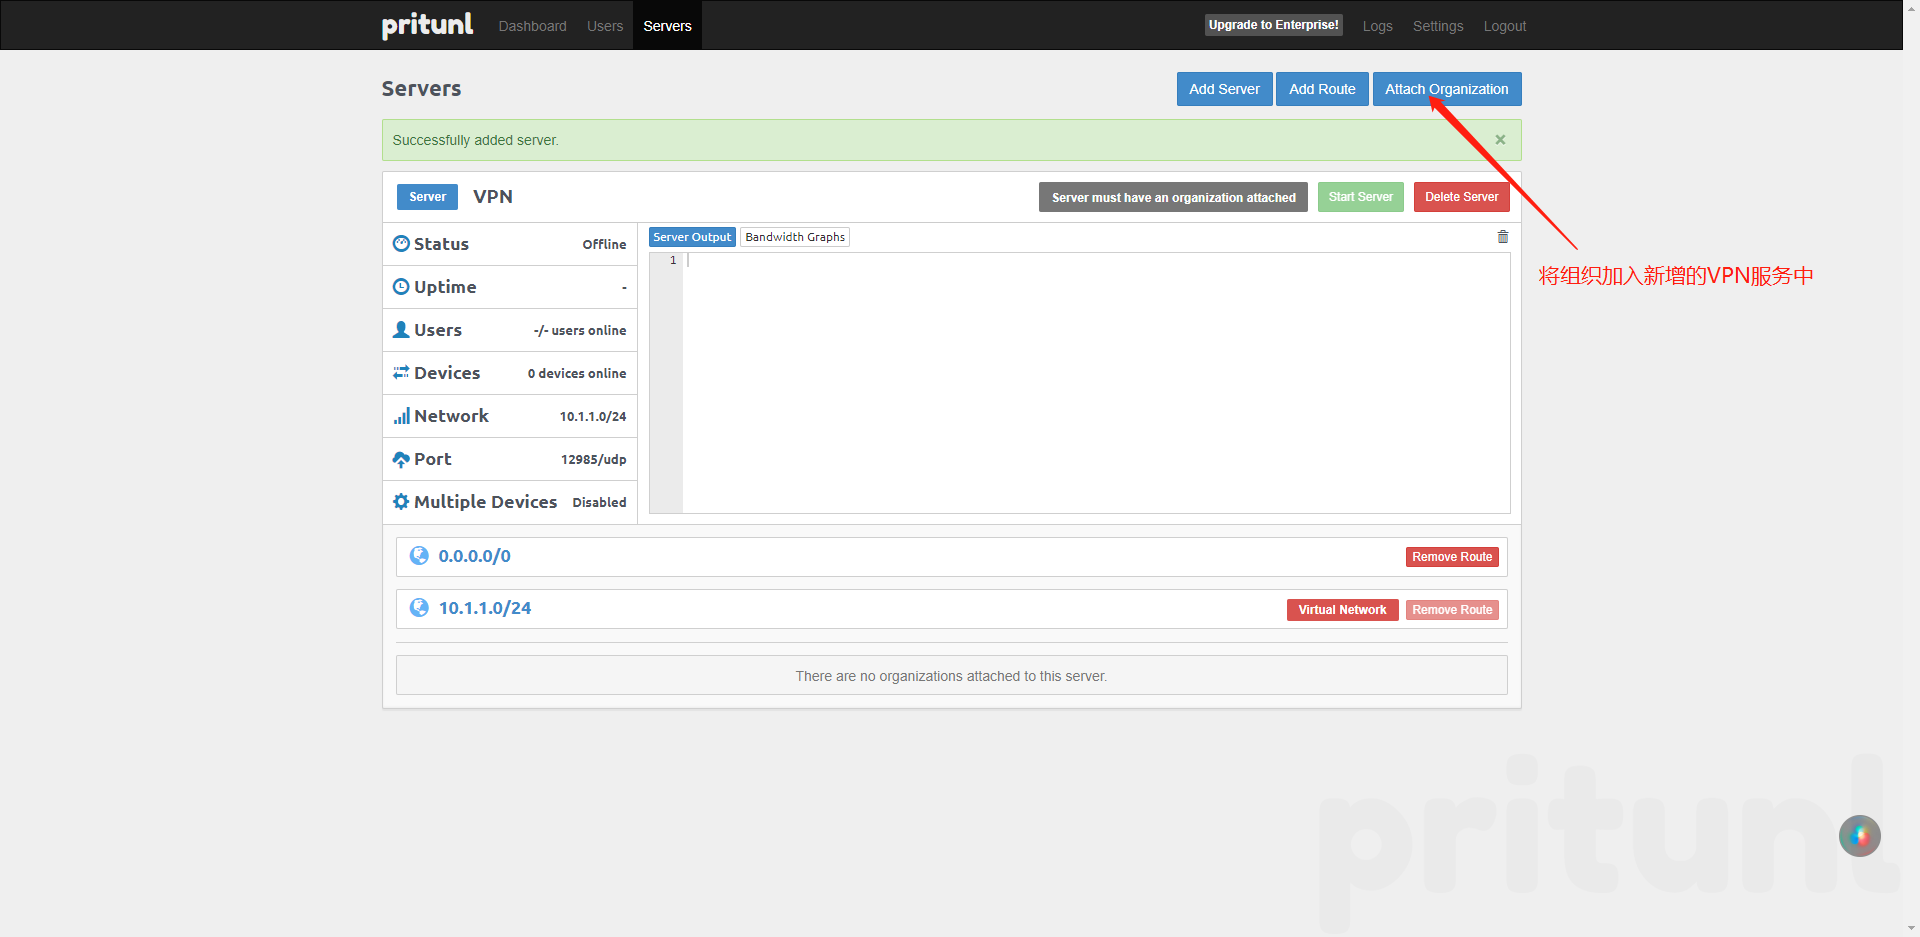
使用Pritunl
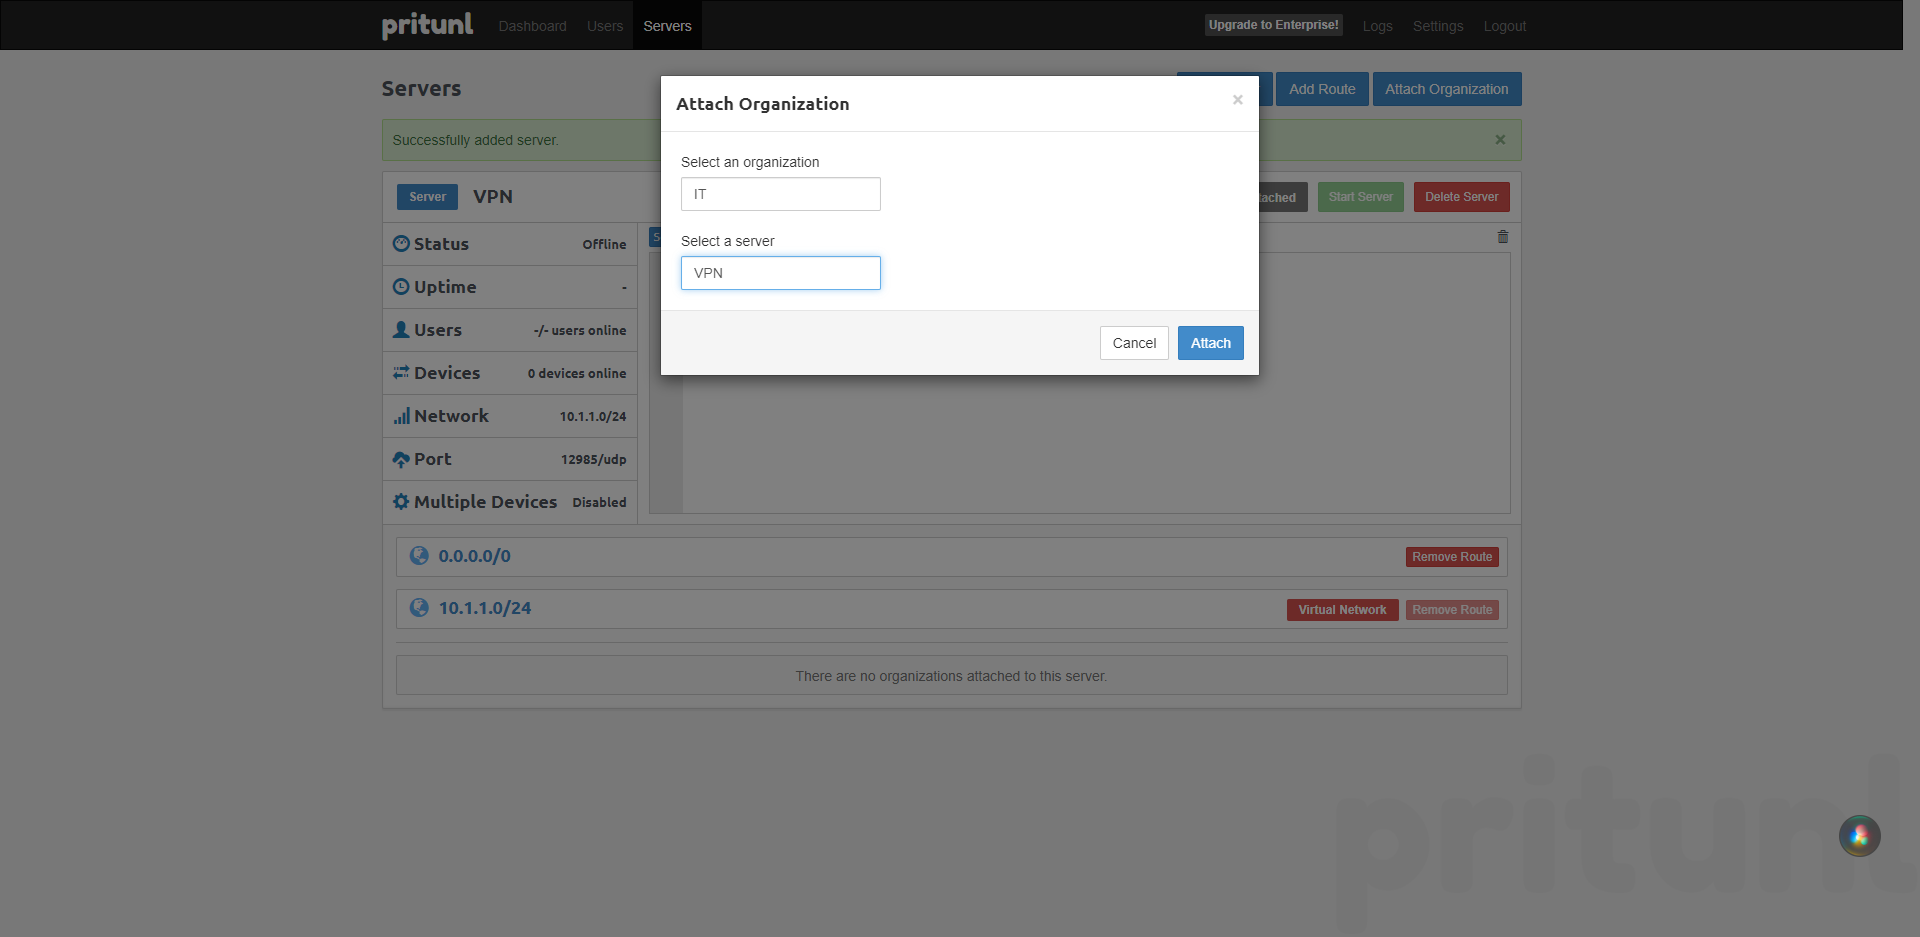
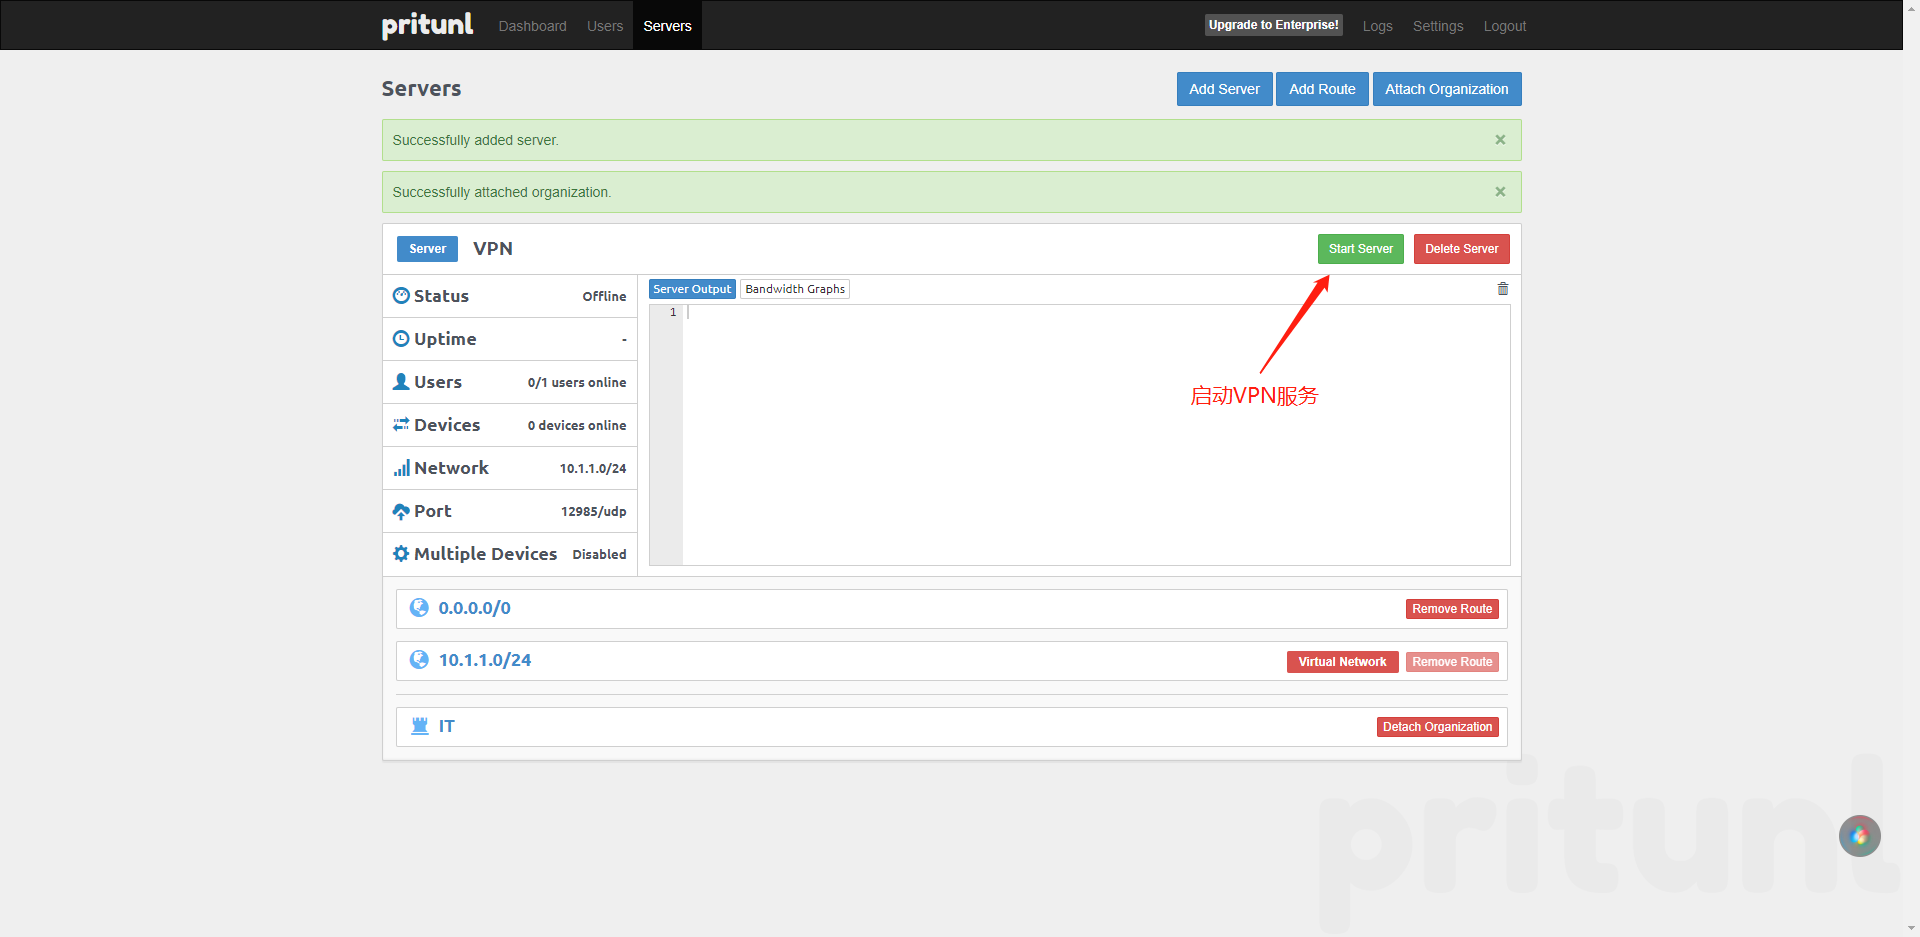
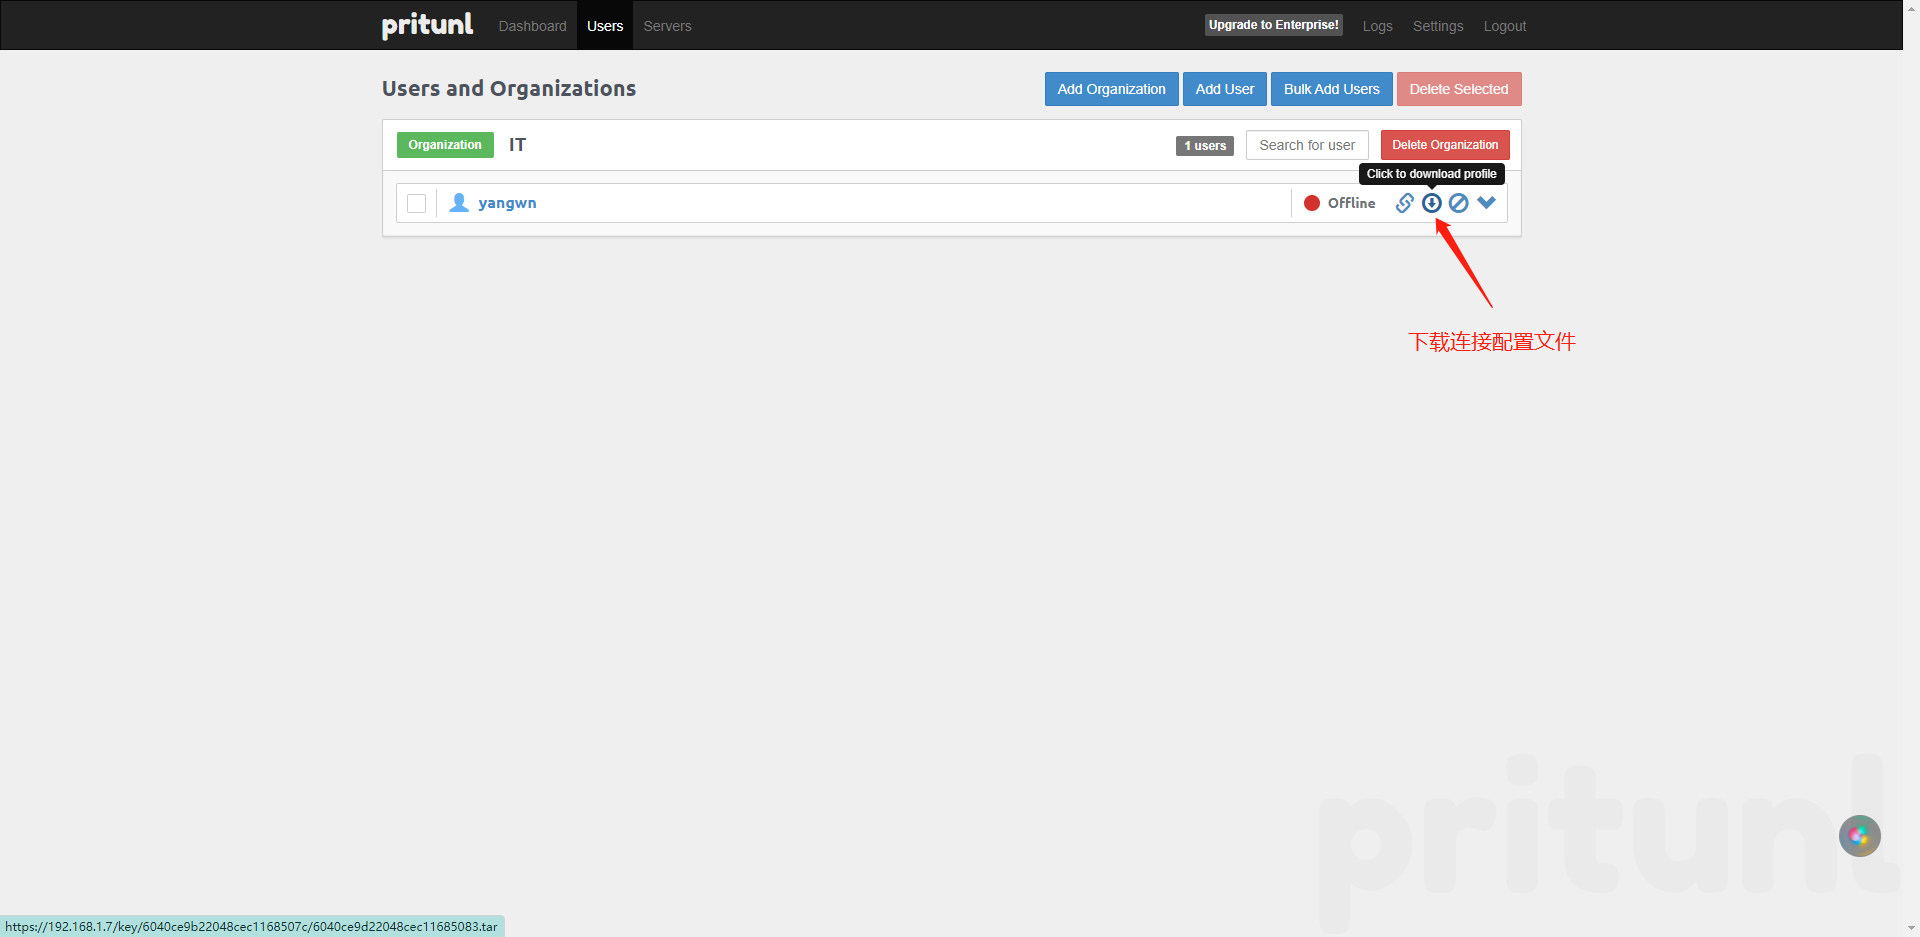
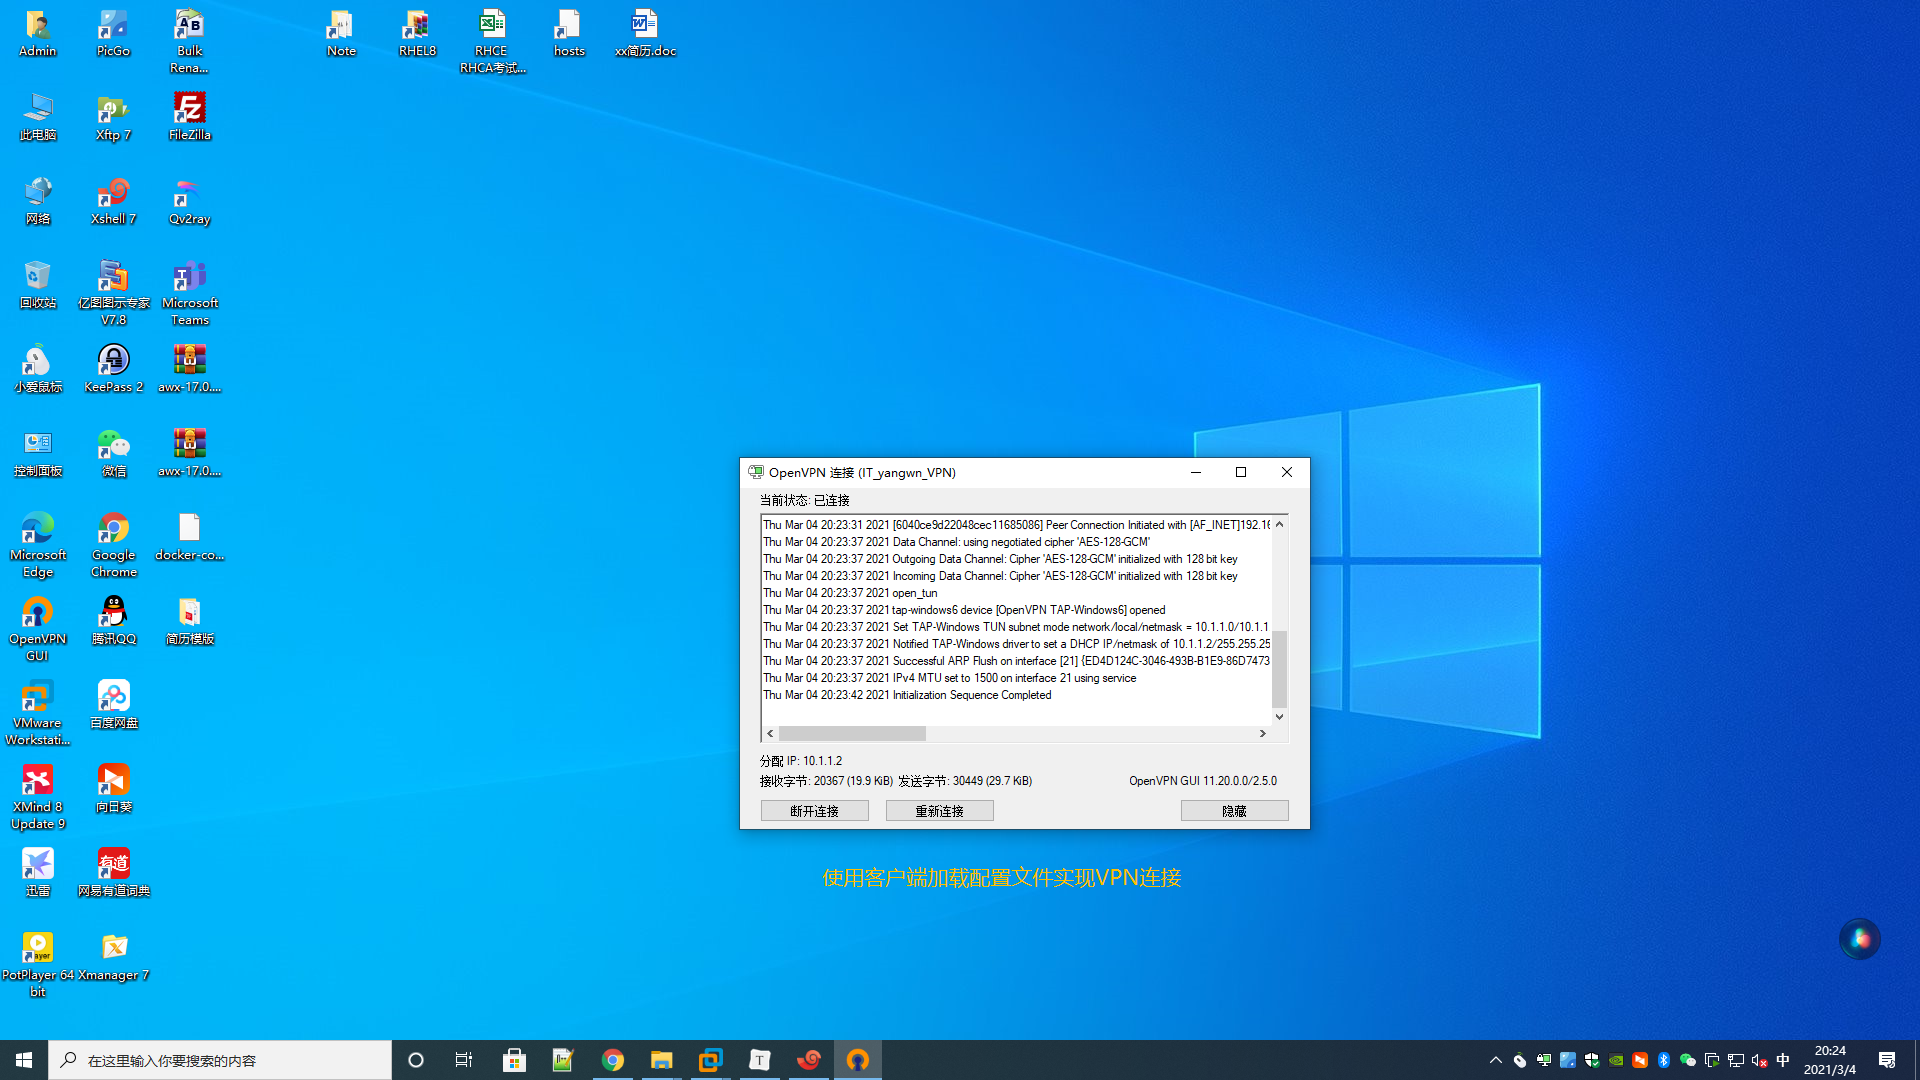
VPN服务器绑定3322动态域名
#添加NAT记录
将VPN服务端口映射到外网上
将VPN主机设置为DME主机
#创建VPN的脚本绑定3322动态域名
vim /etc/3322/vpn.sh
#!/bin/bash
lynx -mime_header -auth=qq1415404105:1415404105 "http://members.3322.net/dyndns/update?system=dyndns&hostname=xiaojinvpn.f3322.net" >>/etc/3322/vpn.log
lynx -mime_header -auth=ywn15220652179:Coke2021 "
#设置定时任务执行VPN脚本
crontab -e
#3322
*/01  *  *  *  * /usr/bin/sh /etc/3322/vpn.sh >/dev/null 2>&1  #绑定3322动态域名
*  *  *  *  7 /usr/bin/echo >/etc/3322/vpn.log >/dev/null 2>&1 #周期清理日志
推荐本站淘宝优惠价购买喜欢的宝贝:

本文链接:https://hqyman.cn/post/4349.html 非本站原创文章欢迎转载,原创文章需保留本站地址!

 微信支付宝扫一扫,打赏作者吧~
休息一下~~