一、概述 ocserv(OpenConnect Server) 是一个用于虚拟私人网络(VPN)连接的开源客户端软件。它最初是为了连接到 Cisco AnyConnect VPN 服务器而开发的,但现在已经发展成为一个支持多种 VPN 协议的通用客户端,包括 Windows、macOS 、Linux 和 Android。
OpenConnect 的优点之一是它的灵活性。它可以通过命令行或图形用户界面进行配置,并且可以与各种 VPN 服务器兼容,包括 Cisco AnyConnect、Juniper SSL VPN 和 Palo Alto Networks GlobalProtect 等。
二、部署 2.1 系统初始化 系统采用阿里云 ECS服务器CentOS 7.8
yum安装并非最新版本,如果想要最新版本则使用下载源码包安装,点我(opens new window) 查看地址
yum install epel-release -y 1
# 配置内核参数vim /etc/sysctl.conf
net.ipv4.ip_forward = 1# 立即生效sysctl -p
1 2 3 4 5
2.2 安装 官方参考文档点击访问(opens new window)
# 直接yum安装yum install ocserv -y# 查看安装版本[root@iZuf68sht1z3iphanqf9fkZ ~]# ocserv --versionocserv 1.1.1

Compiled with: seccomp, tcp-wrappers, oath, radius, gssapi, PAM, PKCS#11, AnyConnectGnuTLS version: 3.3.29
1 2 3 4 5 6 7 8
2.3 CA证书配置 ocserv启动必须配置证书
CA证书我们使用certtool来生成,后面我们会使用该CA证书签发ocserv所需证书来启动,首先我们需要安装该工具包:
yum install gnutls-utils -y 1
2.3.1创建CA模板 [root@iZuf68sht1z3iphanqf9fkZ ~]# mkdir /opt/ssl[root@iZuf68sht1z3iphanqf9fkZ ~]# vim /opt/ssl/ca.tmplcn = "losinx" organization = "losinx" serial = 1 expiration_days = 3650 ca
signing_key
cert_signing_key
crl_signing_key 1 2 3 4 5 6 7 8 9 10
模板参数说明
cn:通用名称,用于指定证书的主题(Subject)。它通常是证书的主要标识,可以是域名、服务器名称等。
organization: 组织名称,用于指定证书所属的组织。
serial: 序列号,用于标识证书的唯一性。每个证书必须具有唯一的序列号。
expiration_days: 证书的有效期天数,指定证书从颁发之日起的有效期限。
ca: 表示该证书是一个根证书(Certificate Authority),即证书颁发机构的证书。
signing_key: 表示该证书可用于签名其他证书。
cert_signing_key: 表示该证书可用于签名用户证书。
crl_signing_key: 表示该证书可用于签名 CRL(证书撤销列表)。
2.3.2生成CA私钥 私钥文件是 CA 在数字证书颁发和管理过程中的关键部分,用于加密和签署证书。
certtool --generate-privkey --outfile /opt/ssl/ca-key.pem 1
2.3.3 生成CA证书 创建ca证书时,指定私钥及模板
certtool --generate-self-signed --load-privkey /opt/ssl/ca-key.pem --template /opt/ssl/ca.tmpl --outfile /opt/ssl/ca-cert.pem 1
2.4 ocserv服务证书生成 这次我们基于上面的CA证书签发
2.4.1 创建证书模板文件 [root@iZuf68sht1z3iphanqf9fkZ ~]# vim /opt/ssl/ocserv.tmplcn = "losinx"organization = "losinx"serial = 2expiration_days = 3650tls_www_client
signing_key 1 2 3 4 5 6 7
证书参数解释
cn: 证书的通用名称,即证书的主题。可以根据需要将其修改为实际的名称。
organization: 证书所属的组织名称。可以根据实际情况进行修改。
serial: 证书的序列号。每个证书必须具有唯一的序列号。请将其更改为适当的值。
expiration_days: 证书的有效期天数。可以根据需求进行更改。
tls_www_client: 表示该证书用于 TLS/SSL 客户端身份验证。
signing_key: 表示该证书使用之前生成的 CA 私钥进行签名。
2.4.2 生成和签名证书 # 私钥certtool --generate-privkey --outfile /opt/ssl/ocserv-key.pem# 证书certtool --generate-certificate --load-privkey /opt/ssl/ocserv-key.pem --load-ca-certificate /opt/ssl/ca-cert.pem --load-ca-privkey /opt/ssl/ca-key.pem --template /opt/ssl/ocserv.tmpl --outfile /opt/ssl/ocserv-cert.pem 1 2 3 4 5
参数说明
ca-key.pem: 之前生成的 CA 私钥文件。
ca-crt.pem :是之前生成的 CA 证书文件。
ocserv.tmpl :是我们创建的ocser证书模板文件。
ocserv-cert.pem :是生成的证书文件的输出路径和文件名。
2.5 配置ocserv yum安装之后,默认配置文件在/etc/ocserv下的ocserv.conf文件
# 配置认证模式# ## 同时还支持本地用户帐户、LDAP、RADIUS 等,以实现灵活的认证方式auth = "plain[passwd=/etc/ocserv/ocpasswd]" 1 2 3
默认为443端口
tcp-port = 9143udp-port = 9143 1 2
使用2.4生成的证书
# 配置上面的证书文件和私钥server-cert = /etc/ocserv/ocserv-cert.pem
server-key = /etc/ocserv/ocserv-key.pem# 这里我们也可以直接使用ca证书,这样上面生成ocserv证书就可以省略server-cert = /etc/ocserv/ca-cert.pem
server-key = /etc/ocserv/ca-key.pem
1 2 3 4 5 6 7
这里尽量使用一个独立的网段,不要跟服务器及本地网段有冲突
ipv4-network = 10.100.1.0
ipv4-netmask = 255.255.255.0
1 2
完整配置
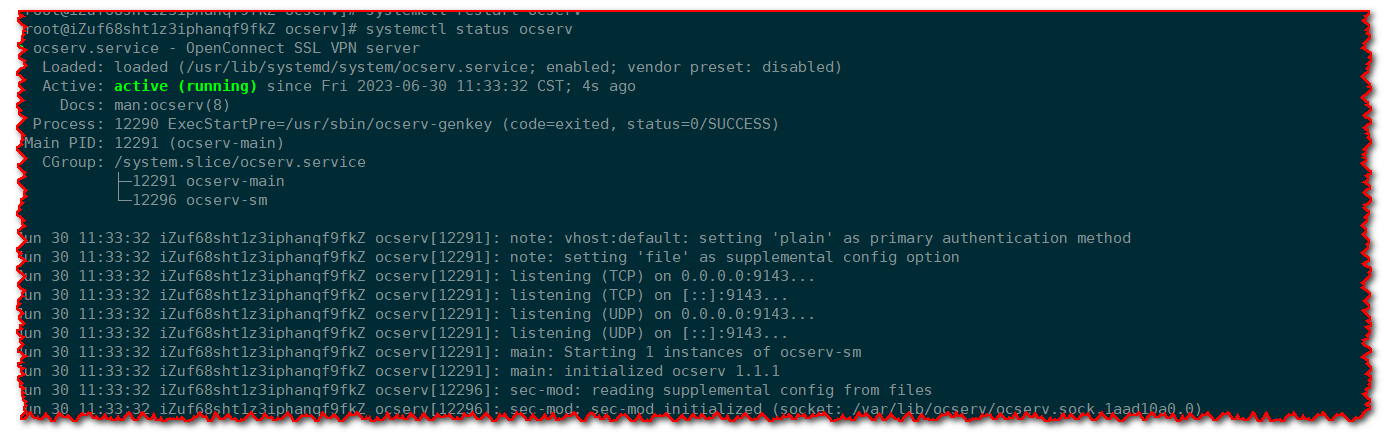
2.6 启动 # 首次安装 先添加至开机自启动systemctl enable ocserv# 启动systemctl restart ocserv# 查看端口监听netstat -nlpt|grep 9143 1 2 3 4 5 6
三、客户端 上面部署好之后,如果想要登陆,我们需要下载客户端进程配置登录,各种客户端下载地址(opens new window)
安装这里就不再说明,都是图形化直接点击下一步下一步完成安装即可。
四、账号管理 在上面我们配置ocserv时,使用 plain 认证方式,并且密码文件位于 /etc/ocserv/ocpasswd,更多命令管理点击查看(opens new window)
4.1 创建用户 [root@iZuf68sht1z3iphanqf9fkZ ~]# touch /etc/ocserv/ocpasswd[root@iZuf68sht1z3iphanqf9fkZ ~]# ocpasswd tchuaEnter password:
Re-enter password: 1 2 3 4
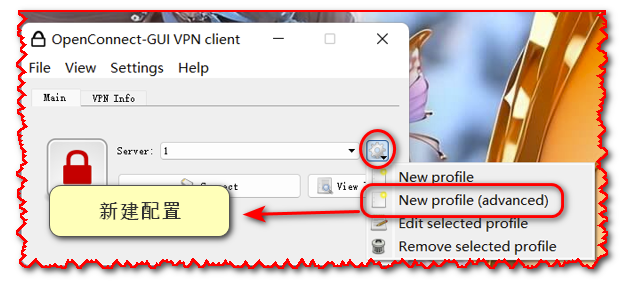
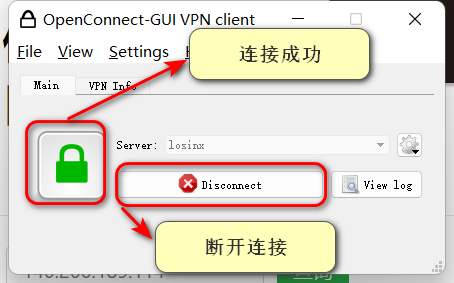
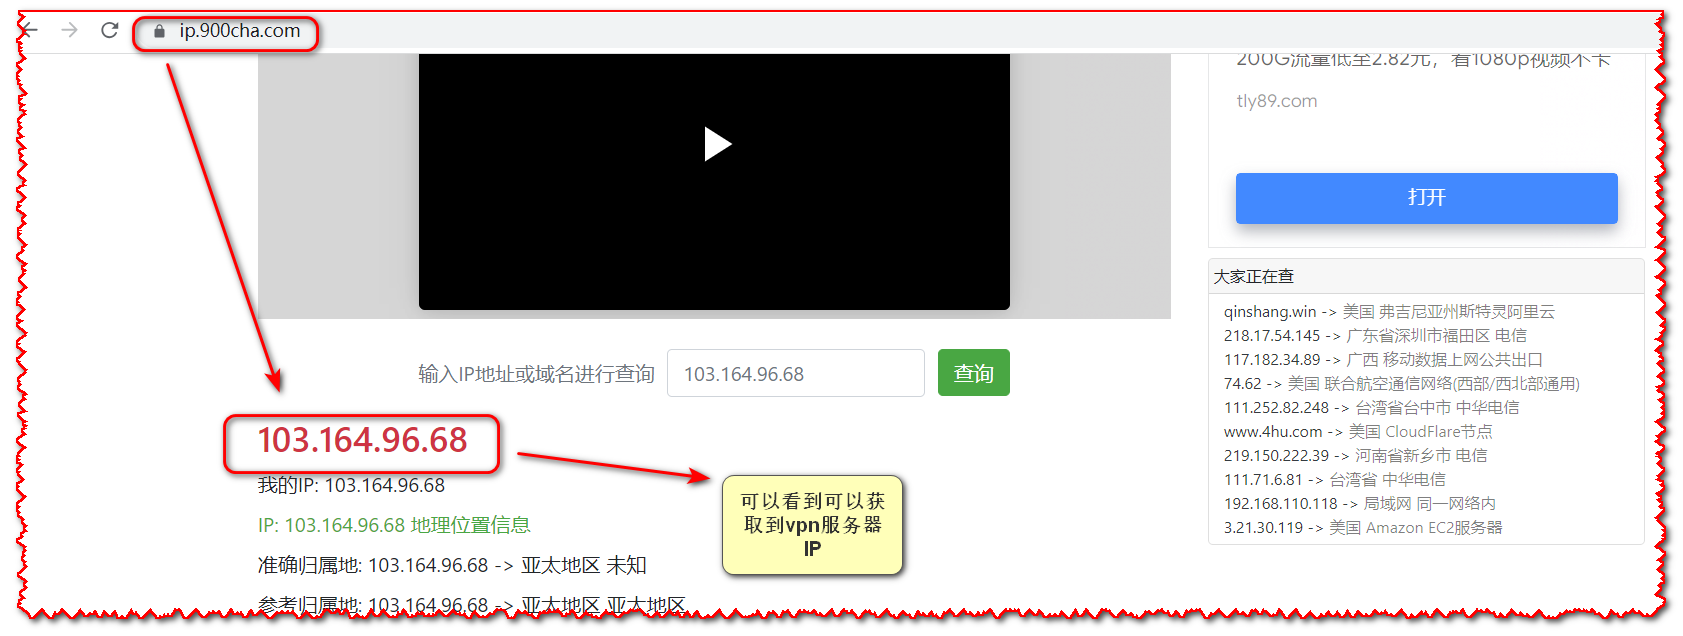
4.2 客户端配置
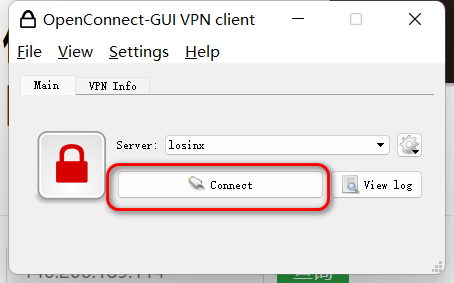
参数配置保存后,点击Connect
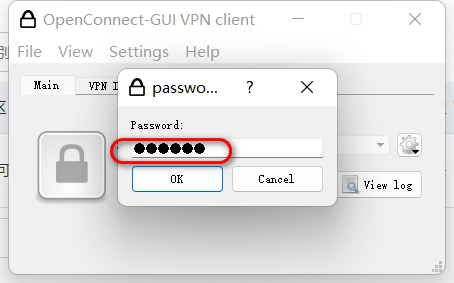
输入vpn账号密码,点击?
五、Docker部署 通过上面步骤可以看到,虽然安装很简单,但是配置还是比较繁琐的,因此我们可以使用别人集成好的镜像,如果想自己构建,则直接参考Docker部署ocserv(opens new window) 中的Dockerfile自行构建即可。
5.1 获取镜像 [root@iZuf6bw31ptihyf55wlkmpZ ~]# docker pull wppurking/ocserv 1
5.2 调整配置 我们虽然使用Docker部署,但是为了方便,这里把ocserv.conf 配置文件和 ocpasswd 用户密码文件映射出来
这里对于配置文件其实没有什么可调整,注意以下几点:
Docker认证模式也是基于文件的,映射时需要注意文职
证书文件下面配置文件也是定义好的,无需改动,镜像中也是生成好的,不用我们再去生成
如果想要自定义,可以直接使用Dockerfile构建镜像,这样证书就是唯一的了。
完整配置
5.3 启动 这里把配置文件还是放在宿主机/etc/ocserv目录下,映射的端口9143:443,也可以修改配置文件端口为9143,其他没有什么变化,注意配置配置文件中所引用内容,位置对应即可。
docker run -d --privileged --name ocserv -v /etc/ocserv:/etc/ocserv -p 9143:443/tcp wppurking/ocserv 1
5.4 查看状态
5.5 总结 这样使用Docker部署就完成了,后面登录配置跟上面一样,按照相关参数配置即可,另外,因为使用的是Docker部署,因此,生成用户时,需要使用以下命令:
docker exec -it $(docker ps -a | grep vpn_run | awk '{print $1}') ocpasswd ${username} 1
关于Docker相关更多参考作者介绍点我(opens new window)
六、occtl occtl是ocserv的命令行工具包,可以支持很多操作,该命令也会随着ocserv一起安装,查看支持的命令,更多的使用参考官方介绍点我(opens new window) 。
[root@iZuf6bw31ptihyf55wlkmpZ ~]# occtl --helpocctl: [OPTIONS...] {COMMAND}

  -s --socket-file       Specify the server's occtl socket file
  -h --help              Show this help
     --debug             Enable more verbose information in some commands
  -v --version           Show the program's version  -j --json              Use JSON formatting for output

Available Commands
 disconnect user [NAME]	Disconnect the specified user
 disconnect id [ID]	Disconnect the specified ID
     unban ip [IP]	Unban the specified IP
           reload	Reloads the server configuration
      show status	Prints the status and statistics of the server
       show users	Prints the connected users
     show ip bans	Prints the banned IP addresses
 show ip ban points	Prints all the known IP addresses which have points
     show iroutes	Prints the routes provided by users of the server
 show sessions all	Prints all the session IDs
 show sessions valid	Prints all the valid for reconnection sessions
 show session [SID]	Prints information on the specified session
    show user [NAME]	Prints information on the specified user
      show id [ID]	Prints information on the specified ID
show events Provides information about connecting users 


 微信支付宝扫一扫,打赏作者吧~