zabbix 微信告警
一、企业微信端配置
1、创建微信群机器人
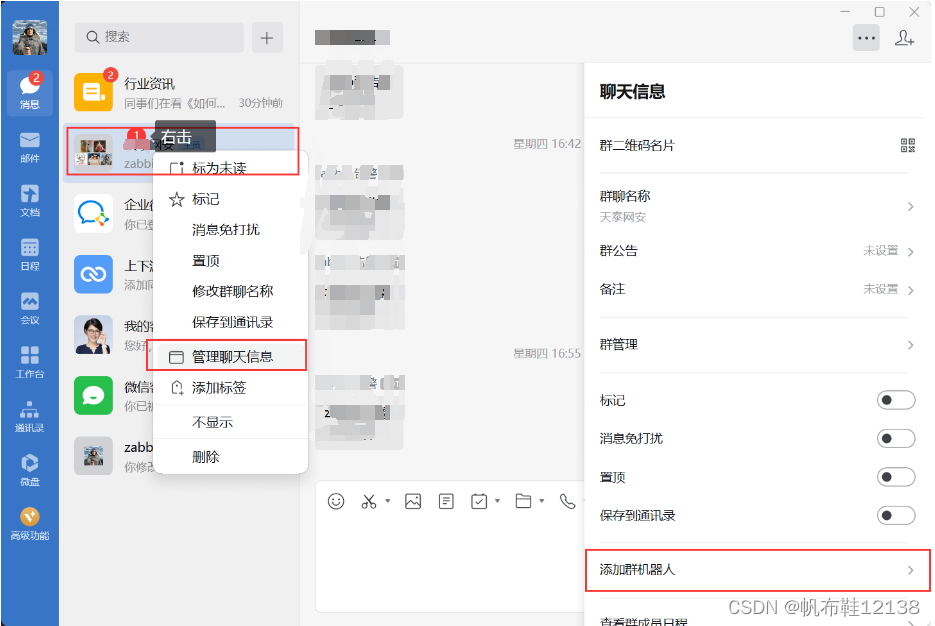
在需要接收告警信息的企业微信群上右键(注意群里成员至少要3人以上),选择“添加群机器人”,设置机器人名称,系统自动生成此机器人的webhook地址,请记住该地址,不要随便给其他人,以免无关人员通过此地址推送垃圾信息!

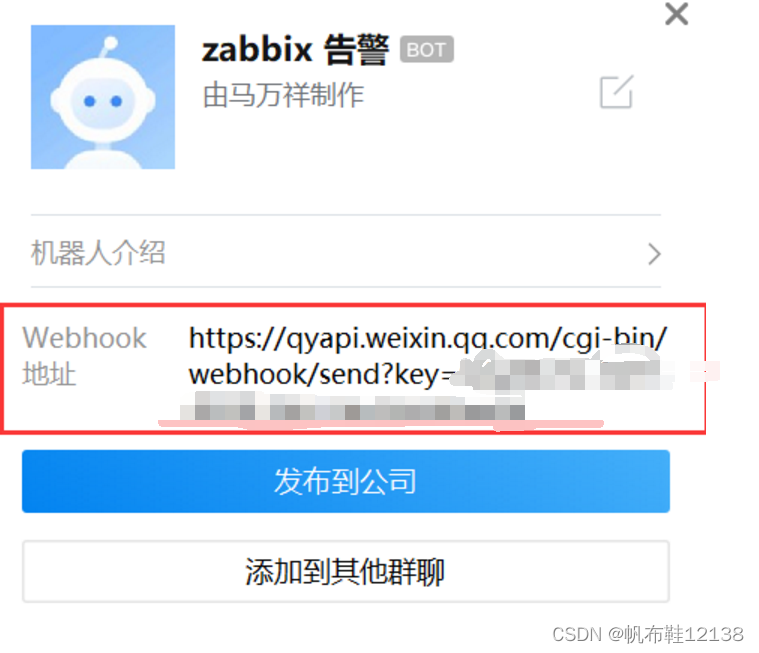
2、查看群机器人webhook信息,后面需要用到。
二、告警脚本配置
ps:zabbix利用python脚本给企业微信机器人推送告警信息~
1、登录zabbix server服务器,查找并进入zabbix告警脚本调用目录
grep -Ev '^$|#' /etc/zabbix/zabbix_server.conf | grep ^A
查到目录为 /usr/lib/zabbix/alertscripts 这也是默认告警脚本目录,进入此目录,创建脚本文件并编辑,名称自定义,例如 weixin.py,填入以下脚本内容,并将“url”字段修改为刚才的机器人webhook地址。
#!/usr/bin/python
#-*- coding: utf-8 -*-
import requests
import json
import sys
import os
headers = {'Content-Type': 'application/json;charset=utf-8'}
api_url = "https://qyapi.weixin.qq.com/cgi-bin/webhook/send?key=cxxxxxxxxxxxxxxxx" #这个是企业微信机器人生成的webhook地址,修改为你的即可。
def msg(text):
json_text= {
"msgtype": "text",
"text": {
"content": text,
"mentioned_mobile_list":["13800000000","13800000001"] #这个是企业微信机器人自动艾特群里成员,修改为群成员手机号即可。
},
}
print requests.post(api_url,json.dumps(json_text),headers=headers).content
if __name__ == '__main__':
text = sys.argv[1]
msg(text)
2、赋予此脚本执行权限,并进行文本内容推送测试
2、赋予此脚本执行权限,并进行文本内容推送测试
chmod +x weixin.py
python weixin.py Hello
微信群机器人正常收到推送内容:
如果容器里面没有python 需要安装python
如果 这个方法不行 请自行搜索换一种方法
apt-get update
apt-get upgrade
apt install build-essential -y
apt install libncurses5-dev libgdbm-dev libnss3-dev libssl-dev libreadline-dev libffi-dev -y
apt install zlib1g-dev
apt install wget
apt install openssl
apt install curl
apt install libsqlite3-dev
wget https://www.python.org/ftp/python/3.7.3/Python-3.7.3.tgz
tar -xvf Python-3.7.3.tgz
cd Python-3.7.3
./configure —enable-loadable-sqlite-extensions
make
make install
apt-get clean
rm -rf /var/lib/apt/lists/*
ln -s /usr/local/bin/pip3 /usr/bin/pip
ln -s /usr/local/bin/python3 /usr/bin/python
安装pip
pip在usr/local/bin/pip,如果已经安装pip,要先进行卸载
没有执行以下命令
sudo apt-get remove python-pip
wget https://bootstrap.pypa.io/get-pip.py
python get-pip.py
hash -r
最后安装requests模块
pip3 install requests -i http://pypi.doubanio.com/simple/ --trusted-host pypi.doubanio.com
##如果 测试的时候报错 把容器内的地址映射到本地路径里面
三、zabbix端配置企业微信告警
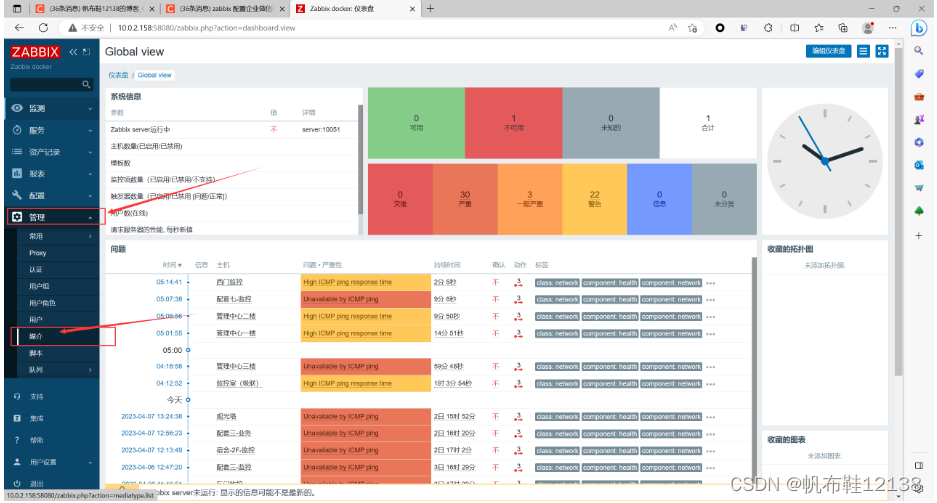
1、创建告警媒介
管理---报警媒介类型---右上角“创建媒体类型”
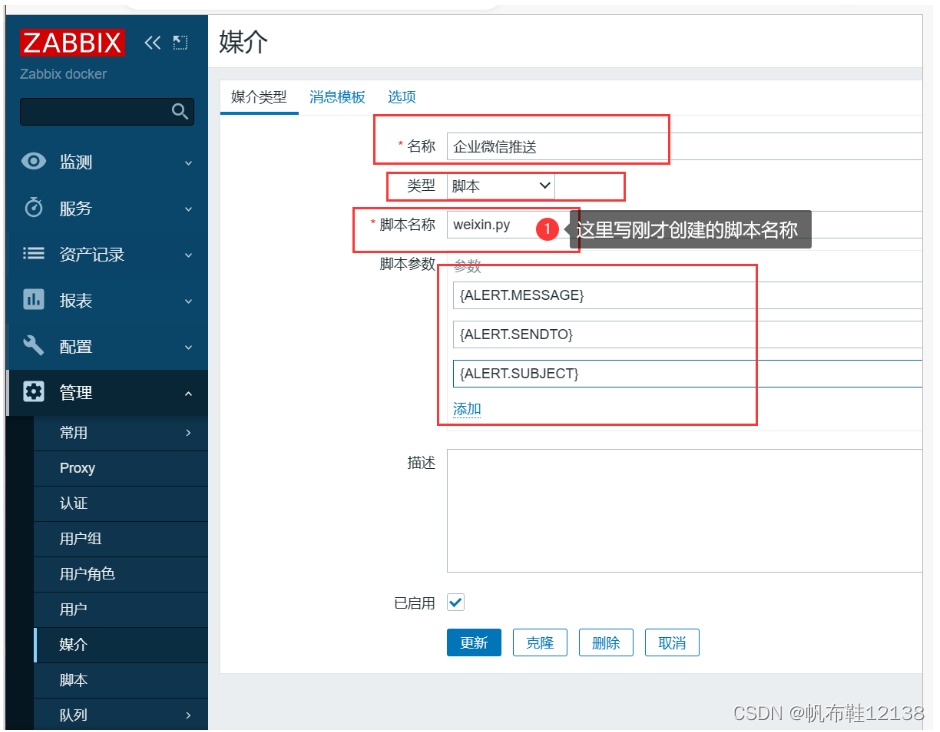
名称自定义,类型选择“脚本”,脚本名称填写刚才创建的python脚本文件名称,参数调用告警消息字段,添加即可:

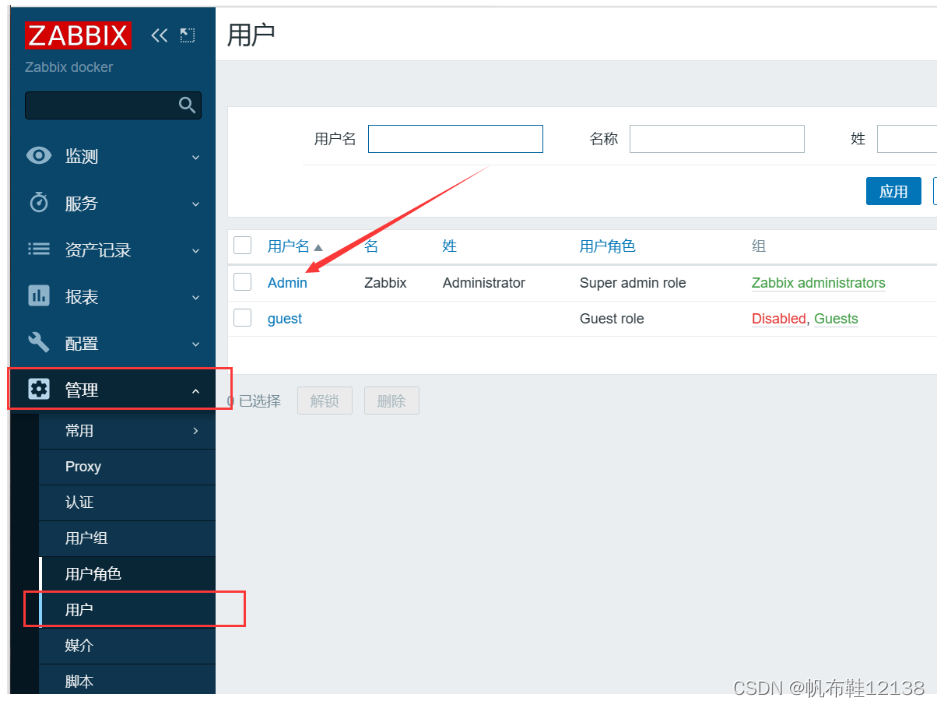
2、编辑用户告警媒介选项
管理---用户,选择需要发送告警消息的用户,点击用户名称进入配置页面,选择“报警媒介”标签,点击添加新媒介

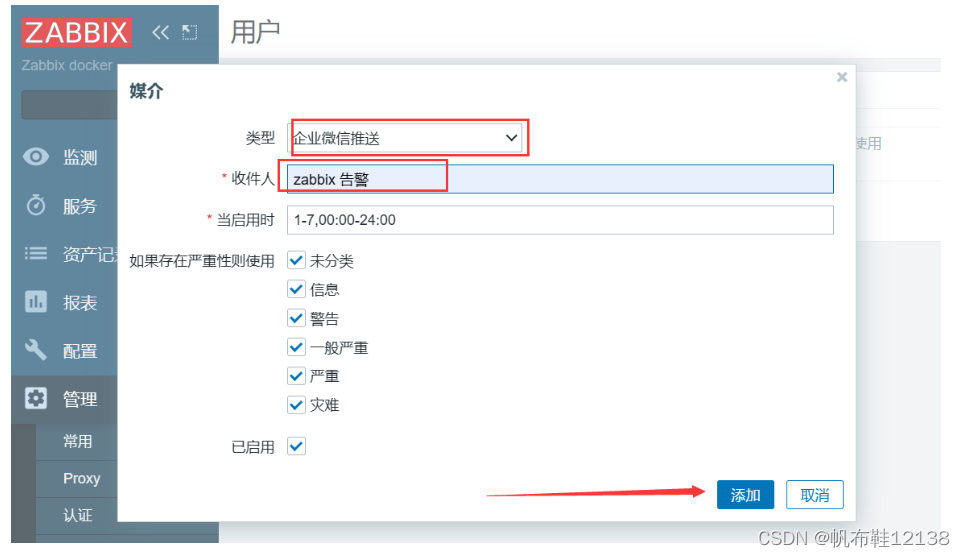
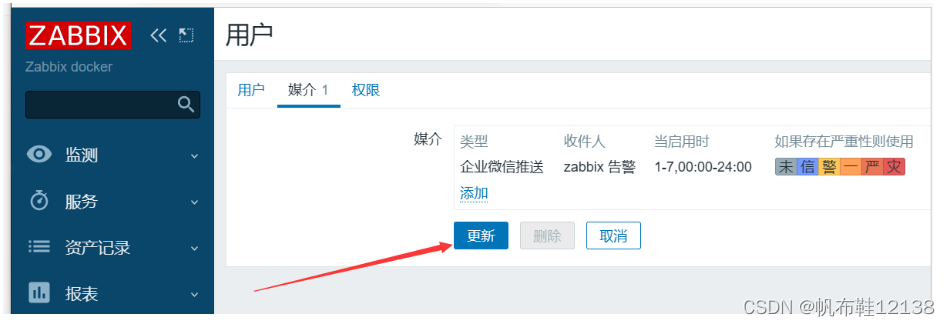
类型选择刚才创建的企业微信告警媒介,收件人填写机器人所在群成员的任何可以作为关键信息的内容,例如成员名称,成员手机号等,启用时段和告警程度按照需求选择,然后启用添加即可
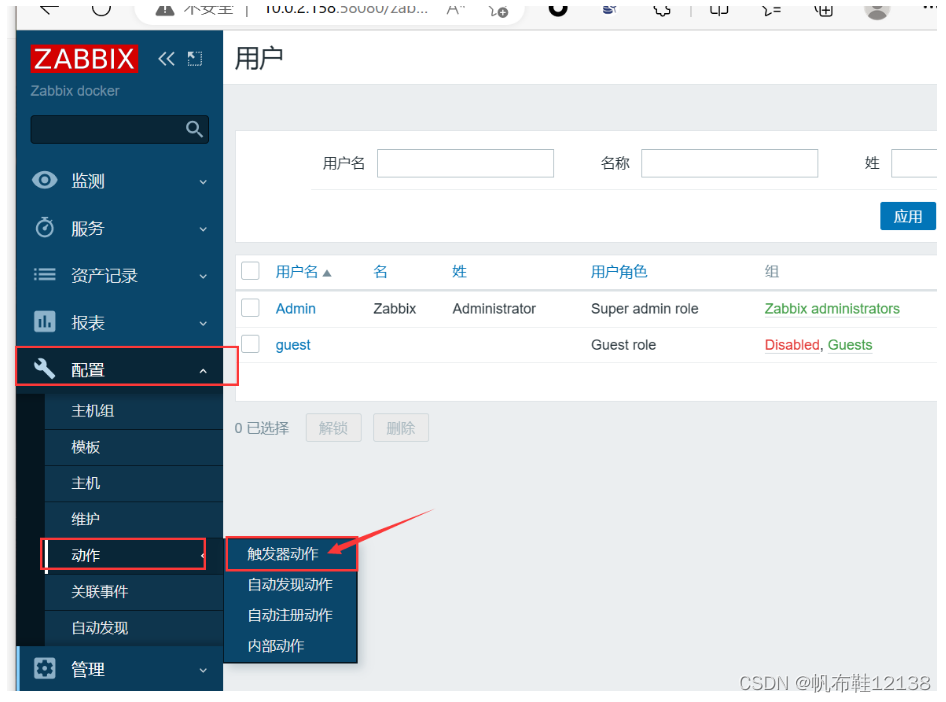
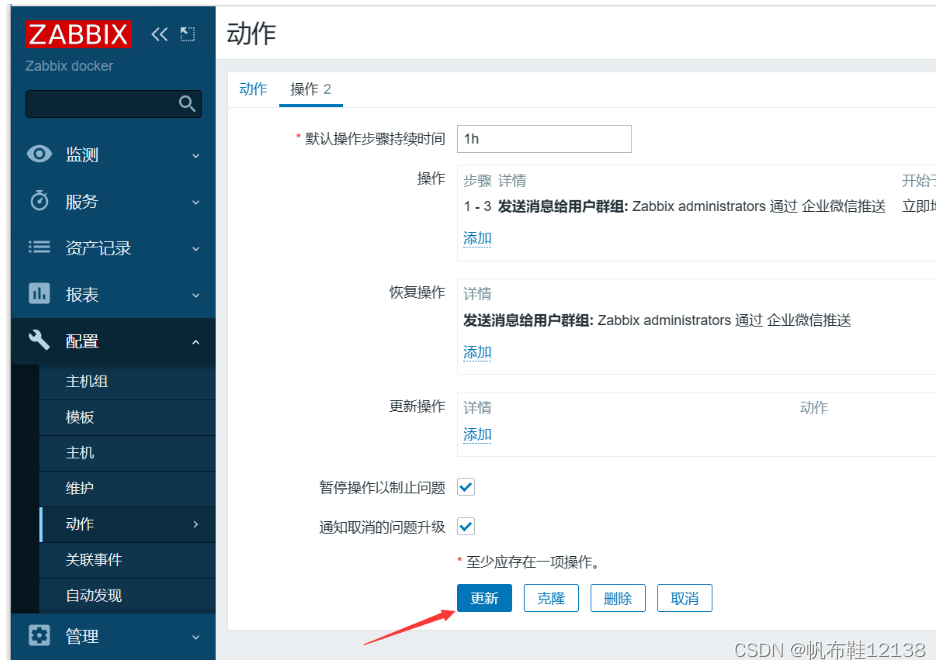
3、配置告警动作参数
配置---动作---右上角“创建动作”
在“动作”标签填写动作名称,添加触发器示警度和触发条件,然后切换到“操作”标签,设置示警动作详细配置:.

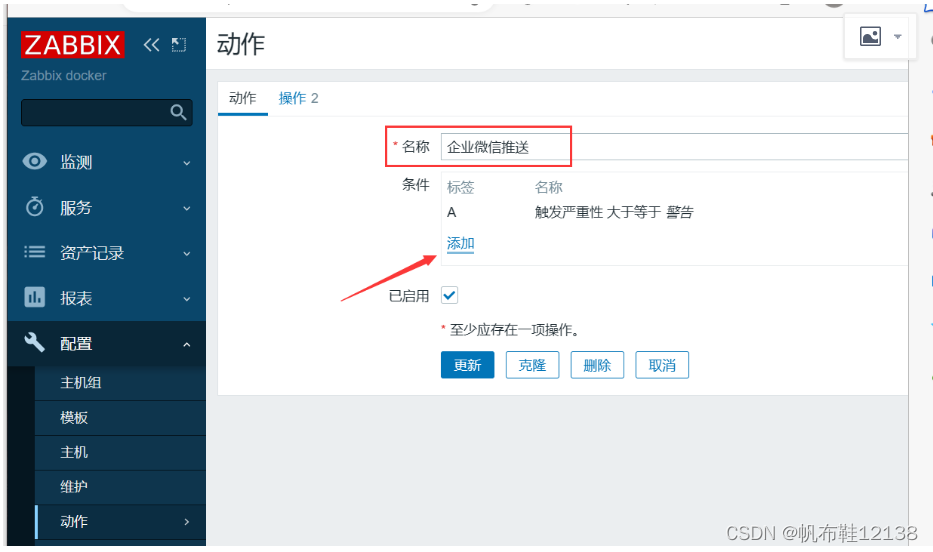
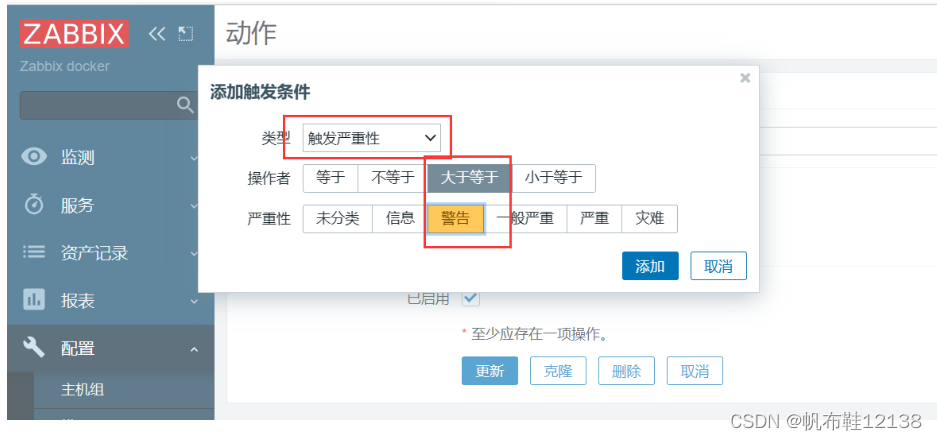

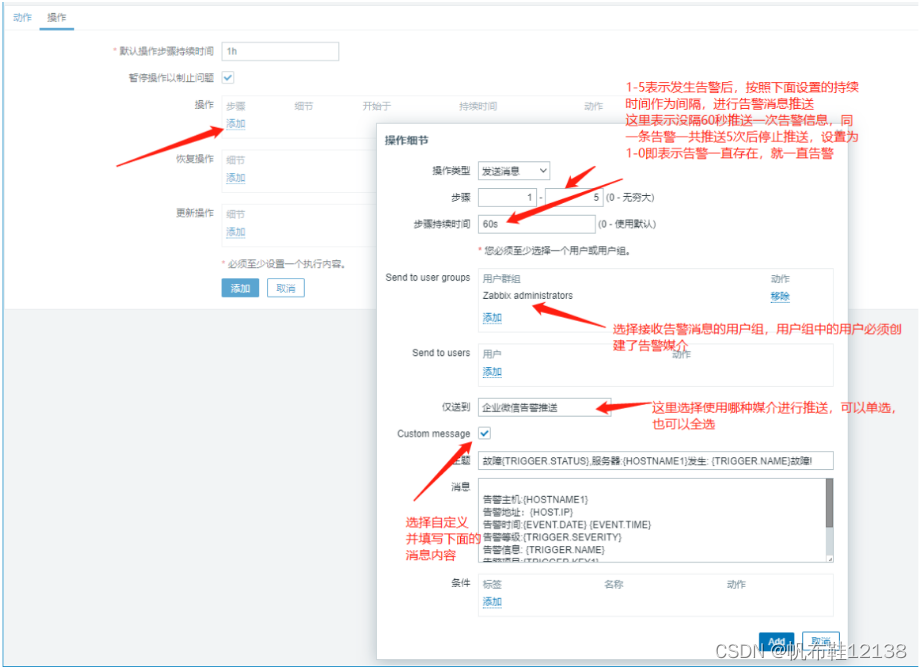
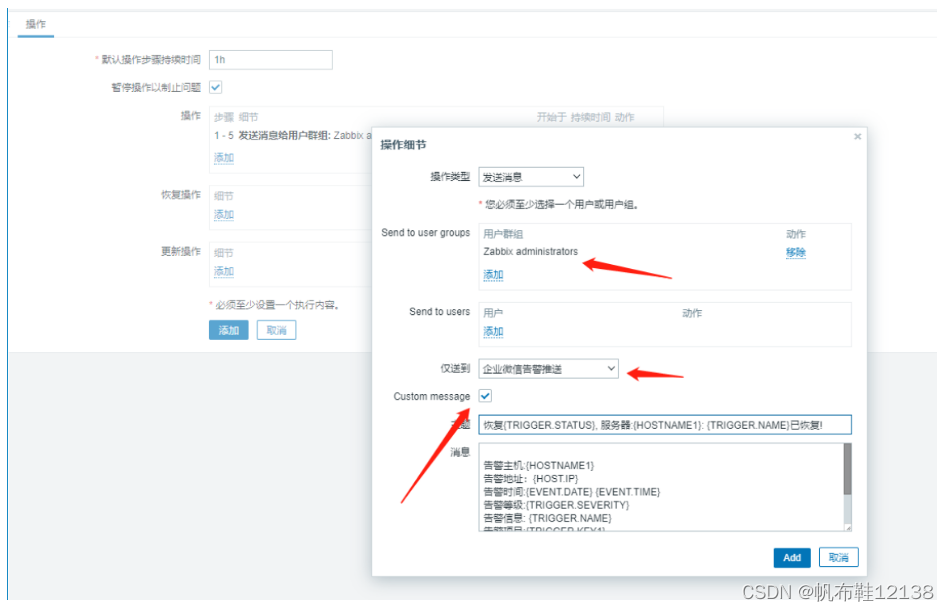
按照下图进行配置,添加“操作”配置。告警消息自定义内容如下,可复制使用:
主题:
故障{TRIGGER.STATUS},服务器:{HOSTNAME1}发生: {TRIGGER.NAME}故障!

消息:
告警主机:{HOSTNAME1}
告警地址:{HOST.IP}
告警时间:{EVENT.DATE} {EVENT.TIME}
告警等级:{TRIGGER.SEVERITY}
告警信息: {TRIGGER.NAME}
告警项目:{TRIGGER.KEY1}
问题详情:{ITEM.NAME}:{ITEM.VALUE}
当前状态:{TRIGGER.STATUS}:{ITEM.VALUE1}
事件ID:{EVENT.ID}
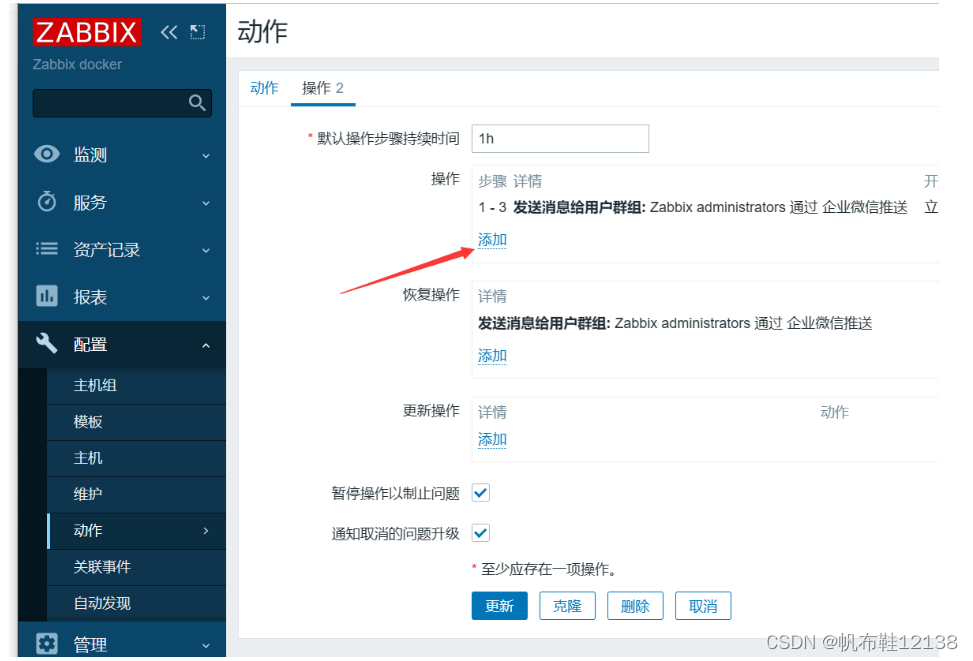
按照下图进行配置,添加“恢复操作”配置。恢复告警消息自定义内容如下,可复制使用:
主题:
故障恢复{TRIGGER.STATUS},服务器:{HOSTNAME1}发生: {TRIGGER.NAME}已恢复!

消息:
恢复告警主机:{HOSTNAME1}
告警地址:{HOST.IP}
告警时间:{EVENT.DATE} {EVENT.TIME}
告警等级:{TRIGGER.SEVERITY}
告警信息: {TRIGGER.NAME}
告警项目:{TRIGGER.KEY1}
问题详情:{ITEM.NAME}:{ITEM.VALUE}
当前状态:{TRIGGER.STATUS}:{ITEM.VALUE1}
事件ID:{EVENT.ID}
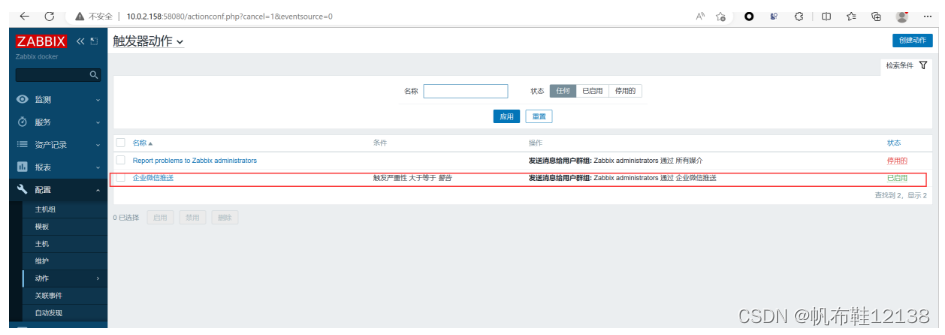
系统已经完成了告警动作生成,这就完成了通过企业微信机器人推送告警的所有配置!
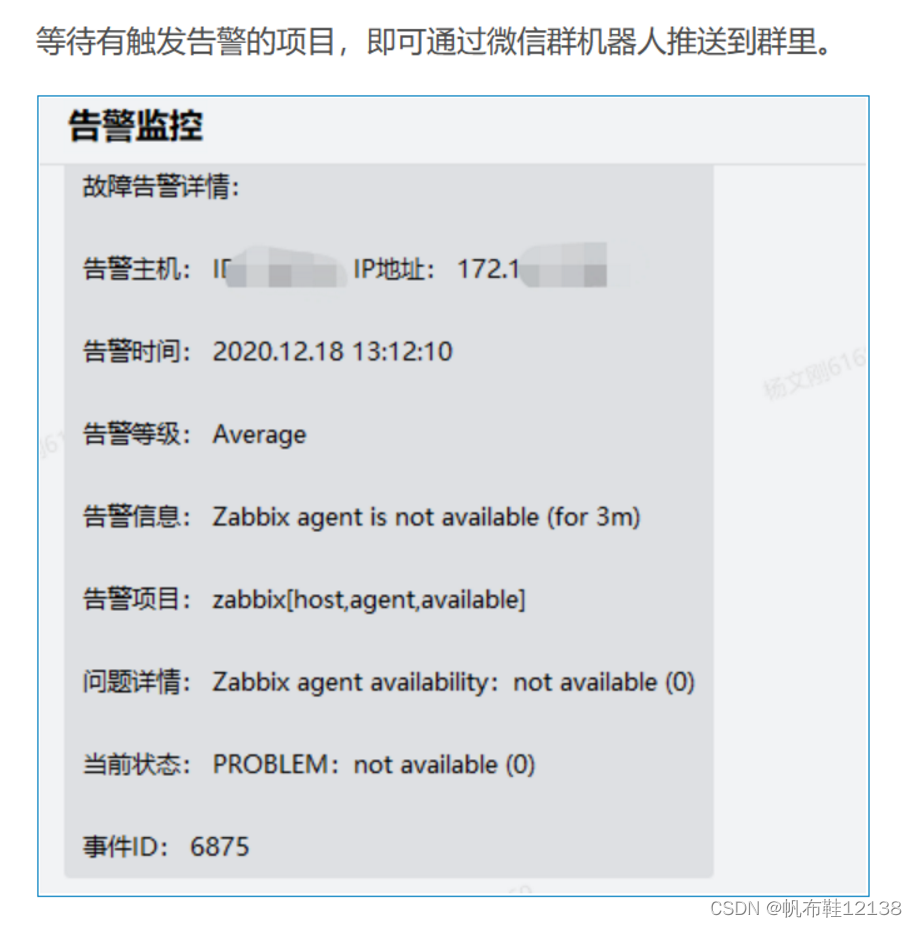
可以关闭某个服务 比如http 服务 测试报警脚本
推荐本站淘宝优惠价购买喜欢的宝贝:

本文链接:https://hqyman.cn/post/5346.html 非本站原创文章欢迎转载,原创文章需保留本站地址!
打赏

微信支付宝扫一扫,打赏作者吧~
休息一下~~
