
华为防火墙基础
文章目录
一、防火墙的工作原理
1、防火墙的工作模式
1、路由模式:如果华为防火墙连接网络的接口配置IP地址,则认为防火墙工作在路由模式下。
2、透明模式:如果华为防火墙通过第二层对外连接(接口无IP地址),则防火墙工作在透明模式下。
3、混合模式:如果华为防火墙既存在工作在路由模式的接口(接口具有IP地址) 又存在工作在透明模式的接口(接口无P地址) 则防火墙工作在混合模式下。
2、华为防火墙的安全区域划分
1、Trust区域:主要用于连接公司内部网络,优先级为85,安全等级较高。
2、 DMZ区域:在防火墙中通常定义为需要对外提供服务的网络,其安全性介于Trust区域和Untrust区域之 间优先级为50,安全等级中等 。
3、Untrust区域:通常定义外部网络,优先级功5,安全级别很低,Untrust区域表示不受信任的区域。
4、Local区域:通常定义防火墙本身,优先级为100。防火墙除了转发区域之间的报文之外还需要自身接收或发送流量。
5、其他区域:用户自定义区域,默认最多自定义16个区域,自定义区域没有默认优先级,所以需要手工指定。
3、防火墙Inbound和Outbound
入方向(Inbound):数据由低级别的安全区域向高级别的安全区域传输的方向 。
出方向(Outbound):数据由高级别的安全区域向低级别的安全区域传输的方向。
二、设备管理方式
1、Telnet管理方式及配置
1、配置初始管理密码
Please Press ENTER.

An initial password is required for the first login via the console.
Set a password and keep it safe. Otherwise you will not be able to login via the
 console.

Please configure the login password (8-16)Enter Password:       //8-16位密码
Confirm Password:
Warning: The authentication mode was changed to password authentication and the
user level was changed to 15 on con0 at the first user login.
Warning: There is a risk on the user-interface which you login through. Please c
hange the configuration of the user-interface as soon as possible.

*************************************************************************
*         Copyright (C) 2014-2015 Huawei Technologies Co., Ltd.         *
*                           All rights reserved.                        *
*               Without the owner's prior written consent,              *
*        no decompiling or reverse-engineering shall be allowed.        *
*************************************************************************
2、配置防火墙的接口IP地址
[USG6000V1]int g0/0/0[USG6000V1-GigabitEthernet0/0/0]ip add 192.168.0.1 24Error: The address already exists.[USG6000V1-GigabitEthernet0/0/0]un shInfo: Interface GigabitEthernet0/0/0 is not shutdown.[USG6000V1-GigabitEthernet0/0/0]int g1/0/0[USG6000V1-GigabitEthernet1/0/0]ip add 192.168.1.1 24[USG6000V1-GigabitEthernet1/0/0]un shInfo: Interface GigabitEthernet1/0/0 is not shutdown.[USG6000V1-GigabitEthernet1/0/0]int g1/0/1[USG6000V1-GigabitEthernet1/0/1]ip add 192.168.2.1 24[USG6000V1-GigabitEthernet1/0/1]un shInfo: Interface GigabitEthernet1/0/1 is not shutdown.[USG6000V1-GigabitEthernet1/0/1]int g1/0/2[USG6000V1-GigabitEthernet1/0/2]ip add 192.168.3.1 24[USG6000V1-GigabitEthernet1/0/2]un shInfo: Interface GigabitEthernet1/0/2 is not shutdown.[USG6000V1-GigabitEthernet1/0/2]quit
3、打开防火墙的Telnet功能
[USG6000V1]telnet server enableWarning: Telnet is not a secure protocol, and it is recommended to use Stelnet.
4、配置防火墙允许远程管理
[USG6000V1]int g0/0/0[USG6000V1-GigabitEthernet0/0/0]service-manage enable       //配置接口管理模式[USG6000V1-GigabitEthernet0/0/0]service-manage telnet permit       //允许Telnet
[USG6000V1-GigabitEthernet0/0/0]quit
5、将防火墙接口GigabitEthernet0/0/0加入安全区域
[USG6000V1]firewall zone trust[USG6000V1-zone-trust]add int g0/0/0
 Error: The interface has been added to trust security zone.        //该接口默认在安全区域[USG6000V1-zone-trust]quit
6、将接口加入安全区域
[USG6000V1]firewall zone trust //信任区域[USG6000V1-zone-trust]add int g1/0/0[USG6000V1-zone-trust]quit[USG6000V1]firewall zone untrust //不信任区域[USG6000V1-zone-untrust]add int g1/0/1[USG6000V1-zone-untrust]quit
7、将防火墙配置域间包过滤,以保证网络基本通信正常
[USG6000V1]security-policy
[USG6000V1-policy-security]rule name allow_telnet       //配置名为allow_telnet的规则[USG6000V1-policy-security-rule-allow_telnet]source-zone trust       //从trust[USG6000V1-policy-security-rule-allow_telnet]destination-zone local       //到达目的地local[USG6000V1-policy-security-rule-allow_telnet]action permit        //配置动作[USG6000V1-policy-security-rule-allow_telnet]quit[USG6000V1-policy-security]quit
8、配置认证模式及本地用户信息
[USG6000V1]user-interface vty 0 4[USG6000V1-ui-vty0-4]authen aaa        //用户接口的验证方式为AAA
Warning: The level of the user-interface(s) will be the default level of AAA use
rs, please check whether it is correct.[USG6000V1-ui-vty0-4]protocol inbound telnet         //允许telnet连接虚拟终端[USG6000V1-ui-vty0-4]quit[USG6000V1]aaa[USG6000V1-aaa]manager-user demo        // 配置本地用户demo[USG6000V1-aaa-manager-user-demo]password cipher demo@1234        // 配置密码
Info: You are advised to config on man-machine mode.[USG6000V1-aaa-manager-user-demo]service-type telnet        // 配置服务类型telnet
Warning: The user access modes include Telnet or FTP, so security risks exist.[USG6000V1-aaa-manager-user-demo]level 3        //配置用户权限级别[USG6000V1-aaa-manager-user-demo]quit
9、测试从telnet登录防火墙,首次登录需要修改密码,然后再重新用新密码连接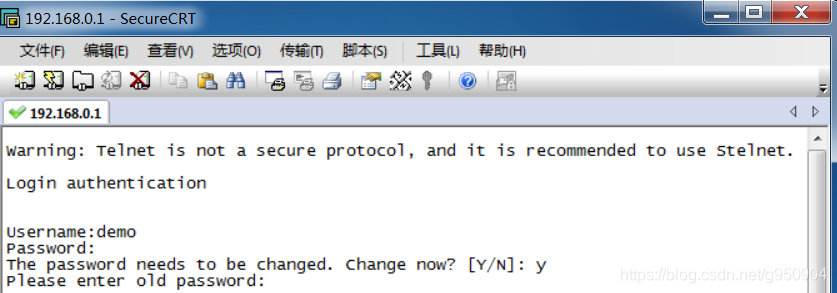
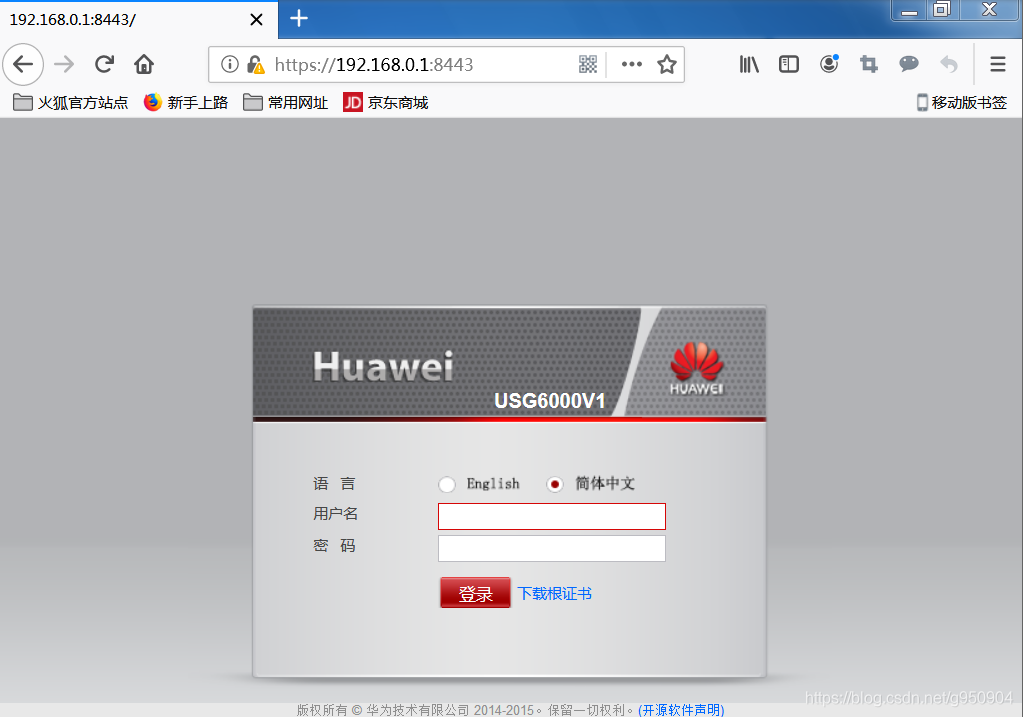
2、配置Web方式登录设备
[USG6000V1]int g0/0/0[USG6000V1-GigabitEthernet0/0/0]service-manage http permit         //打开接口的http和https管理[USG6000V1-GigabitEthernet0/0/0]service-manage https permit[USG6000V1-GigabitEthernet0/0/0]quit[USG6000V1]firewall zone trust
[USG6000V1-zone-trust]add int g0/0/0        //接口加入trust区域
 Error: The interface has been added to trust security zone.
[USG6000V1-zone-trust]quit[USG6000V1]security-policy        // 配置安全策略[USG6000V1-policy-security]rule name allow_web        //配置名为allow_web的规则[USG6000V1-policy-security-rule-allow_web]source-zone trust[USG6000V1-policy-security-rule-allow_web]destination-zone local        //指定条件[USG6000V1-policy-security-rule-allow_web]action permit        // 指定动作[USG6000V1-policy-security-rule-allow_web]quit[USG6000V1-policy-security]quit[USG6000V1]web-manager security enable        // 开启https功能
 Info: Web security-server has been enabled.[USG6000V1]aaa        //配置aaa以及本地用户[USG6000V1-aaa]manager-user demo        //以man-machine 的方式配置密码, 在此模式下, 输入的密码屏幕上不可见[USG6000V1-aaa-manager-user-demo]password

Enter Password:

Confirm Password:[USG6000V1-aaa-manager-user-demo]service-type web        //指定用户类型[USG6000V1-aaa-manager-user-demo]level 3        //指定权限级别[USG6000V1-aaa-manager-user-demo]quit[USG6000V1-aaa]quit
3、配置SSH方式登录设备
[USG6000V1]int g0/0/0[USG6000V1-GigabitEthernet0/0/0]service-manage enable [USG6000V1-GigabitEthernet0/0/0]service-manage ssh permit
[USG6000V1-GigabitEthernet0/0/0]quit[USG6000V1]firewall zone trust[USG6000V1-zone-trust]add int g0/0/0
 Error: The interface has been added to trust security zone.
[USG6000V1-zone-trust]quit[USG6000V1]security-policy
[USG6000V1-policy-security]rule name allow_ssh[USG6000V1-policy-security-rule-allow_ssh]source-zone trust[USG6000V1-policy-security-rule-allow_ssh]destination-zone local[USG6000V1-policy-security-rule-allow_ssh]action permit[USG6000V1-policy-security-rule-allow_ssh]quit[USG6000V1-policy-security]quit[USG6000V1]rsa local-key-pair create        //创建所需的密钥对
The key name will be: USG6000V1_Host
The range of public key size is (512 ~ 2048).
NOTES: If the key modulus is greater than 512,
       it will take a few minutes.
Input the bits in the modulus[default = 2048]:
Generating keys...
.+++++........................++....++++...........++[USG6000V1]user-manage vty 0 4[USG6000Vl-ui-vty0-4]authentication-mode aaa[USG6000Vl-ui-vty0-4]protocol inbound ssh[USG6000Vl-ui-vty0-4Jquit[USG6000Vl]ssh user test[USG6000Vl]ssh user test authentication-type password[USG6000Vl]ssh user test service-type stelnet        //配置服务类型[USG6000Vl]aaa[USG6000Vl-aaa]rnanager-user test        //创建本地用户test[USG6000Vl-aaa-manager-user-test]password cipher test@123        //指定密码[USG6000Vl-aaa-manager-user-test]service-type ssh[USG6000Vl-aaa-manager-user-test]level 3[USG6000Vl-aaa-manager-user-test]quit[USG6000Vl-aaa]quit[USG6000Vl]stelnet server enable        //开启SSH
4、配置安全策略
1、让内部的pc1可以ping通外部的主机
[USG6000V1]security-policy
[USG6000V1-policy-security]rule name pc1toout[USG6000V1-policy-security-rule-pc1toout]source 192.168.1.2 32[USG6000V1-policy-security-rule-pc1toout]destination-zone untrust
[USG6000V1-policy-security-rule-pc1toout]service icmp[USG6000V1-policy-security-rule-pc1toout]action permit
[USG6000V1-policy-security-rule-pc1toout]quit[USG6000V1-policy-security]quit
查看会话
[USG6000V1]display firewall session table
 Current Total Sessions : 1
 netbios-data  VPN: default --> default  192.168.0.2:138 --> 192.168.0.255:138
2、让外部的主机可以访问dmz中的ftp,http以及ping
[USG6000V1]security-policy
[USG6000V1-policy-security]rule name outtodmz[USG6000V1-policy-security-rule-outtodmz]source-zone untrust
[USG6000V1-policy-security-rule-outtodmz]destination-address 192.168.3.2 32[USG6000V1-policy-security-rule-outtodmz]service icmp[USG6000V1-policy-security-rule-outtodmz]service http[USG6000V1-policy-security-rule-outtodmz]service ftp[USG6000V1-policy-security-rule-outtodmz]action permit
[USG6000V1-policy-security-rule-outtodmz]quit[USG6000V1-policy-security]quit
三、NAT概述
1、NAT分类
1、NAT No- PAT:类似于Cisco的动态转换,只转换源IP地址不转换端口,属于多对多转换。
2、NAPT(网络地址和端口转换) :类似于Cisco 的PAT转换,NAPT既转换报文的源地址,又转换源端口。转换后的地址不能是外网接口IP地址,属于多对多或多对一转换。
3、出接口地址(Easy-IP):和NAPT— 样,既转换源IP地址又转换源端口。区别是出接口地址方式转换后的地址只能是NAT设备外网接口所配置的IP地址,属于多对—转换。
4、Smart NAT (智能转换):通过预留一个公网地址进行NAPT转换而其他的公网地址用来进行NAT No-PAT转换。
5、三元组NAT:与源IP地址源端口和协议类型有关的—种转换,将源IP地址和源端口转换为固定公网IP地址和端口。
2、NAT配置
1、NAT No- PAT方式的地址转换
配置网络参数及路由
[USG6000V1]int g1/0/1[USG6000V1-GigabitEthernet1/0/1]ip add 192.168.1.254 24[USG6000V1-GigabitEthernet1/0/1]un shInfo: Interface GigabitEthernet1/0/1 is not shutdown.[USG6000V1-GigabitEthernet1/0/1]int g1/0/0[USG6000V1-GigabitEthernet1/0/0]ip add 202.96.1.1 24[USG6000V1-GigabitEthernet1/0/0]un shInfo: Interface GigabitEthernet1/0/0 is not shutdown.[USG6000V1-GigabitEthernet1/0/0]quit[USG6000V1]ip route-static 0.0.0.0 0.0.0.0 202.96.1.2
配置安全策略
[USG6000V1]firewall zone trust
[USG6000V1-zone-trust]add int g1/0/1        //内网接口加入trust区域[USG6000V1-zone-trust]quit[USG6000V1]firewall zone untrust
[USG6000V1-zone-untrust]add int g1/0/0        //外网接口加入untrust区域[USG6000V1-zone-untrust]quit[USG6000V1]security-policy        //配置安全策略[USG6000V1-policy-security]rule name sec_1        //配置第 一 个规则并指定规则名sec_1[USG6000V1-policy-security-rule-sec_1]source-zone trust        //指定条件[USG6000V1-policy-security-rule-sec_1]destination-zone untrust         //内网到外网[USG6000V1-policy-security-rule-sec_1]source-address 192.168.1.0 24        //允许192.168.1.0网段通过[USG6000V1-policy-security-rule-sec_1]action permit         //指定动作[USG6000V1-policy-security-rule-sec_1]quit[USG6000V1-policy-security]quit
配置NAT地址组
[USG6000V1]nat address-group natgroup //配置NAT地址组,指定名称natgroup[USG6000V1-address-group-natgroup]section 0 202.96.1.10 202.96.1.11 //指定地址组的起始地址和结束地址[USG6000V1-address-group-natgroup]mode no-pat local //指定地址组的模式为no-pat[USG6000V1-address-group-natgroup]quit
配置NAT策略
[USG6000V1]nat-policy //配置NAT策略[USG6000V1-policy-nat]rule name natpolicy //配置名称为natpolicy的NAT规则[USG6000V1-policy-nat-rule-natpolicy]source-address 192.168.1.0 24 //192.168.1.0网段[USG6000V1-policy-nat-rule-natpolicy]source-zone trust //来自trust[USG6000V1-policy-nat-rule-natpolicy]destination-zone untrust //去往untrust[USG6000V1-policy-nat-rule-natpolicy]action nat address-group natgroup //满足条件的数据包将依据地址组做NAT No-PAT方式的源地址转换[USG6000V1-policy-nat-rule-natpolicy]quit[USG6000V1-policy-nat]quit
针对转换后的全局地址(NAT地址组中的地址)配置黑洞路由
[USG6000V1]ip route-static 202.96.1.10 32 NULL 0        //将转换后的地址所在的网络指向空接口[USG6000V1]ip route-static 202.96.1.11 32 NULL 0        //防火墙接收到的数据包匹配黑洞路由时将被丢弃
所以不会形成环路
2、出接口地址(easy-ip)方式的地址转换
之前同上,配置NAT策略
[USG6000V1]nat-policy //配置NAT策略[USG6000V1-policy-nat]rule name natpolicy //配置名称为natpolicy的NAT规则[USG6000V1-policy-nat-rule-natpolicy]source-address 192.168.1.0 24 //192.168.1.0网段[USG6000V1-policy-nat-rule-natpolicy]source-zone trust //来自trust[USG6000V1-policy-nat-rule-natpolicy]destination-zone untrust //去往untrust[USG6000V1-policy-nat-rule-natpolicy]action nat easy-ip //配置出接口方式[USG6000V1-policy-nat-rule-natpolicy]quit[USG6000V1-policy-nat]quit
3、NAT Server
配置网络参数及路由
[USG6000V1]int g1/0/1[USG6000V1-GigabitEthernet1/0/1]ip add 192.168.1.254 24[USG6000V1-GigabitEthernet1/0/1]un shInfo: Interface GigabitEthernet1/0/1 is not shutdown.[USG6000V1-GigabitEthernet1/0/1]int g1/0/0[USG6000V1-GigabitEthernet1/0/0]ip add 202.96.1.1 24[USG6000V1-GigabitEthernet1/0/0]un shInfo: Interface GigabitEthernet1/0/0 is not shutdown.[USG6000V1-GigabitEthernet1/0/0]quit[USG6000V1]ip route-static 0.0.0.0 0.0.0.0 202.96.1.2
配置安全策略
[USG6000V1]firewall zone trust[USG6000V1-zone-trust]add int g1/0/1[USG6000V1-zone-trust]quit[USG6000V1]firewall zone untrust
[USG6000V1-zone-untrust]add int g1/0/0[USG6000V1-zone-untrust]quit[USG6000V1]security-policy
[USG6000V1-policy-security]rule name sec_1[USG6000V1-policy-security-rule-sec_1]source-zone untrust
[USG6000V1-policy-security-rule-sec_1]destination-zone trust
[USG6000V1-policy-security-rule-sec_1]destination-address 192.168.1.0 24[USG6000V1-policy-security-rule-sec_1]service permit
 Error: The specified object permit does not exist.[USG6000V1-policy-security-rule-sec_1]service ftp        //配置条件为ftp协议[USG6000V1-policy-security-rule-sec_1]action permit
[USG6000V1-policy-security-rule-sec_1]quit[USG6000V1-policy-security]quit
配詈FTP应用层检测(默认已开启)
[USG6000V1]firewall interzone trust untrust
[USG6000V1-interzone-trust-untrust]detect ftp[USG6000V1-interzone-trust-untrust]quit
配置 NAT Server
[USG6000V1]nat server natserver_ftp protocol tcp global 202.96.10.10 21 inside
192.168.1.10 21        //外网用户访问202.96.10.10: 21瑞口时,将转换地址和端口为192.168.1.10:21发送到内网服务器
配置黑洞路由
[USG6000V1]ip route-static 202.96.10.10 32 NULL 0
查看名称为natpolicy的NAT策略
[USG6000V1]display nat-policy rule natpolicy
四、防火墙双机热备
双机热备配置
模式
1、热备模式:同一时间只有一台防火场转发数据包,其他防火墙不转发数据包,但是会同步会话表及Server-map表。
2、负载均衡模式:同一时间,多台防火姗同时转发数据,但每个防火墙又作为其他防火墙的备用设备,即每个防火墙既是主用设备也是备用设备,防火墙之间同步会话表及Server-map表。
接口加入安全区域并配置安全策略
[FW1]firewall zone trust[FW1-zone-trust]add int g1/0/2[FW1-zone-trust]firewall zone dmz[FW1-zone-dmz]add int g1/0/1[FW1-zone-dmz]firewall zone untrust[FW1-zone-untrust]add int g1/0/0[FW1-zone-untrust]quit[FW1]security-policy
[FW1-policy-security]rule name permit_head[FW1-policy-security-rule-permit_head]source-zone local[FW1-policy-security-rule-permit_head]destination-zone dmz[FW1-policy-security-rule-permit_head]action permit[FW1-policy-security-rule-permit_head]quit[FW1-policy-security]rule name permit_trust_untrust[FW1-policy-security-rule-permit_trust_untrust]source-zone trust[FW1-policy-security-rule-permit_trust_untrust]destination-zone untrust
[FW1-policy-security-rule-permit_trust_untrust]action permit
[FW1-policy-security-rule-permit_trust_untrust]quit[FW1-policy-security]quit
[FW2]security-policy
[FW2-policy-security]rule name permit_head[FW2-policy-security-rule-permit_head]source-zone local[FW2-policy-security-rule-permit_head]destination-zone dmz[FW2-policy-security-rule-permit_head]action permit
[FW2-policy-security-rule-permit_head]quit[FW2-policy-security]rule name permit_trust_untrust[FW2-policy-security-rule-permit_trust_untrust]source-zone trust[FW2-policy-security-rule-permit_trust_untrust]destination-zone untrust[FW2-policy-security-rule-permit_trust_untrust]action permit
[FW2-policy-security-rule-permit_trust_untrust]quit[FW2-policy-security]quit
配置VRRP备份组
[FW1]int g1/0/2[FW1-GigabitEthernet1/0/2]vrrp vrid 1 virtual-ip 192.168.1.100 active    //设置本端状态[FW1-GigabitEthernet1/0/2]quit[FW1]int g1/0/0[FW1-GigabitEthernet1/0/0]vrrp vrid 2 virtual-ip 10.1.1.100 active    //设置本端状态[FW1-GigabitEthernet1/0/0]quit[FW1]hrp interface GigabitEthernet 1/0/1 remote 172.16.1.2    //配置心跳接口[FW1]hrp enable    //启动双机热备
HRP_M[FW1]hrp auto-sync     //配置自动备份模式[FW2]int g1/0/2[FW2-GigabitEthernet1/0/2]vrrp vrid 1 virtual-ip 192.168.1.100 standby     //设置对端状态[FW2-GigabitEthernet1/0/2]quit[FW2]int g1/0/0[FW2-GigabitEthernet1/0/0]vrrp vrid 2 virtual-ip 10.1.1.100 standby     //设置对端状态[FW2-GigabitEthernet1/0/0]quit[FW2]hrp interface GigabitEthernet 1/0/1 remote 172.16.1.1    //配置心跳接口[FW2]hrp enable    //启用双机热备
HRP_S[FW2]hrp auto-sync     //配置自动备份模式
查看双机热备的状态信息
HRP_M[FW1]display hrp state
 Role: active, peer: standby
 Running priority: 45000, peer: 45000
 Core state: normal, peer: normal
 Backup channel usage: 0.00%
 Stable time: 0 days, 0 hours, 0 minutes
 Last state change information: 2020-03-25 7:14:52 HRP core state changed, old_s
tate = abnormal(standby), new_state = normal, local_priority = 45000, peer_prior
ity = 45000.
查看心跳接口状态
HRP_M[FW1]disp
HRP_M[FW1]display hrp int
             GigabitEthernet1/0/1 : running
推荐本站淘宝优惠价购买喜欢的宝贝:

本文链接:https://hqyman.cn/post/5596.html 非本站原创文章欢迎转载,原创文章需保留本站地址!

 微信支付宝扫一扫,打赏作者吧~
休息一下~~