This is a step-by-step tutorial for setting up LTE WAN on pfSense 2.6.
Known working LTE modems
Here's a list of 3G/4G modems that have been tested with APU2E5, APU3, APU4, :
Huawei ME909s-120
Huawei ME909u-521
Number of other modems
Many other modems are also working well, but have not been tested. if you don't have a modem yet, consider buying one of the listed ones.
pfSense publishes it's own list of known working modems which you can find here: https://doc.pfsense.org/index.php/Known_Working_3G-4G_Modems many of these modems will also work with APU, but we haven't tested them so can't make any compatibility guarantees.
Linux operating systems (IPFire, OpenWRT, debian, Voyage) have much wider support for the LTE modems.
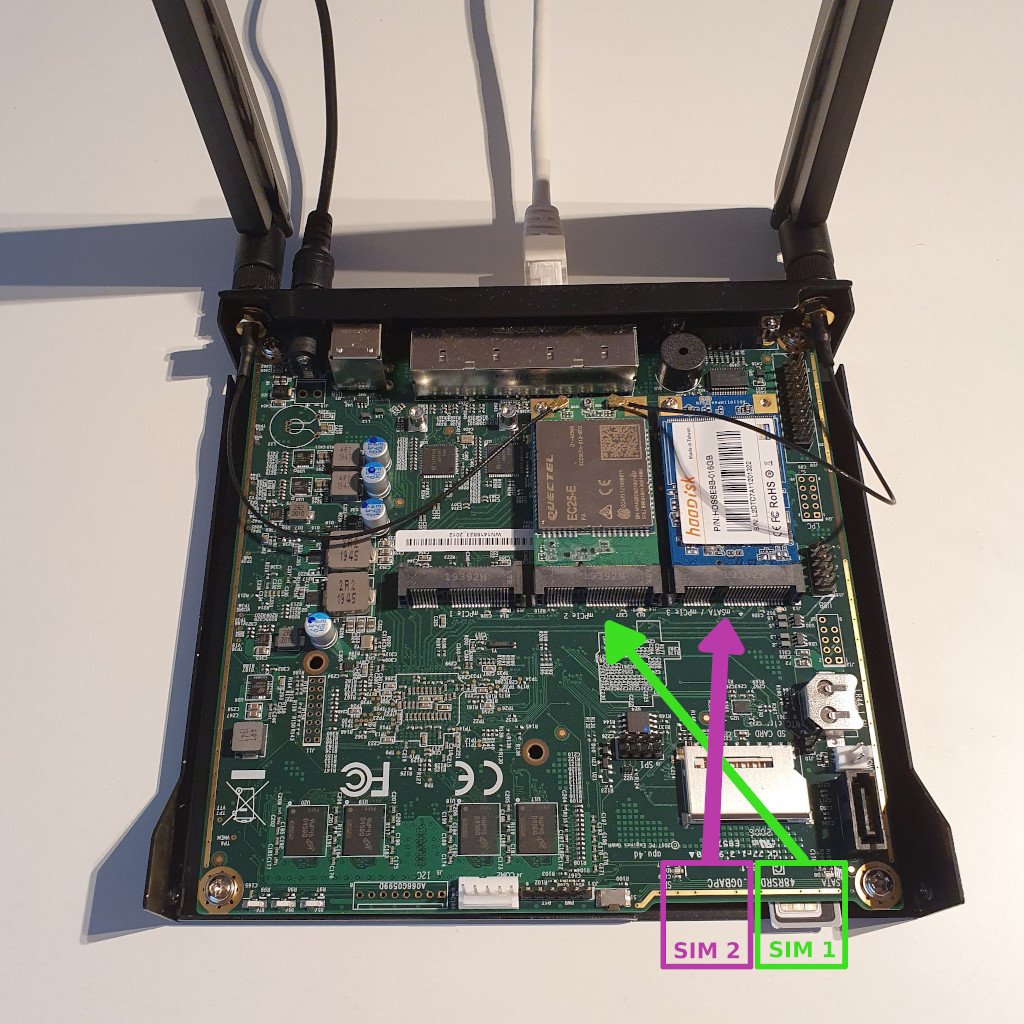
See how SIM slots are connected to the mPCIe ports.
SIM1 is connected to J15
SIM2 is connected to J14
Note: J14 is typically used for mSata SSD drive. If you plan on connecting 2 LTE modems, you must install operating system on the SD card.
Step 0: connect your hardware properly
You can connect 2 LTE modems to APU3/APU4 boards, but typically you will use only one.
Connect your modem to the middle mPCIe port and your SIM card to SIM 1 port (refer to the image).
If you want to connect 2 modems, you will have to install the operating system on SD card. The first mPCIe port is shared between SATA drive and LTE modem.
If you decide to use the first mPCIe slot (mSATA), you must enable EHCI0 controller in BIOS. Otherwise the modem won't be detected.
The last mPCIe is intended for WiFi. Modem won't work in this port because it's not wired to a SIM slot (it will be detected though)
WARNING: make sure you use a new BIOS version (from 2019 or newer). Older BIOS versions had opposite wiring of SIM to mPCIe slots. SIM 1 was connected to the first mPCIe slot instead of the middle one.
Step 1: Install pfSense
Installation of pfSense is covered by a separate article. Follow the pfSense installation instructions and come back.
Step 2: Add boot delay
Note: This step is only necessary for some modems such as Huawei.
Huawei takes about 20 seconds to fully initialize and be detected by the operating system. You must add a boot delay in the operating system to allow enough time for the modem to initialize. We recommend setting the loader_delay variable to 40 seconds.
Boot the operating system and edit /boot/loader.conf
loader_delay="40"
Note, there is another configuration variable called "autoboot_delay". This is something else. Don't confuse these two.
See the video to the right for more details.
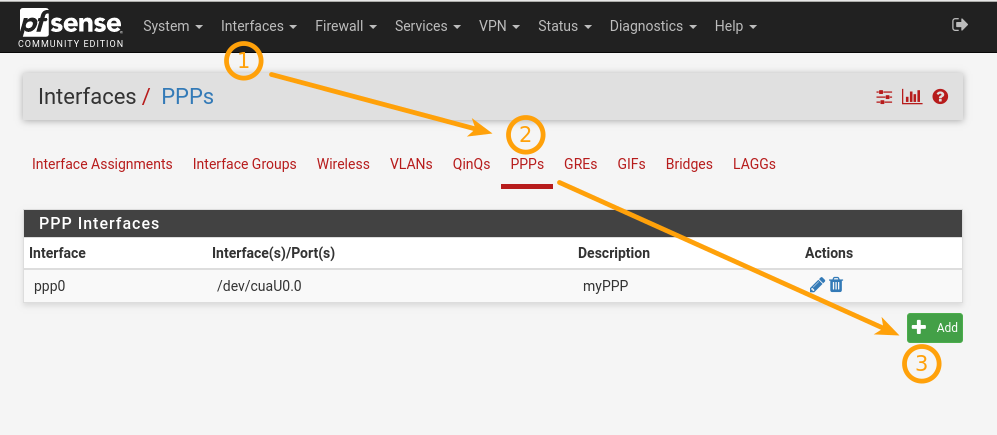
Step 3: setup PPP interface in pfSense
Login to the web UI, go to "interfaces"->"Assignments"->PPPs->"Add"
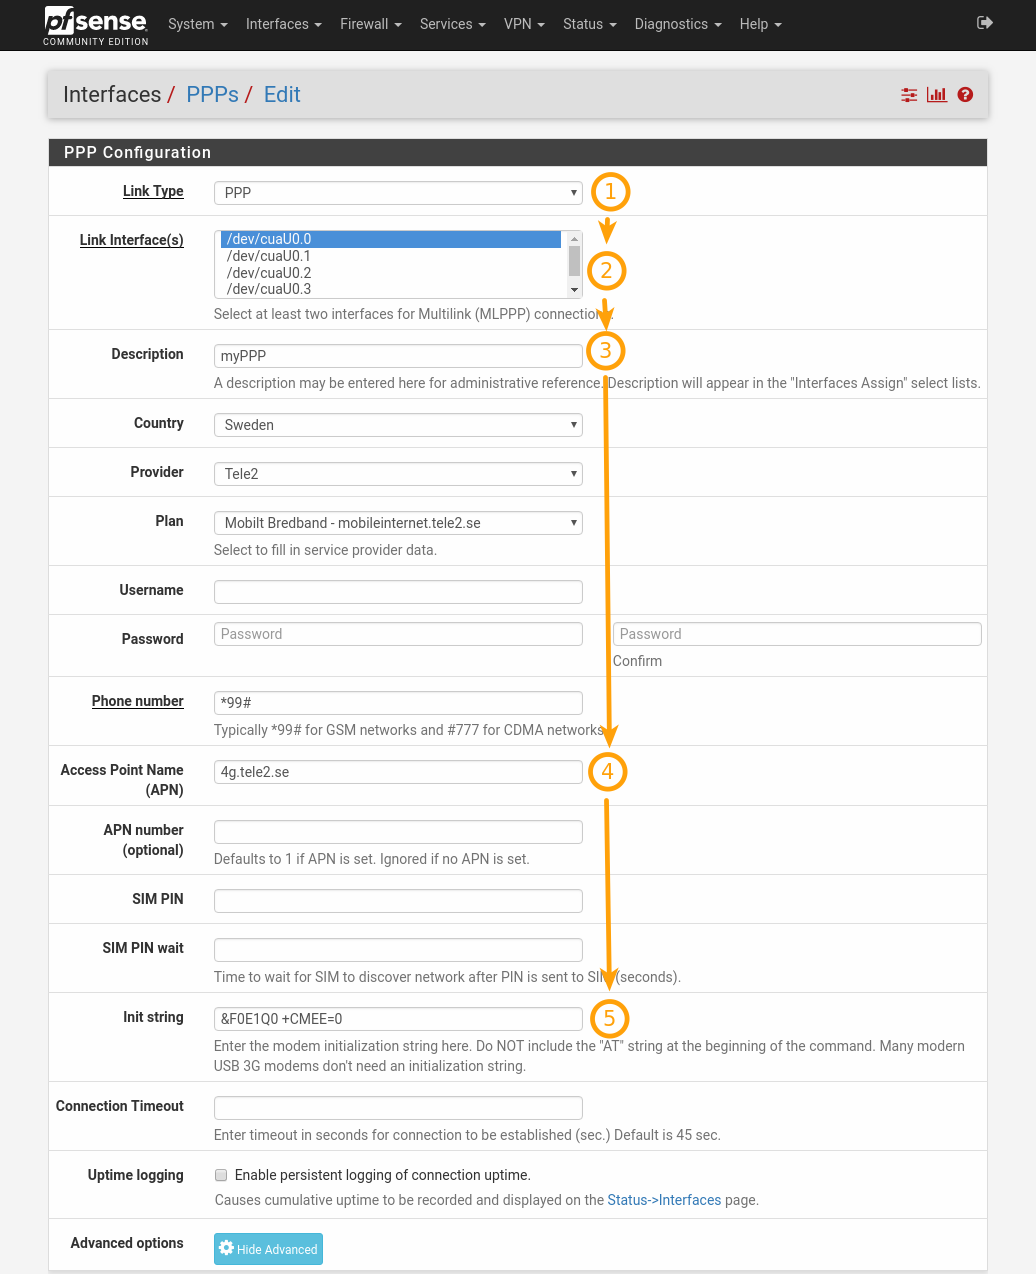
PPP configuration fields:
Link Type: PPP
Link Interface: is different for different modems. For Huawei it's /dev/cuaU0.0 for Quectel it's /dev/cuaU0.3
Note: If you only see /dev/cuau0 and /dev/cuau1 in this list, it means that your modem is not detected. Try rebooting the router.
Access Point Name (APN): ???
Note: You can select Country, Provider and Plan, this will populate the Phone number and APN fields, but remember that these values can be incorrect!
APN field depends on your provider. Try googling "Provider APN". For example, "Tele2 APN".
For Tele2 in Sweden the APN is "4g.tele2.se".
Phone number: *99# (this is almost always the same)
Init string: &F
Note: your provider may require different, special init string. Different modems also accept different commands. "&F" is a minimal working init string. If you leave this field empty, pfSense will use default "AT&F&C1&D2E0S0=0M1" which won't work.
If you have a PIN set on your SIM card, fill that in. If you don't leave it empty.
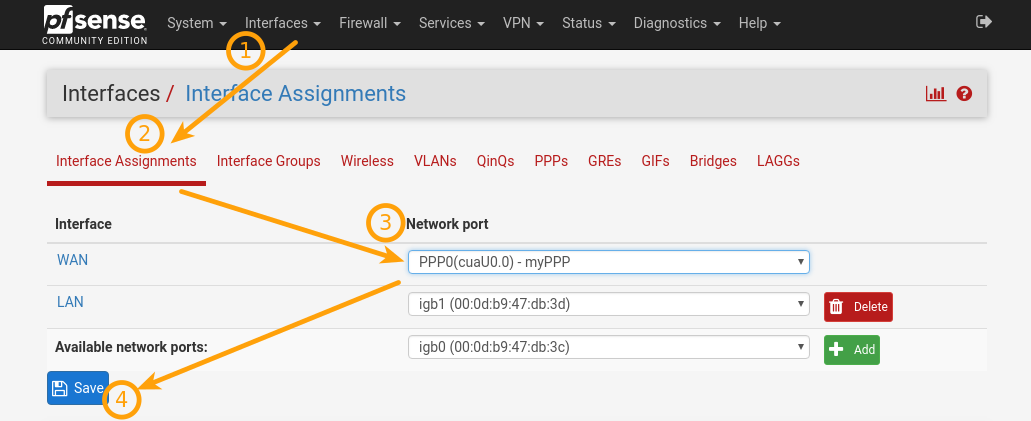
Step 4: Assign PPP interface as WAN
Once the PPP is created, go to Interfaces->Assign and select PPP in place of your old WAN.
 Step 5: verify that it works
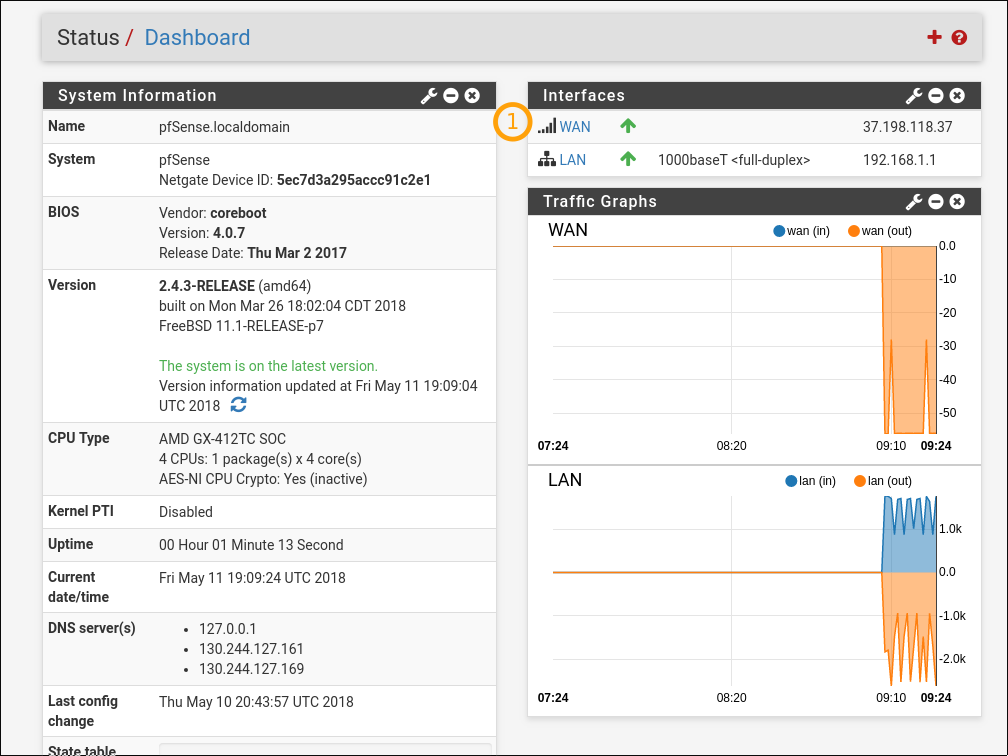
if the stars aligned just right, you should have internet connection through LTE now. The WAN interface should show a green arrow up on the dashboard.
推荐本站淘宝优惠价购买喜欢的宝贝:
本文链接:https://hqyman.cn/post/7689.html 非本站原创文章欢迎转载,原创文章需保留本站地址!
休息一下~~


 微信支付宝扫一扫,打赏作者吧~