
超好用的 AI 智能助手 -- Open WebUI
Open WebUI 是一款功能强大的 AI 智能助手,不仅支持语音输入输出,上传文件,个人知识库,在线展示 Mermaid,还支持联网查询等诸多功能。
如果你有本地运行大语言模型的需求,Open WebUI 会是个很不错的选择。
安装 Open WebUI
目前有两种安装 Open WebUI 的方式。
01

Docker 安装
如果你已经安装过 Docker 的话,运行如下命令即可安装 Open WebUI:
docker run -d -p 8080:8080 --add-host=host.docker.internal:host-gateway -v open-webui:/app/backend/data --name open-webui --restart always ghcr.io/open-webui/open-webui:main
如果你还安装过 Docker 的话,可在 https://www.docker.com/products/docker-desktop/ 下载 Docker 桌面版。
02
Python pip 安装
另外一种方式是通过 pip 安装:
// 安装 Open WebUI$ pip install open-webui// 运行 Open WebUI$ open-webui serve
安装完成后,在浏览器中打开 localhost:8080,即可使用 Open WebUI。
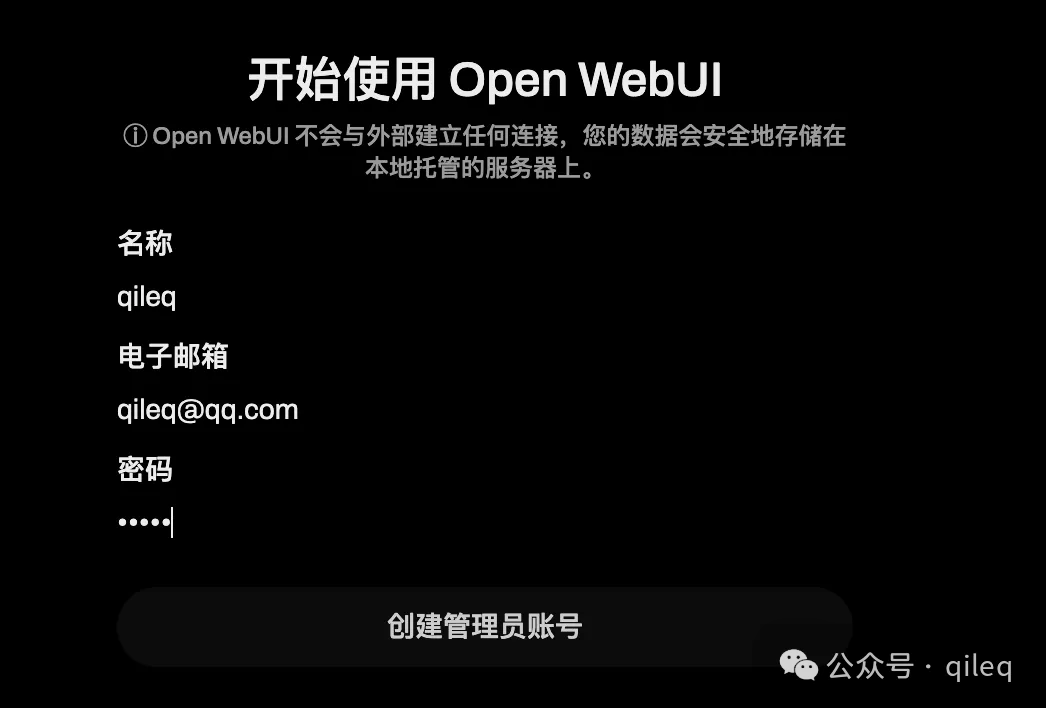
首先我们创建管理员账号:
然后在设置->通用->语言中,修改语言为“简体中文”:

通用设置配置完后,我们再来配置大模型。
配置大语言模型 API
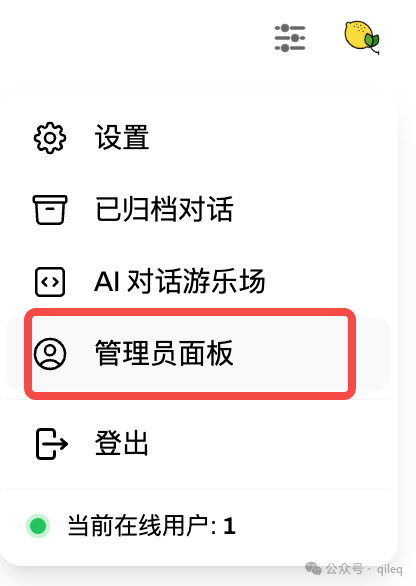
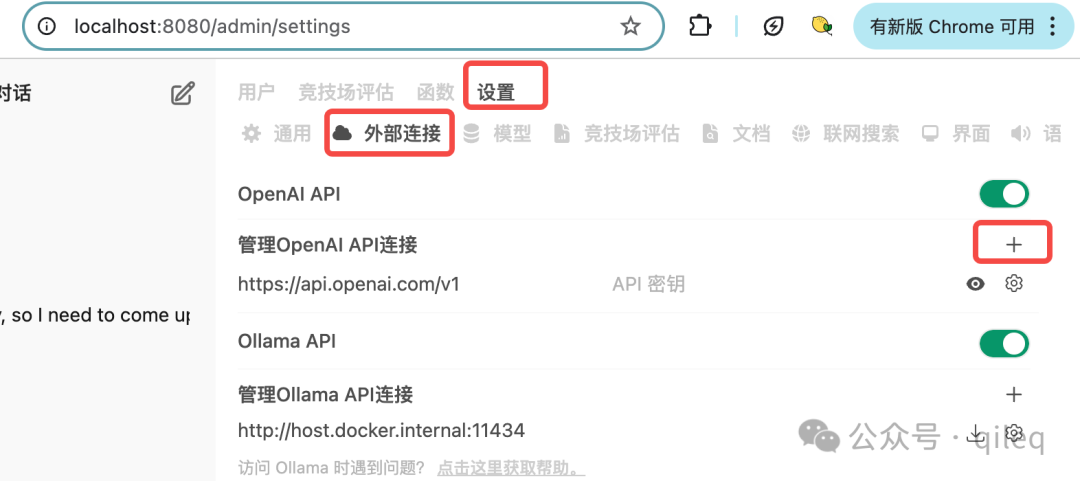
首先进入“管理员面板”。
然后点击设置 -> 外部连接-> 添加 API 连接。
此时弹出如下对话框:
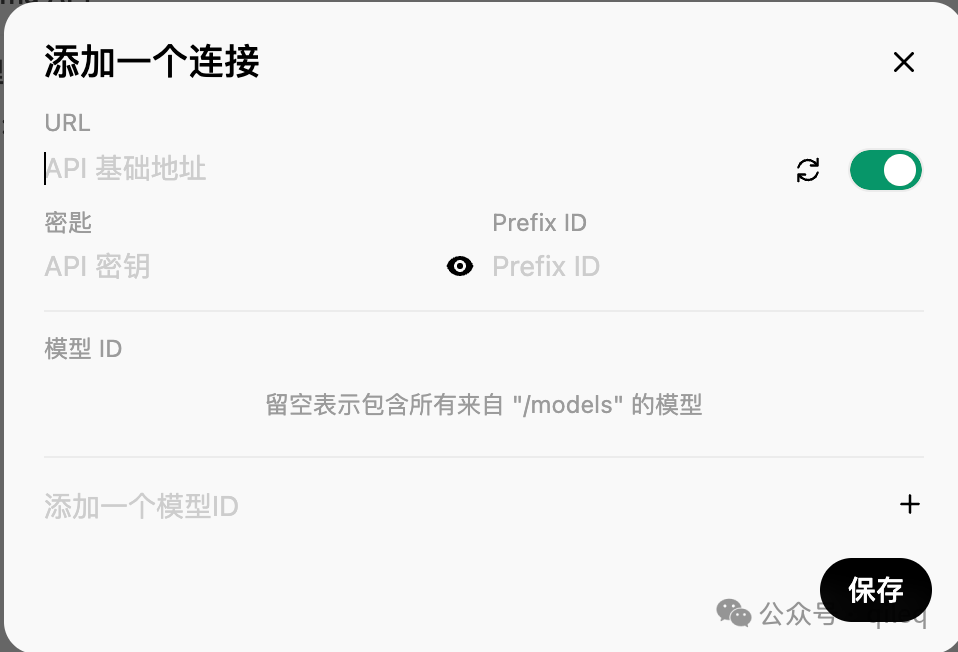
我们需要输入对应服务的 API 地址和 key。
这里列下常用的 API 地址和生成对应 key 的地址,方便大家快速配置:
| AI 服务 | API 地址 | API Key 地址 |
| OpenAI | https://api.openai.com/v1 | https://platform.openai.com/api-keys |
| Claude | https://api.anthropic.com/v1/complete | https://console.anthropic.com/ |
| DeepSeek | https://api.deepseek.com | https://platform.deepseek.com/api_keys |
| 豆包 | https://ark.cn-beijing.volces.com/api/v3/chat/completions | https://console.volcengine.com/ark/region:ark+cn-beijing/apiKey |
| 通义千问-Max | https://dashscope.aliyuncs.com/compatible-mode/v1 | https://bailian.console.aliyun.com/?apiKey=1#/api-key |
| 硅基流动 | https://api.siliconflow.cn/v1 | https://cloud.siliconflow.cn/account/ak |
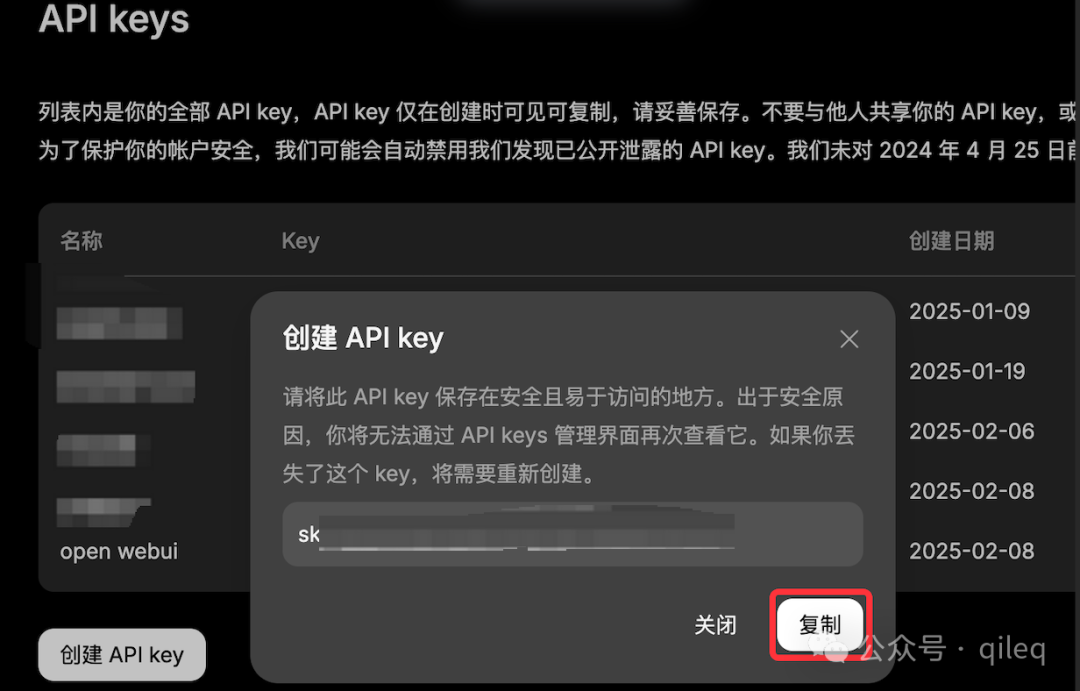
以 DeepSeek 为例,在浏览器中打开 https://platform.deepseek.com/api_keys ,点击创建 API key 按钮,点击复制。
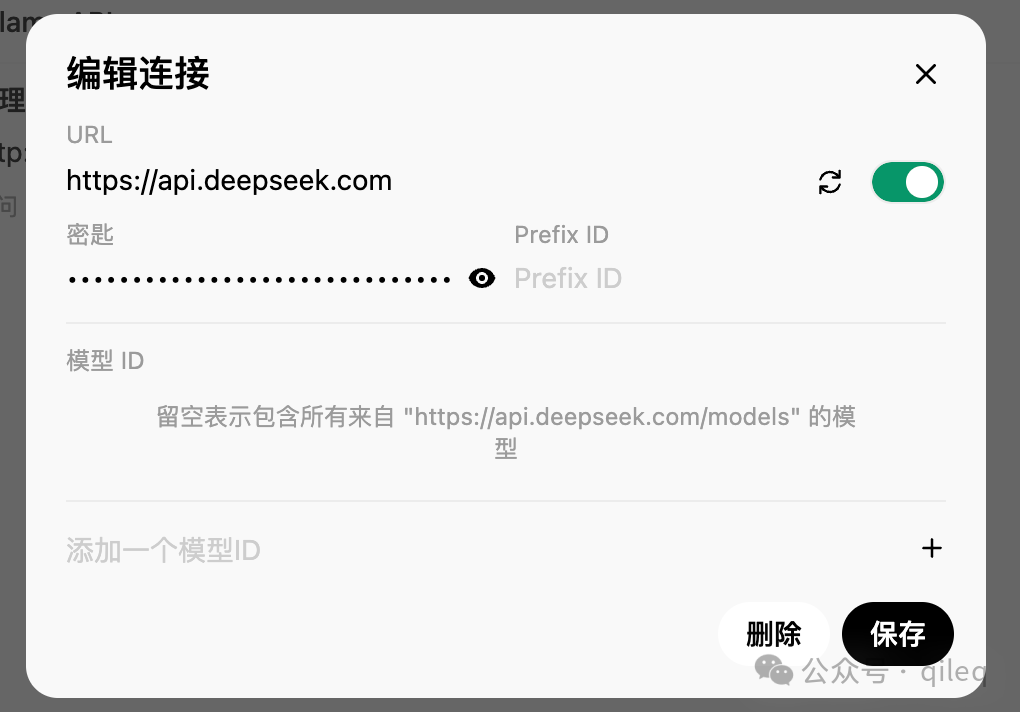
回到 Open WebUI 界面,在 URL 一栏中输入 https://api.deepseek.com ,密匙为刚复制的 key。
点击保存后,回到聊天窗口,点击左上角的模型,可以看到 DeepSeek 的两个模型:
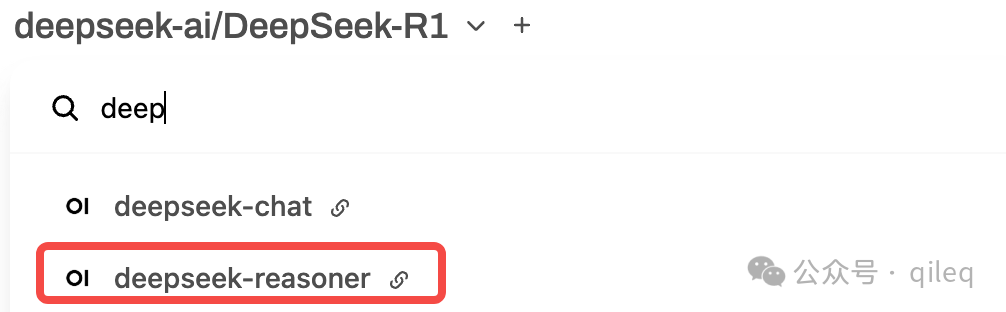
其中:
1. deepseek-chat 表示 V3
2. deepseek-reasoner 表示 R1
鉴于最近 DeepSeek API 太卡的原因,推荐配置硅基流动 (https://cloud.siliconflow.cn/i/W2JAdPRe) 的 API。
配置 Ollama 服务
如果你本地已经搭建过 Ollama,还可以在配置中设置本地 Ollama 服务。如果还没搭建的话,可参考此文搭建。
同样点击管理员面板 -> 设置-> 外部连接,找到 Ollama API 配置,点击添加连接按钮。
若是 docker 启动的服务,可设置 http://host.docker.internal:11434。
若是 python 启动的服务,可设置 http://localhost:11434。
回到聊天窗口,点击左上角的模型,可以看到自己本地安装的模型。

联网搜索
默认情况下,Open WebUI 未开启联网搜索功能。
我们可以点击管理员面板 -> 设置 -> 联网搜索中开启联网搜索。
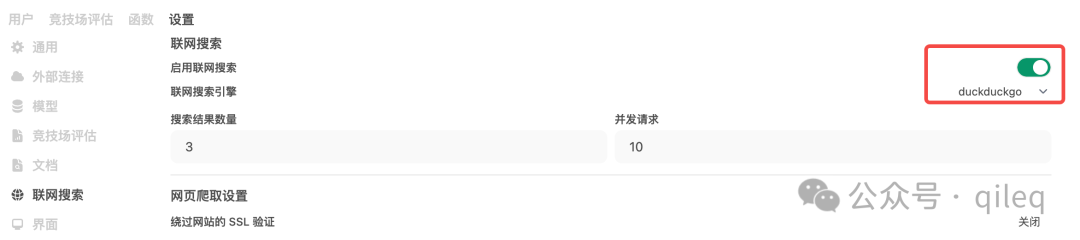
根据官方文档显示,目前支持 Google、Bing、DuckDuckGo 等搜索引擎,前两个搜索引擎都是通过 API 的方式来进行搜索的,为简单起见,直接使用 DuckDuckGo 也行。
回到聊天窗口,点击 “+” ,开启“联网搜索”功能,测试效果如下:
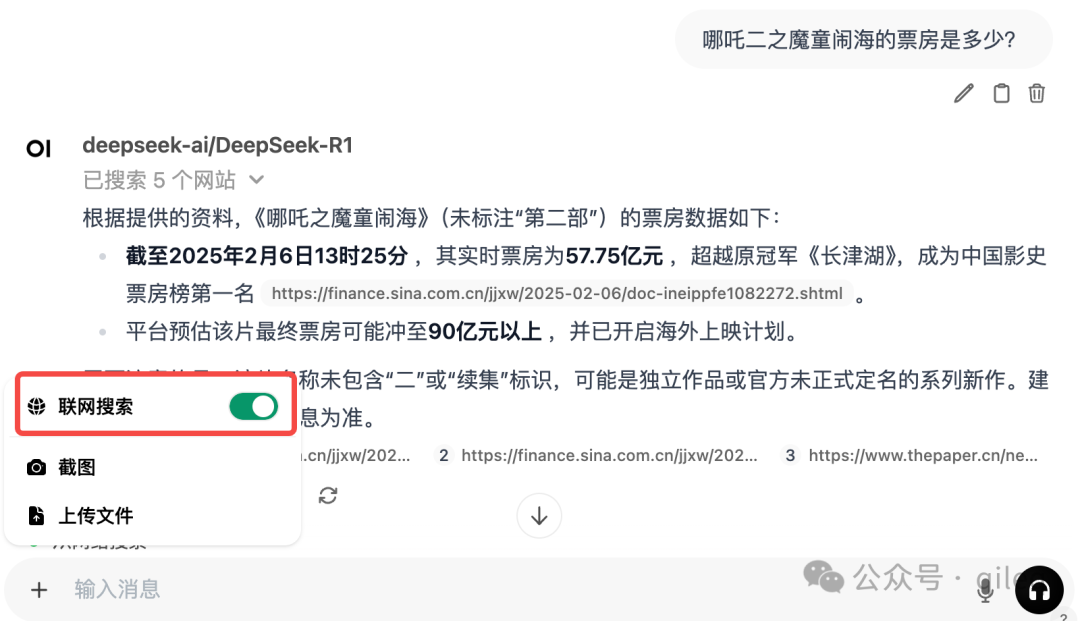
发现没有,通过 DeepSeek API 和联网功能,我们相当于在本地搭建了一个满血且能联网的 DeepSeek R1 大模型了!
再加上支持知识库和工具等功能, Open WebUI 的整体可玩性还是蛮强的。
推荐本站淘宝优惠价购买喜欢的宝贝:

本文链接:https://hqyman.cn/post/9048.html 非本站原创文章欢迎转载,原创文章需保留本站地址!

 微信支付宝扫一扫,打赏作者吧~
休息一下~~