
开源免费vρν平台Anylink部署使用——具备图形化管理界面
AnyLink 基于 ietf-openconnect 协议开发,并且借鉴了 ocserv 的开发思路,使其可以同时兼容 AnyConnect 客户端。
github地址:https://github.com/bjdgyc/anylinkgitee地址:https://gitee.com/bjdgyc/anylink
1. 测试环境说明
yum install iptables iproute -y
2. 安装和配置anylink
2.1 下载anylink
https://github.com/bjdgyc/anylink/releases
https://github.com/bjdgyc/anylink/releases/download/v0.12.1/anylink-0.12.1-linux-amd64.tar.gz
2.2 解压软件
tar -zxf anylink-0.12.1-linux-amd64.tar.gz -C /usr/local
2.3 生成管理员密码
cd /usr/local/anylink-deploy/./anylink tool -p Aa@123456

$2a$10$SbmlC6LYL2lxAqZgxtBiEOnKAjt3E8MP5S9/lMSuIgoX8OzBacsMi
2.4 生成jwt密码
./anylink tool -s

EYG_uvTRQv3COit7lWlBbK3VPCgSZrYQfnWbj1FpLcfm6yJ0HbQ0cqXb
2.5 修改配置
vi server.toml
issuer = "host01"admin_pass = "$2a$10$SbmlC6LYL2lxAqZgxtBiEOnKAjt3E8MP5S9/lMSuIgoX8OzBacsMi"jwt_secret = "EYG_uvTRQv3COit7lWlBbK3VPCgSZrYQfnWbj1FpLcfm6yJ0HbQ0cqXb"ipv4_master = "ens32" #根据网卡名称自定义
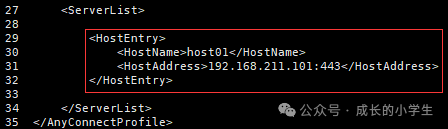
2.7 修改provile.xml文件
vi /usr/local/anylink-deploy/conf/profile.xml
<HostName>host01</HostName> # 第30行,最好与server.toml配置文件中的系统名称保持一致,用于客户端区分<HostAddress>192.168.211.101:443</HostAddress> # 第31行,客户端连接地址,域名加端口,或者IP加端口
3. 生成自签证书
3.1 备份原来软件包自带的证书
cd /usr/local/anylink-deploy/confmkdir bakmv vpn_cert.* bak
3.2 创建配置文件,请修改为自己IP地址和域名
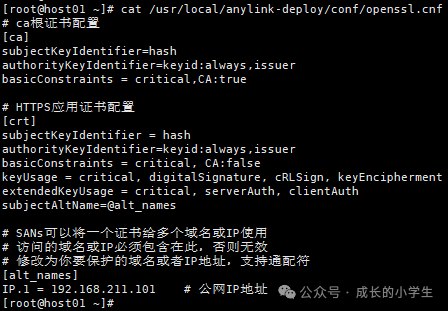
vi /usr/local/anylink-deploy/conf/openssl.cnf
# ca根证书配置[ca]subjectKeyIdentifier=hashauthorityKeyIdentifier=keyid:always,issuerbasicConstraints = critical,CA:true# HTTPS应用证书配置[crt]subjectKeyIdentifier = hashauthorityKeyIdentifier=keyid:always,issuerbasicConstraints = critical, CA:falsekeyUsage = critical, digitalSignature, cRLSign, keyEnciphermentextendedKeyUsage = critical, serverAuth, clientAuthsubjectAltName=@alt_names# SANs可以将一个证书给多个域名或IP使用# 访问的域名或IP必须包含在此,否则无效# 修改为你要保护的域名或者IP地址,支持通配符[alt_names]IP.1 = 192.168.211.101 # 公网IP地址# DNS.1 = anylink.com # 访问的域名,没有域名可以删掉
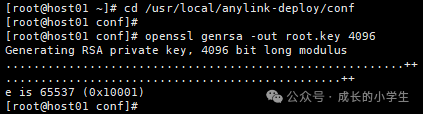
3.3 生成根私钥
cd /usr/local/anylink-deploy/confopenssl genrsa -out root.key 4096
3.4 生成根证书请求文件
openssl req -new -key root.key -out root.csr -subj "/C=CN/ST=Guangxi/L=Liuzhou/O=Public/OU=Public/CN=192.168.211.101"
C:所在国家 (Country),只能是两位字母缩写ST:所在省份(State)L:所在城市(Locality)O:所在组织(Organization)OU:所在部门(Organization Unit)CN:公用名,即域名(Common Name),如果不使用域名,就填IP地址
3.5 生成根证书
openssl x509 -req -extfile openssl.cnf -extensions ca -in root.csr -out root.crt -signkey root.key -CAcreateserial -days 3650
-req: 证书请求-extfile:扩展文件配置和-extensions参数使用-extensions:扩展配置-in:证书请求文件-out:证书输出文件-signkey:签名的私钥-days:有效期
3.6 生成vρν的私钥
openssl genrsa -out vpn_cert.key 4096
3.7 生成vρν证书的请求文件
openssl req -new -key vpn_cert.key -out vpn_cert.csr -subj "/C=CN/ST=Guangxi/L=Liuzhou/O=Public/OU=Public/CN=192.168.211.101"
3.8 签发vρν证书
openssl x509 -req -extfile openssl.cnf -extensions crt -CA root.crt -CAkey root.key -CAserial vpn_cert.srl -CAcreateserial -in vpn_cert.csr -out vpn_cert.pem -days 3650

3.9 删除多余的中间文件
rm -rf root.csr vpn_cert.csr vpn_cert.srl vpn_cert.crt
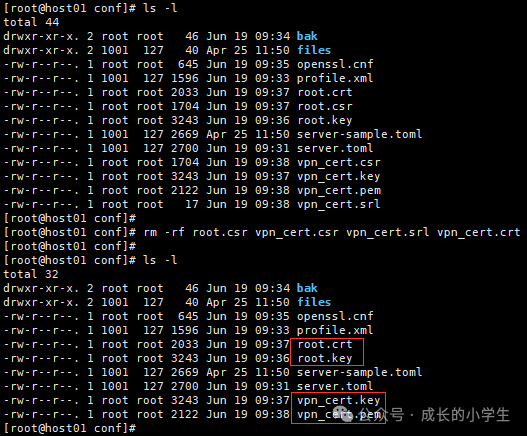
3.10 拷贝根证书到files文件夹下,供客户端下载
cp root.crt files/
4. 启动anylink
cp /usr/local/anylink-deploy/deploy/anylink.service /usr/lib/systemd/system/
systemctl start anylinksystemctl enable anylink
systemctl status anylink

5. 浏览器访问后台管理
5.1 访问方式
https://192.168.211.101:8800
 |
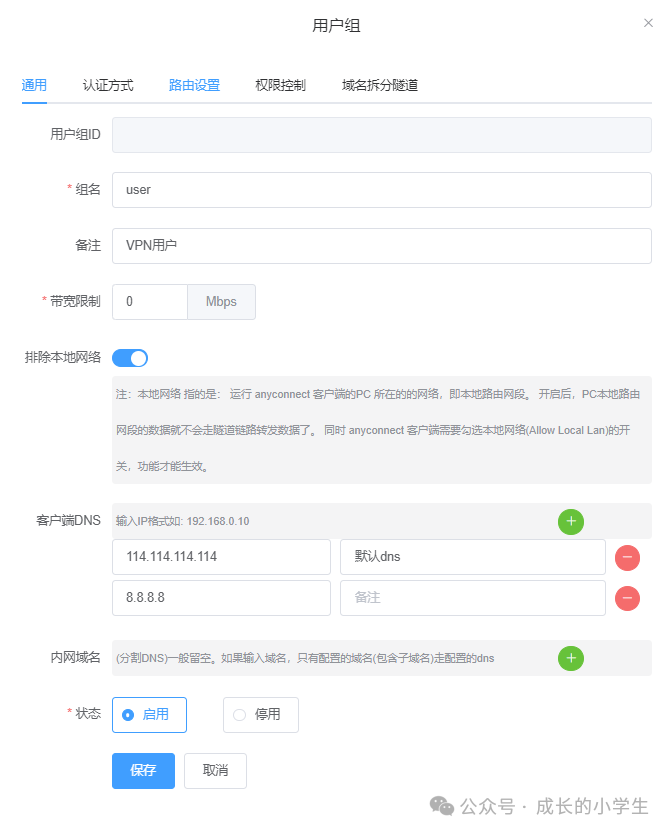
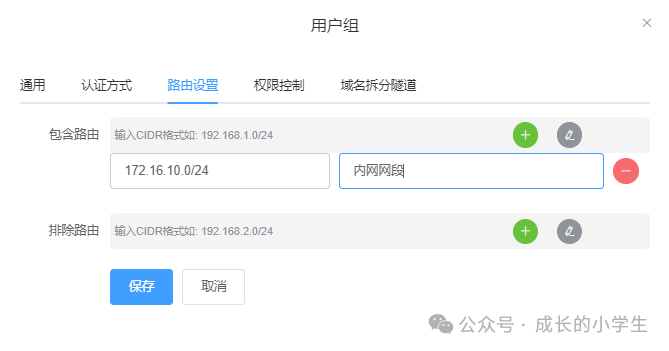
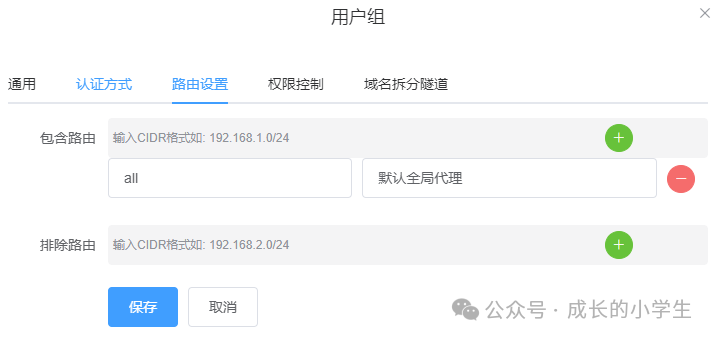
5.2 创建用户组
 |
 |
 |
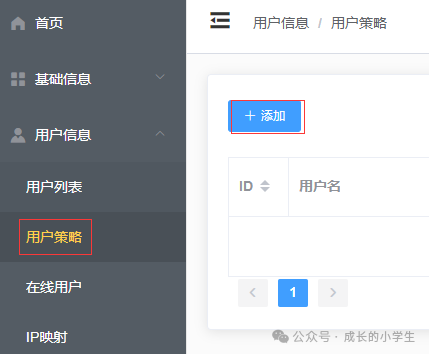 |
5.3 增加用户
 |
5.4 其他设置
 |
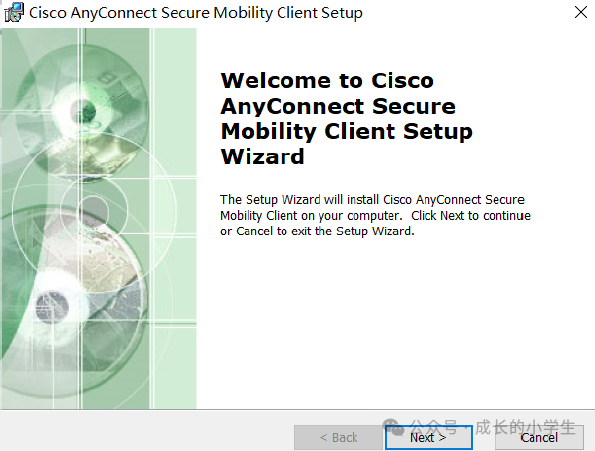
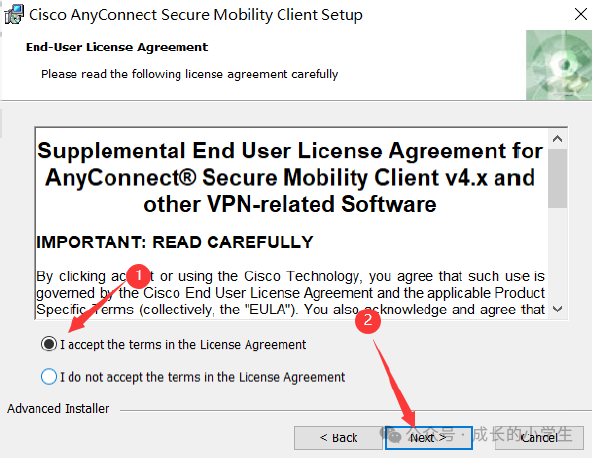
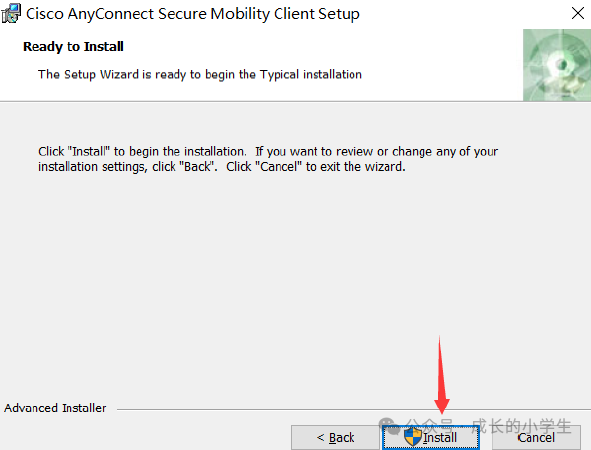
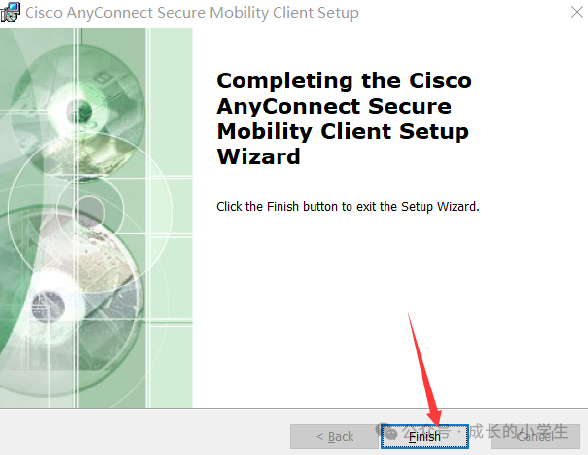
6. 安装客户端
https://pan.baidu.com/s/1hqeSfimERGaMnLVsiMR8sQ?pwd=pany
 |
 |
|
 |
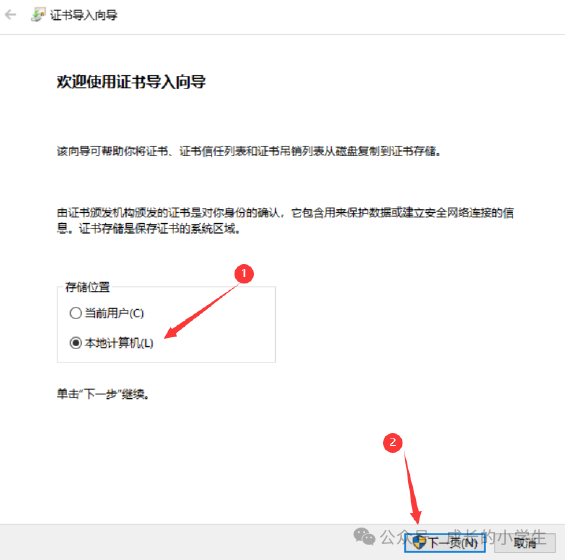
7. 客户端添加根证书
7.1 下载根证书
https://192.168.211.101:443/files/root.crt
7.2 双击证书安装
|

 |
 |
 |
 |
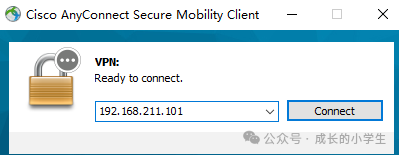
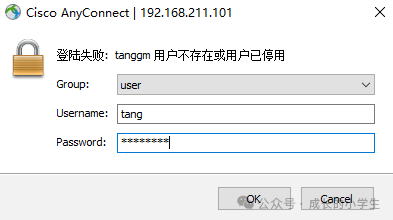
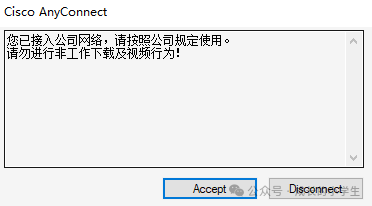
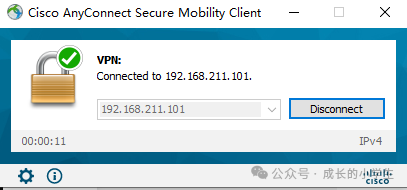
8. 启动vρν客户测试
 |
 |
 |
 |
 |
推荐本站淘宝优惠价购买喜欢的宝贝:

本文链接:https://hqyman.cn/post/9068.html 非本站原创文章欢迎转载,原创文章需保留本站地址!

 微信支付宝扫一扫,打赏作者吧~
休息一下~~