
安装 Ubuntu 24.04 (LTS), Webmin, Nginx, MariaDB, PHP8.3-FPM,Perl-Fastcgi 到 DigitalOcean 的 VPS
在第一部分,DavidYin 介绍了如何在 DigitalOcean 创建新 VPS。并且完成基本的 Ubuntu 24.04 LTS的系统。
第二部分介绍如何安装 Webmin 主机控制面板,SSH 的安全设置,时区设置和添加新用户 。
下面 要说明一下如何用之前的新添加的用户来安装 Nginx Web 服务器和 MairaDB 数据库服务器。
第三部分
安装 Nginx Web 服务器
Ubuntu 24.04 LTS server 版目前的 Nginx 还是 Legacy 版本,可以直接安装,当前的最新版本是 1.24.0。
输入命令安装。
sudo apt install nginx
安装完成后,可以看一下安装后的版本以及编译信息
davidyin@walnut:~$ nginx -Vnginx version: nginx/1.24.0 (Ubuntu)built with OpenSSL 3.0.13 30 Jan 2024TLS SNI support enabled
configure arguments: --with-cc-opt='-g -O2 -fno-omit-frame-pointer -mno-omit-leaf-frame-pointer -ffile-prefix-map=/build/nginx-DlMnQR/nginx-1.24.0=. -flto=auto -ffat-lto-objects -fstack-protector-strong -fstack-clash-protection -Wformat -Werror=format-security -fcf-protection -fdebug-prefix-map=/build/nginx-DlMnQR/nginx-1.24.0=/usr/src/nginx-1.24.0-2ubuntu7.1 -fPIC -Wdate-time -D_FORTIFY_SOURCE=3' --with-ld-opt='-Wl,-Bsymbolic-functions -flto=auto -ffat-lto-objects -Wl,-z,relro -Wl,-z,now -fPIC' --prefix=/usr/share/nginx --conf-path=/etc/nginx/nginx.conf --http-log-path=/var/log/nginx/access.log --error-log-path=stderr --lock-path=/var/lock/nginx.lock --pid-path=/run/nginx.pid --modules-path=/usr/lib/nginx/modules --http-client-body-temp-path=/var/lib/nginx/body --http-fastcgi-temp-path=/var/lib/nginx/fastcgi --http-proxy-temp-path=/var/lib/nginx/proxy --http-scgi-temp-path=/var/lib/nginx/scgi --http-uwsgi-temp-path=/var/lib/nginx/uwsgi --with-compat --with-debug --with-pcre-jit --with-http_ssl_module --with-http_stub_status_module --with-http_realip_module --with-http_auth_request_module --with-http_v2_module --with-http_dav_module --with-http_slice_module --with-threads --with-http_addition_module --with-http_flv_module --with-http_gunzip_module --with-http_gzip_static_module --with-http_mp4_module --with-http_random_index_module --with-http_secure_link_module --with-http_sub_module --with-mail_ssl_module --with-stream_ssl_module --with-stream_ssl_preread_module --with-stream_realip_module --with-http_geoip_module=dynamic --with-http_image_filter_module=dynamic --with-http_perl_module=dynamic --with-http_xslt_module=dynamic --with-mail=dynamic --with-stream=dynamic --with-stream_geoip_module=dynamic
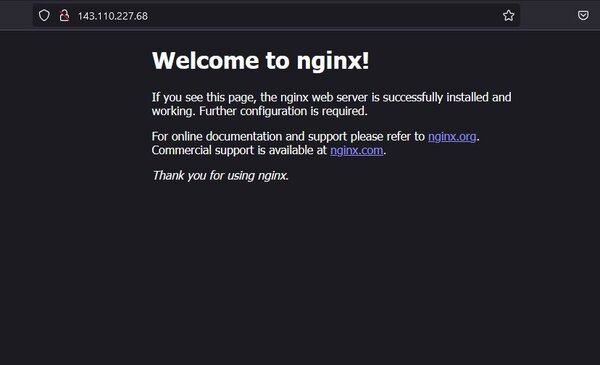
在浏览器中输入 IP 地址,就可以看到默认 Nginx 网页了。
安装 MariaDB 数据库服务器
它其实就是一个 MySQL 服务器,目前 Ubuntu 24.04 LTS 软件仓库中包含的默认 MariaDB 版本是 10.11.8,此版本是 MariaDB 官方所维护的多个稳定版本之一,在我粗浅的看来,10.4以上的这些个都是稳定版本。
所以也是直接安装就可以了。
输入安装命令。
sudo apt install mariadb-server
安装完成后,就需要修改 MySQL 默认的 root 用户的密码。默认是空密码。
sudo mysql_secure_installation
命令执行过程中的设置如下:
注意两点,一个是要设置MysQL 服务器的 root 密码,默认是没有密码的。其它的我都选的默认值。很多次看到某些网站被黑,说的都是数据库没有密码保护之类的疏忽。
davidyin@walnut:~$ sudo mysql_secure_installation

NOTE: RUNNING ALL PARTS OF THIS SCRIPT IS RECOMMENDED FOR ALL MariaDB
      SERVERS IN PRODUCTION USE!  PLEASE READ EACH STEP CAREFULLY!In order to log into MariaDB to secure it, we'll need the current
password for the root user. If you've just installed MariaDB, and
haven't set the root password yet, you should just press enter here.

Enter current password for root (enter for none):
OK, successfully used password, moving on...

Setting the root password or using the unix_socket ensures that nobody
can log into the MariaDB root user without the proper authorisation.

You already have your root account protected, so you can safely answer 'n'.

Switch to unix_socket authentication [Y/n]
Enabled successfully!
Reloading privilege tables..
 ... Success!


You already have your root account protected, so you can safely answer 'n'.

Change the root password? [Y/n]
New password:
Re-enter new password:
Password updated successfully!
Reloading privilege tables..
 ... Success!


By default, a MariaDB installation has an anonymous user, allowing anyone
to log into MariaDB without having to have a user account created for
them.  This is intended only for testing, and to make the installation
go a bit smoother.  You should remove them before moving into a
production environment.

Remove anonymous users? [Y/n]
 ... Success!

Normally, root should only be allowed to connect from 'localhost'.  This
ensures that someone cannot guess at the root password from the network.

Disallow root login remotely? [Y/n]
 ... Success!

By default, MariaDB comes with a database named 'test' that anyone can
access.  This is also intended only for testing, and should be removed
before moving into a production environment.

Remove test database and access to it? [Y/n]
 - Dropping test database...
 ... Success!
 - Removing privileges on test database...
 ... Success!

Reloading the privilege tables will ensure that all changes made so far
will take effect immediately.

Reload privilege tables now? [Y/n]
 ... Success!

Cleaning up...

All done!  If you've completed all of the above steps, your MariaDB
installation should now be secure.

Thanks for using MariaDB!
然后回到 Webmin 控制面板的地方,左侧: Refresh Modules,在经过一点点时间后, Webmin 系统自动就发现了我已经安装了 MySQL Databse Server。
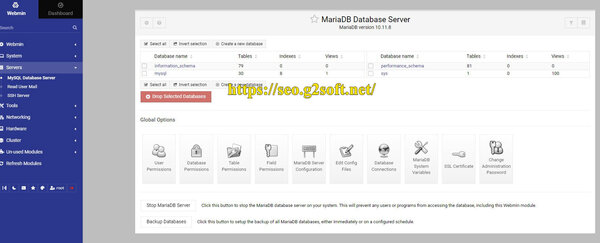
在这里,可以用来添加新的数据库,新的Mysql 用户等等,都是为了以后添加网站,比如 Wordpress 之类的时候使用的。
至此两个服务器的安装已经完成,接下来就要介绍 php8.3-fpm 以及 Perl-fastcgi 的安装了。
推荐本站淘宝优惠价购买喜欢的宝贝:

本文链接:https://hqyman.cn/post/9814.html 非本站原创文章欢迎转载,原创文章需保留本站地址!

 微信支付宝扫一扫,打赏作者吧~
休息一下~~