
https://blog.csdn.net/qq_42045349/article/details/115740818
网上没有一个完整版本的安装教程,只能看官方英文文档,折腾数周,成功编译。现附上安装历程供大家参考。有问题可以互相讨论。
windows支持strongswan5.2.0以上版本。本次用5.5.3版本。该文档中英文部分摘抄自官方文档(作为解释):
Windows下编译strongswan
pki的用法
准备工作
1、下载strongswan源码5.2.0以上版本strongswan5.5.3较好。
strongswan-5.5.3下载地址
2、安装MinGW64,能正确使用gcc4.8.1:x86-64-win32-seh稳定性较好。选择x64 Architecture win32 threading.(要连外网才能下载安装)下载Installer在线安装。
mingw安装教程
3:停止/禁用IKEEXT服务来禁用Windows本机IKE服务:(服务恢复选不操作否则就会自动启用该服务
禁用IKEEXT服务
4、安装openssl-1.0.2u。最好1.0.x版本的(1.1.x找不到libeay32.dll)nasm安装,masm安装,特别复杂,masm还下载不了8.0以上的版本,其他版本又不兼容。很多报错(折腾一天)。建议用VS2010/2013等编译安装。
openssl-1.0.2u下载
openssl-1.1.x安装教程(不建议)
VC6编译openssl教程(不建议)
VS2010编译openssl:(一定配置好环境变量或者用.bat脚本自动配置环境变量)
VS编译openssl教程1
VS编译openssl教程2
以下是编译64位openssl的步骤:
安装路径D:\VC\bin\amd64\“中运行vcvars64.bat
进入openssl-1.0.2u目录,我的目录是D:\openssl-1.0.2u:
perl Configure VC-WIN64
ms\do_win64a
nmake -f ms\nt.mak     (在out32生成静态链接库libeay32.lib和ssleay32.lib)nmake -f ms\nt.mak test来测试
nmake -f ms\ntdll.mak   (在out32dll生成动态链接库libeay32.dll和ssleay32.dll)nmake -f ms\nt.mak install (默认生成路径是同磁盘驱动下的\usr\local\ssl\)
nmake -f ms\ntdll.mak install
拷贝D:\usr\local\ssl\bin下的两个dll到D:\usr\local\ssl\lib
若存在转换到COFF期间失败的报错,以下方案可以解决:

全部重命名,不使用这两个exe。
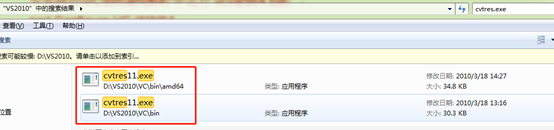
成功编译openssl:

配置strongswan
我的配置文件所在位置:
D:\strongswan-5.5.3\src\swanctl\swanctl.conf
D:\strongswan-5.5.3\src\swanctl\swanctl\swanctl.conf(编译后才有)
D: \strongswan-5.5.3\conf\strongswan.conf
Windows下ipsec.conf和secrets.conf不可用。必须使用swanctl.conf
swanctl.conf(多次编译,最好两个swanctl.conf都一起改)
connections {
    testvpn {
        version = 2                  #ikev2认证方式
        unique = never               #允许多个客户端连接
        fragmentation = yes
        local_addrs = 10.10.216.144 #服务器端ip地址
        proposals = default          #ike阶段使用的秘钥算法,默认
        local {
                auth = pubkey
                certs = cymCert.pem #后面会生成证书,服务器认证客户端
                id = 10.10.216.144        }
        remote {
            auth = eap-mschapv2     #客户端认证方式
            eap_id = %any            }
        pools = mypool
        children {
            testChild {
                esp_proposals = default #ipsec阶段使用的秘钥算法,默认        }
        }
    }}pools {
  mypool {
    addrs = 10.1.0.0/16    #分配虚拟ip  }}secrets {
    eap {
        id = cym             #客户端连接用户名与密码
        secret = 123456    }}
strongswan.conf(这里配置了两个日志,但是没有生效)charon-svc配置是必需的。
swanctl {
  load = pem pkcs1 pkcs8 curve25519 x509 revocation constraints pubkey openssl random}charon-systemd {
  load = random nonce aes sha1 sha2 hmac pem pkcs1 pkcs8 x509 revocation curve25519 curl kernel-netlink socket-win updown vici}charon-svc {
    filelog {
        D:\strongswan-5.5.3\charon.log {
            flush_line = yes        }    }
    dns1=8.8.8.8
    dns2=10.10.50.1
    dns3=114.114.114.114
    load_modular = yes
    plugins {
        include strongswan.d/charon/*.conf
    }
    start-scripts {
    swanctl-creds = swanctl --load-creds --noprompt
    swanctl-conns = swanctl --load-conns
  }
}

charon {
     filelog {
        D:\strongswan-5.5.3\charon.log {
            flush_line = yes
        }
    }
    load_modular = yes
        i_dont_care_about_security_and_use_aggressive_mode_psk = yes
        compress = yes
        dns1=8.8.8.8
        dns2=10.10.50.1
        dns3=114.114.114.114
        plugins {
                 duplicheck{
                            enable=no
                 }
                include strongswan.d/charon/*.conf
        }

}

include strongswan.d/*.conf
编译
可查看官方文档:windows编译strongswan官方文档
编译步骤:
msys.bat
sh /postinstall/pi.sh(一次之后就不用了,主要是为了选择mingw的安装路径,之后直接双击打开msys.bat即可)
cd D:\strongswan-5.5.3 编译命令:
./configure --enable-monolithic–disable-defaults <options…>
make
make install
msys.bat
cd d:\strongswan-5.5.3CC=x86_64-w64-mingw32-gcc CFLAGS="-g -O2 -Wall -Wno-pointer-sign -Wno-format-security -Wno-format -mno-ms-bitfields -I/D/usr/local/ssl/include/" LDFLAGS="-L/D/usr/local/ssl/lib/" ./configure --disable-defaults --enable-monolithic --enable-static --enable-svc --enable-ikev2 --enable-ikev1 --enable-openssl --enable-nonce --enable-pem --enable-pkcs1 --enable-x509  --enable-socket-win --enable-kernel-wfp --enable-kernel-iph --enable-pubkey --enable-eap-identity --enable-eap-mschapv2 --enable-pki --enable-swanctl --with-swanctldir=swanctl --with-strongswan-conf=strongswan.conf
make
make install DESTDIR=D:/strongswan-5.5.3b (生成的文件放入这个文件夹方便找dll文件)
./configure时可查看日志文件:d:\strongswan-5.5.3\config.log


编译时存在一些小错误,修改了mingw64的源码:
重复定义FWPM_DISPLAY_DATA0_,注释掉该部分

#endif没有#if,注释掉#endif

创建证书
需要复制D:\strongswan-5.5.3b\usr\local\lib\bin下的libcharon-0.dll, libtpmtss-0.dll,libstrongswan-0.dll,这3个dll文件D:\strongswan-5.5.3\src\pki\.libs
D:\strongswan-5.5.3\src\pki\.libs下打开cmd生成证书:
pki --gen > caKey.der

pki --self --in caKey.der --dn "C=CN, O=one, CN=10.10.216.144" --ca --lifetime 3650 > caCert.der

pki --gen > cymKey.der

pki --pub --in cymKey.der > cymPub.der

pki --pub --in cymKey.der | pki --issue --lifetime 3601 --cacert caCert.der --cakey caKey.der --dn "C=CN, O=one, CN=10.10.216.144" --san="10.10.216.144" --flag serverAuth --flag ikeIntermediate > cymCert.der

复制证书cymKey.der, cymCert.der, caCert.der 到D:\strongswan-5.5.3\src\swanctl\swanctl下的一些目录:
/swanctl/(rsa|pkcs8)/cymKey.der/swanctl/x509/cymCert.der/swanctl/x509ca/caCert.der
• /etc/swanctl/(rsa|pkcs8)/cymKey.der holds the private key of the given peer (directory depends on the type of key), gets loaded automatically. Passwords may be configured in swanctl.conf.
• /etc/swanctl/x509/cymCert.der holds the end-entity certificate of the given peer, gets loaded automatically. Reference it in swanctl.conf to explicitly use it.
• /etc/swanctl/x509ca/caCert.der
创建客户端证书(在该cmd下继续):
To convert an X.509 certificate from DER to PEM
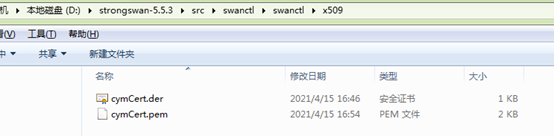
openssl x509 -inform der -outform pem -in caCert.der -out caCert.pem
openssl x509 -inform der -outform pem -in cymCert.der -out cymCert.pem
To convert an RSA key from DER to PEM
openssl rsa -inform der -outform pem -in cymKey.der -out cymKey.pem
To package all of the files into a PKCS#12 container
openssl pkcs12 -in cymCert.pem -inkey cymKey.pem -certfile caCert.pem -export -out cym.p12
The cym.p12 file contains everything needed and is ready for the import on other systems.
cymCert.pem 复制到:D:\strongswan-5.5.3\src\swanctl\swanctl\x509
cym.p12导入客户端计算机。(计算机开始,输入mmc,添加删除管理单元,证书,添加,计算机账户,受信任的根证书颁发机构,导入cym.p12,关闭,不用保存控制台)
启动charon-svc.exe
需要复制D:\strongswan-5.5.3b\usr\local\lib\bin下的libcharon-0.dll, libtpmtss-0.dll,libstrongswan-0.dll,这3个dll文件到charon-svc.exe目录下才能启动程序。每个版本不同,生成的dll文件可能不同。
同时复制到:D:\strongswan-5.5.3\src\swanctl\.libs
启动:服务方式启动或者直接右键(管理员启动)
先启动charon-svc.exe,然后swanctl --load-all,客户端再连接。
sc create “strongSwan IKE service” binPath= D:\strongswan-5.2.0b\usr\local\bin\charon-svc.exe
sc start “strongSwan IKE service”
在D:\strongswan-5.5.3\src\swanctl中打开cmd:swanctl --load-all

服务器端连接成功:

Note:
Note the specified include path /D/usr/local/ssl/include/openssl/. In the code, the include is specified as #include <openssl/evp.h>. The C compiler resolves the include, due to the usage of <>, as dependent on the include paths. So it looks, at /D/usr/local/ssl/include/openssl/ + openssl/evp. That is then /D/usr/local/ssl/include/openssl/openssl/evp.h. Your openssl headers are at /D/usr/local/ssl/include/openssl/ exactly though. So you need to get rid of that extra openssl in the path. The straight forward solution to that is to just remove the openssl/ from /D/usr/local/ssl/include/openssl/. That is then /D/usr/local/ssl/include/. Together with openssl/evp.h, that then results in the correct path /D/usr/local/ssl/include/openssl/evp.h. So use -I/D/usr/local/ssl/include/ instead of -I/D/usr/local/ssl/include/openssl/
Run charon-svc.exe with system privileges (not admin or user), and make sure the ikeext service is disabled.
最后,编译strongswan源码花了将近3周时间,过程确实很繁杂,bug也特别多。一定要认真看官方文档!!!有问题在strongswan on windows的github页面发起提问,一天就可以找到解决方案!附上链接:github讨论
推荐本站淘宝优惠价购买喜欢的宝贝:

本文链接:https://hqyman.cn/post/3874.html 非本站原创文章欢迎转载,原创文章需保留本站地址!

 微信支付宝扫一扫,打赏作者吧~
休息一下~~